Setup & Configuration
Connect your HubSpot account to Quotient and configure basic sync settings
Prerequisites
Before setting up the HubSpot integration, ensure you have:
- HubSpot Account: A HubSpot account with appropriate permissions
- Admin Access: Administrative access to your HubSpot portal to authorize the integration
- Quotient Business: An active Quotient business account
Required HubSpot Permissions
The integration requires the following HubSpot scopes:
- CRM Objects: Read/write access to contacts, companies, and deals
- Lists: Read/write access to contact lists
- Custom Properties: Access to create and manage custom properties
- Marketing Email (optional): For email sync functionality
Connecting Your HubSpot Account
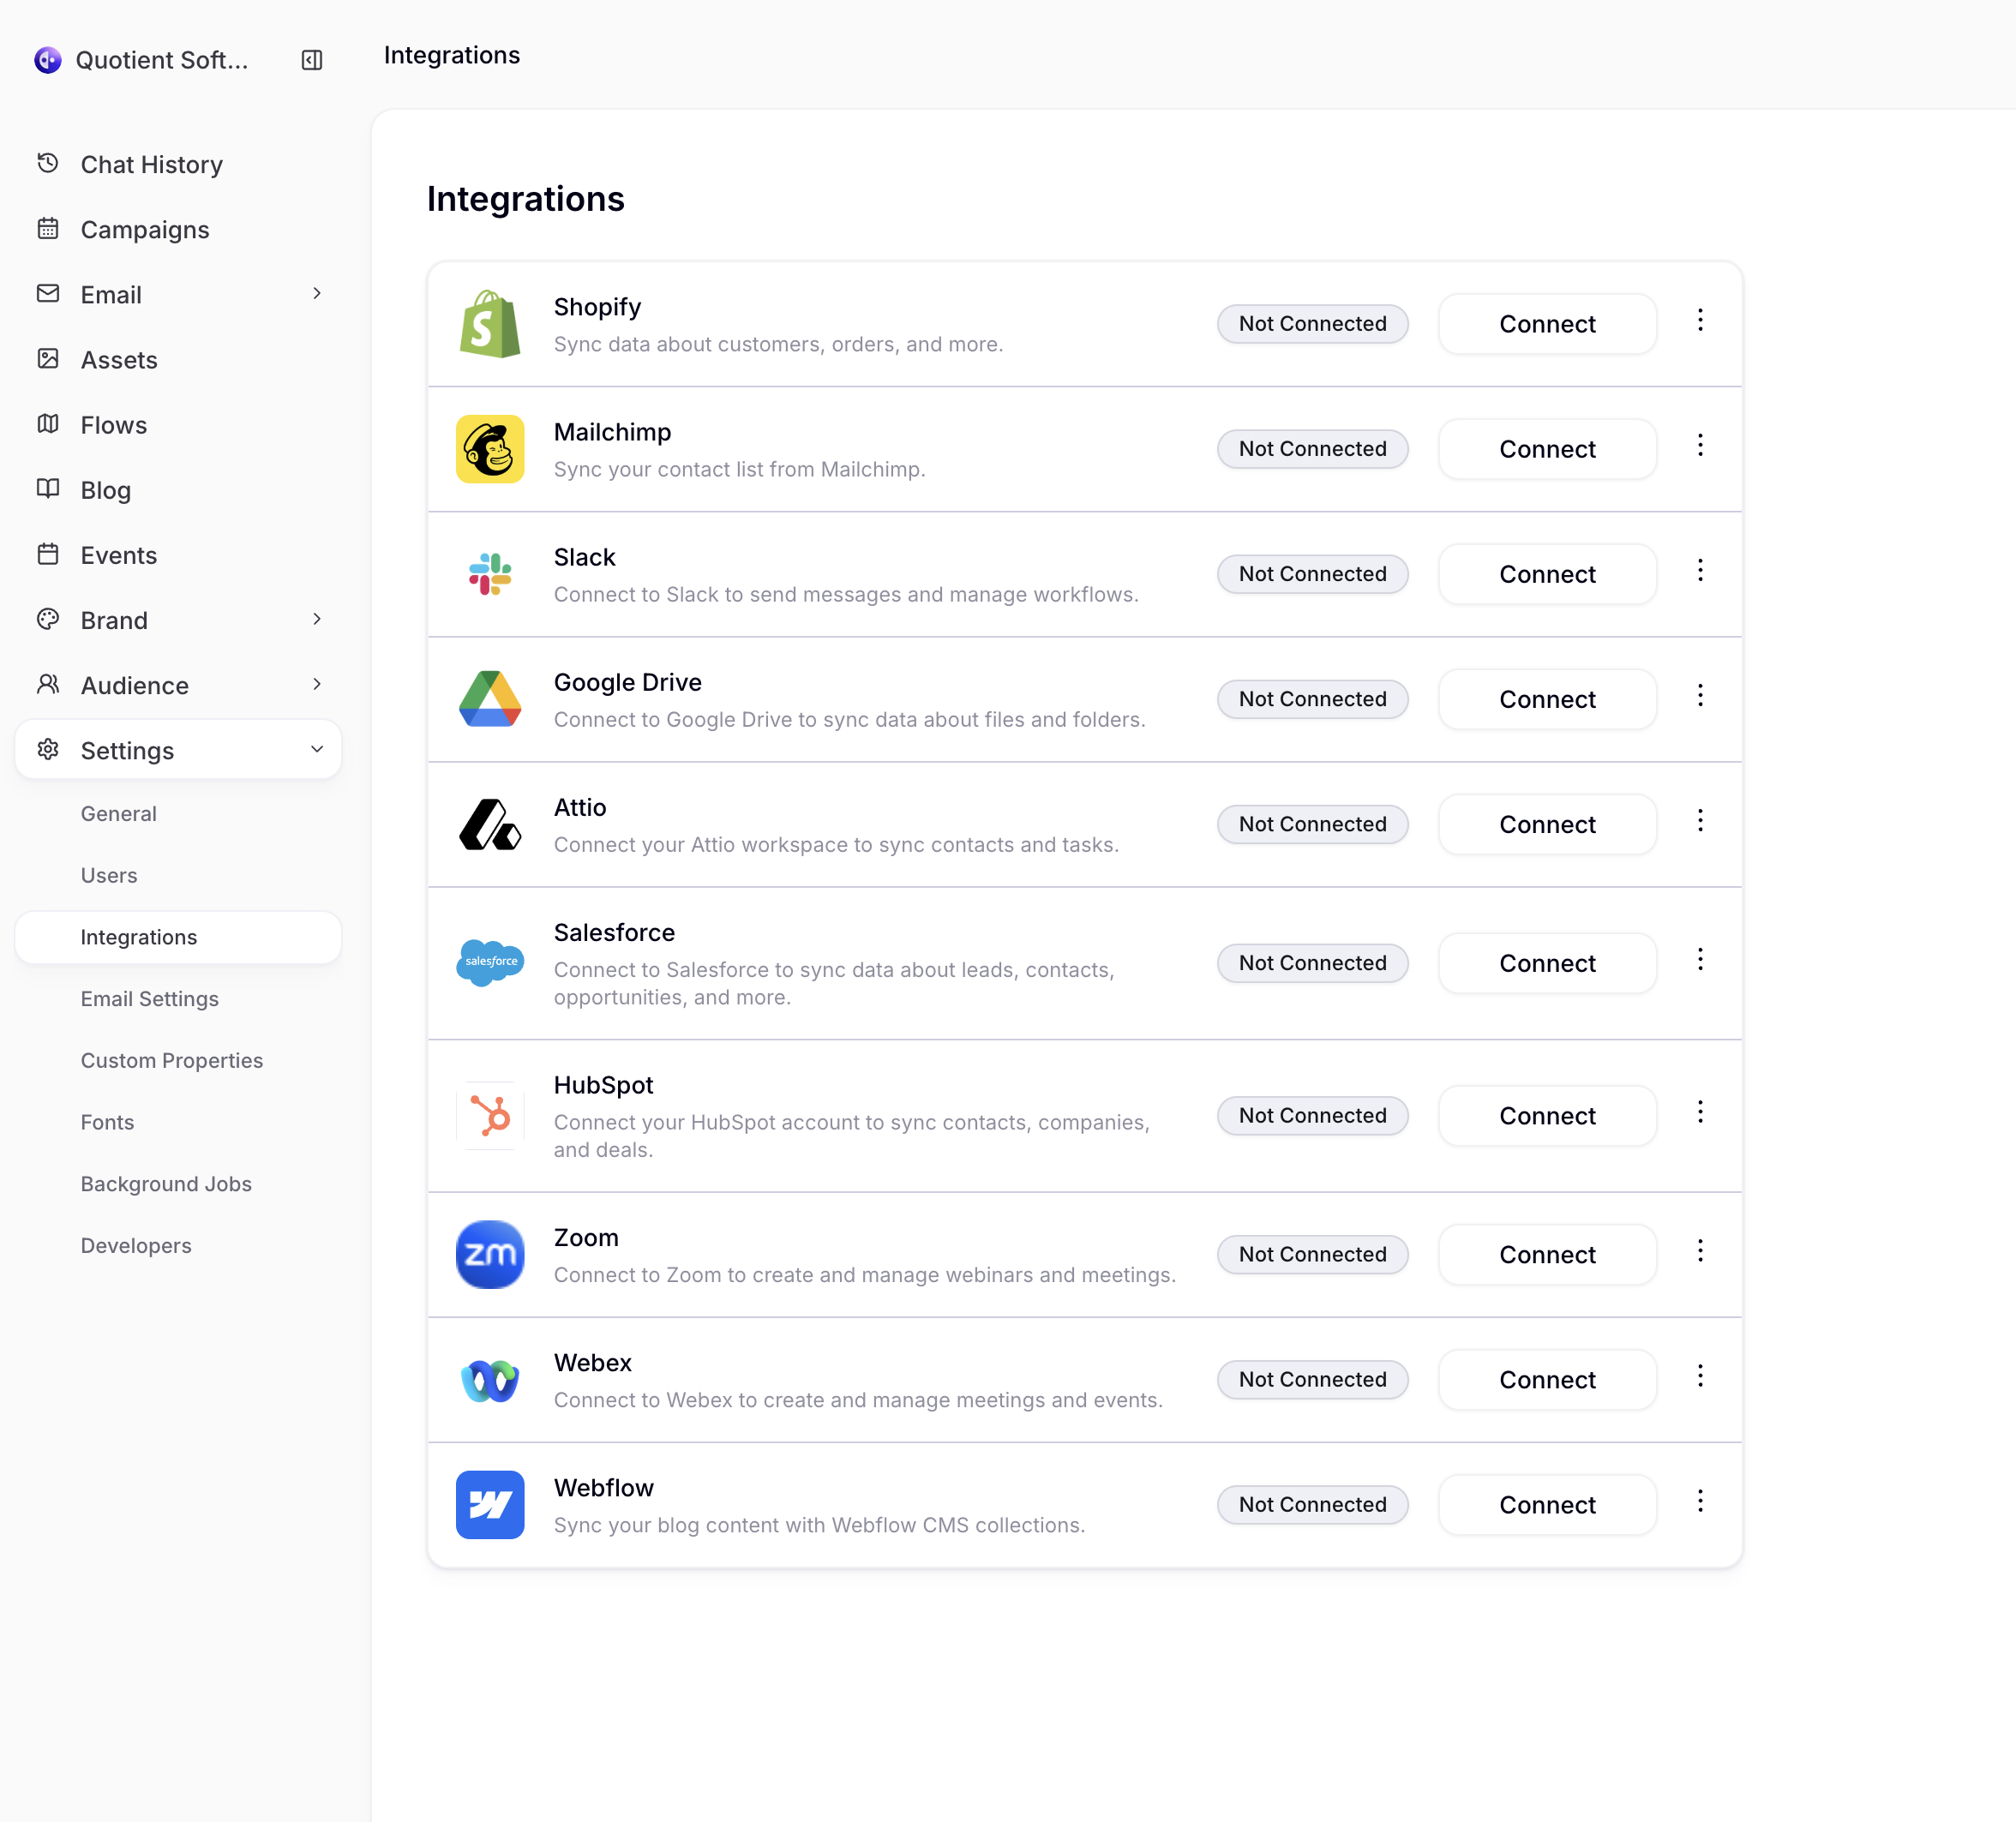
Step 1: Navigate to Integrations
- In your Quotient workspace, go to Integrations
- Find the HubSpot integration card
- Click Connect to begin the setup process
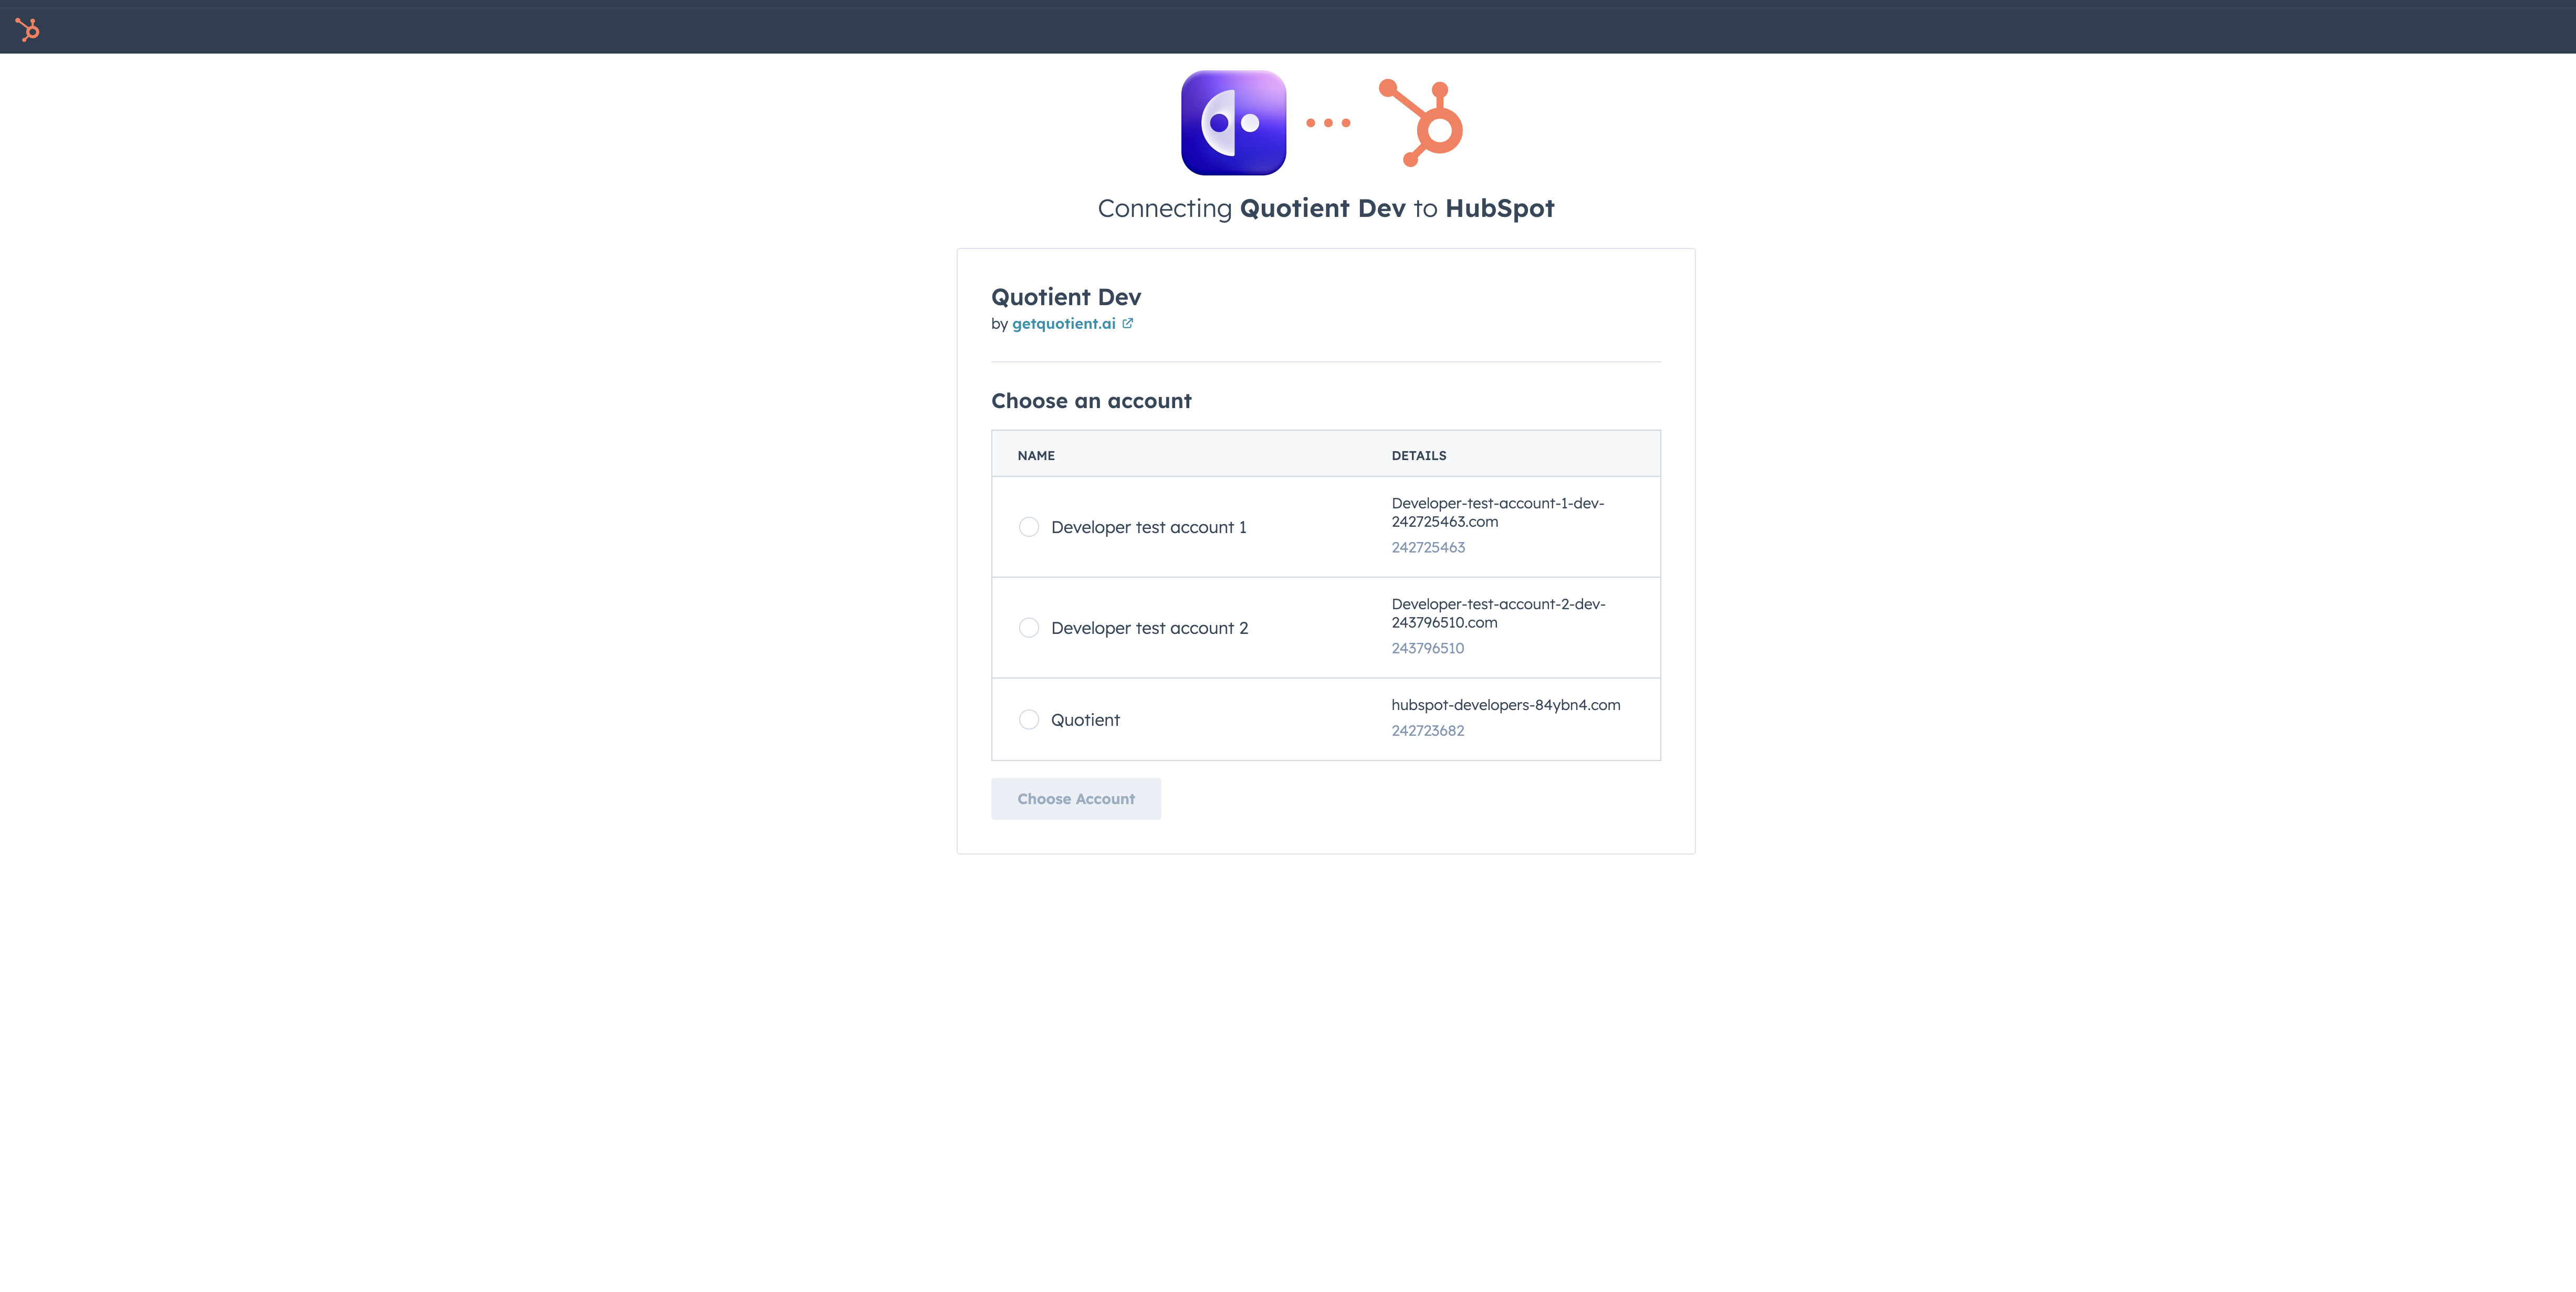
Step 2: Authorize with HubSpot
- You'll be redirected to HubSpot's authorization page
- Select your HubSpot portal if you have access to multiple accounts
- Review the permissions that Quotient is requesting
- Click Grant access to authorize the integration
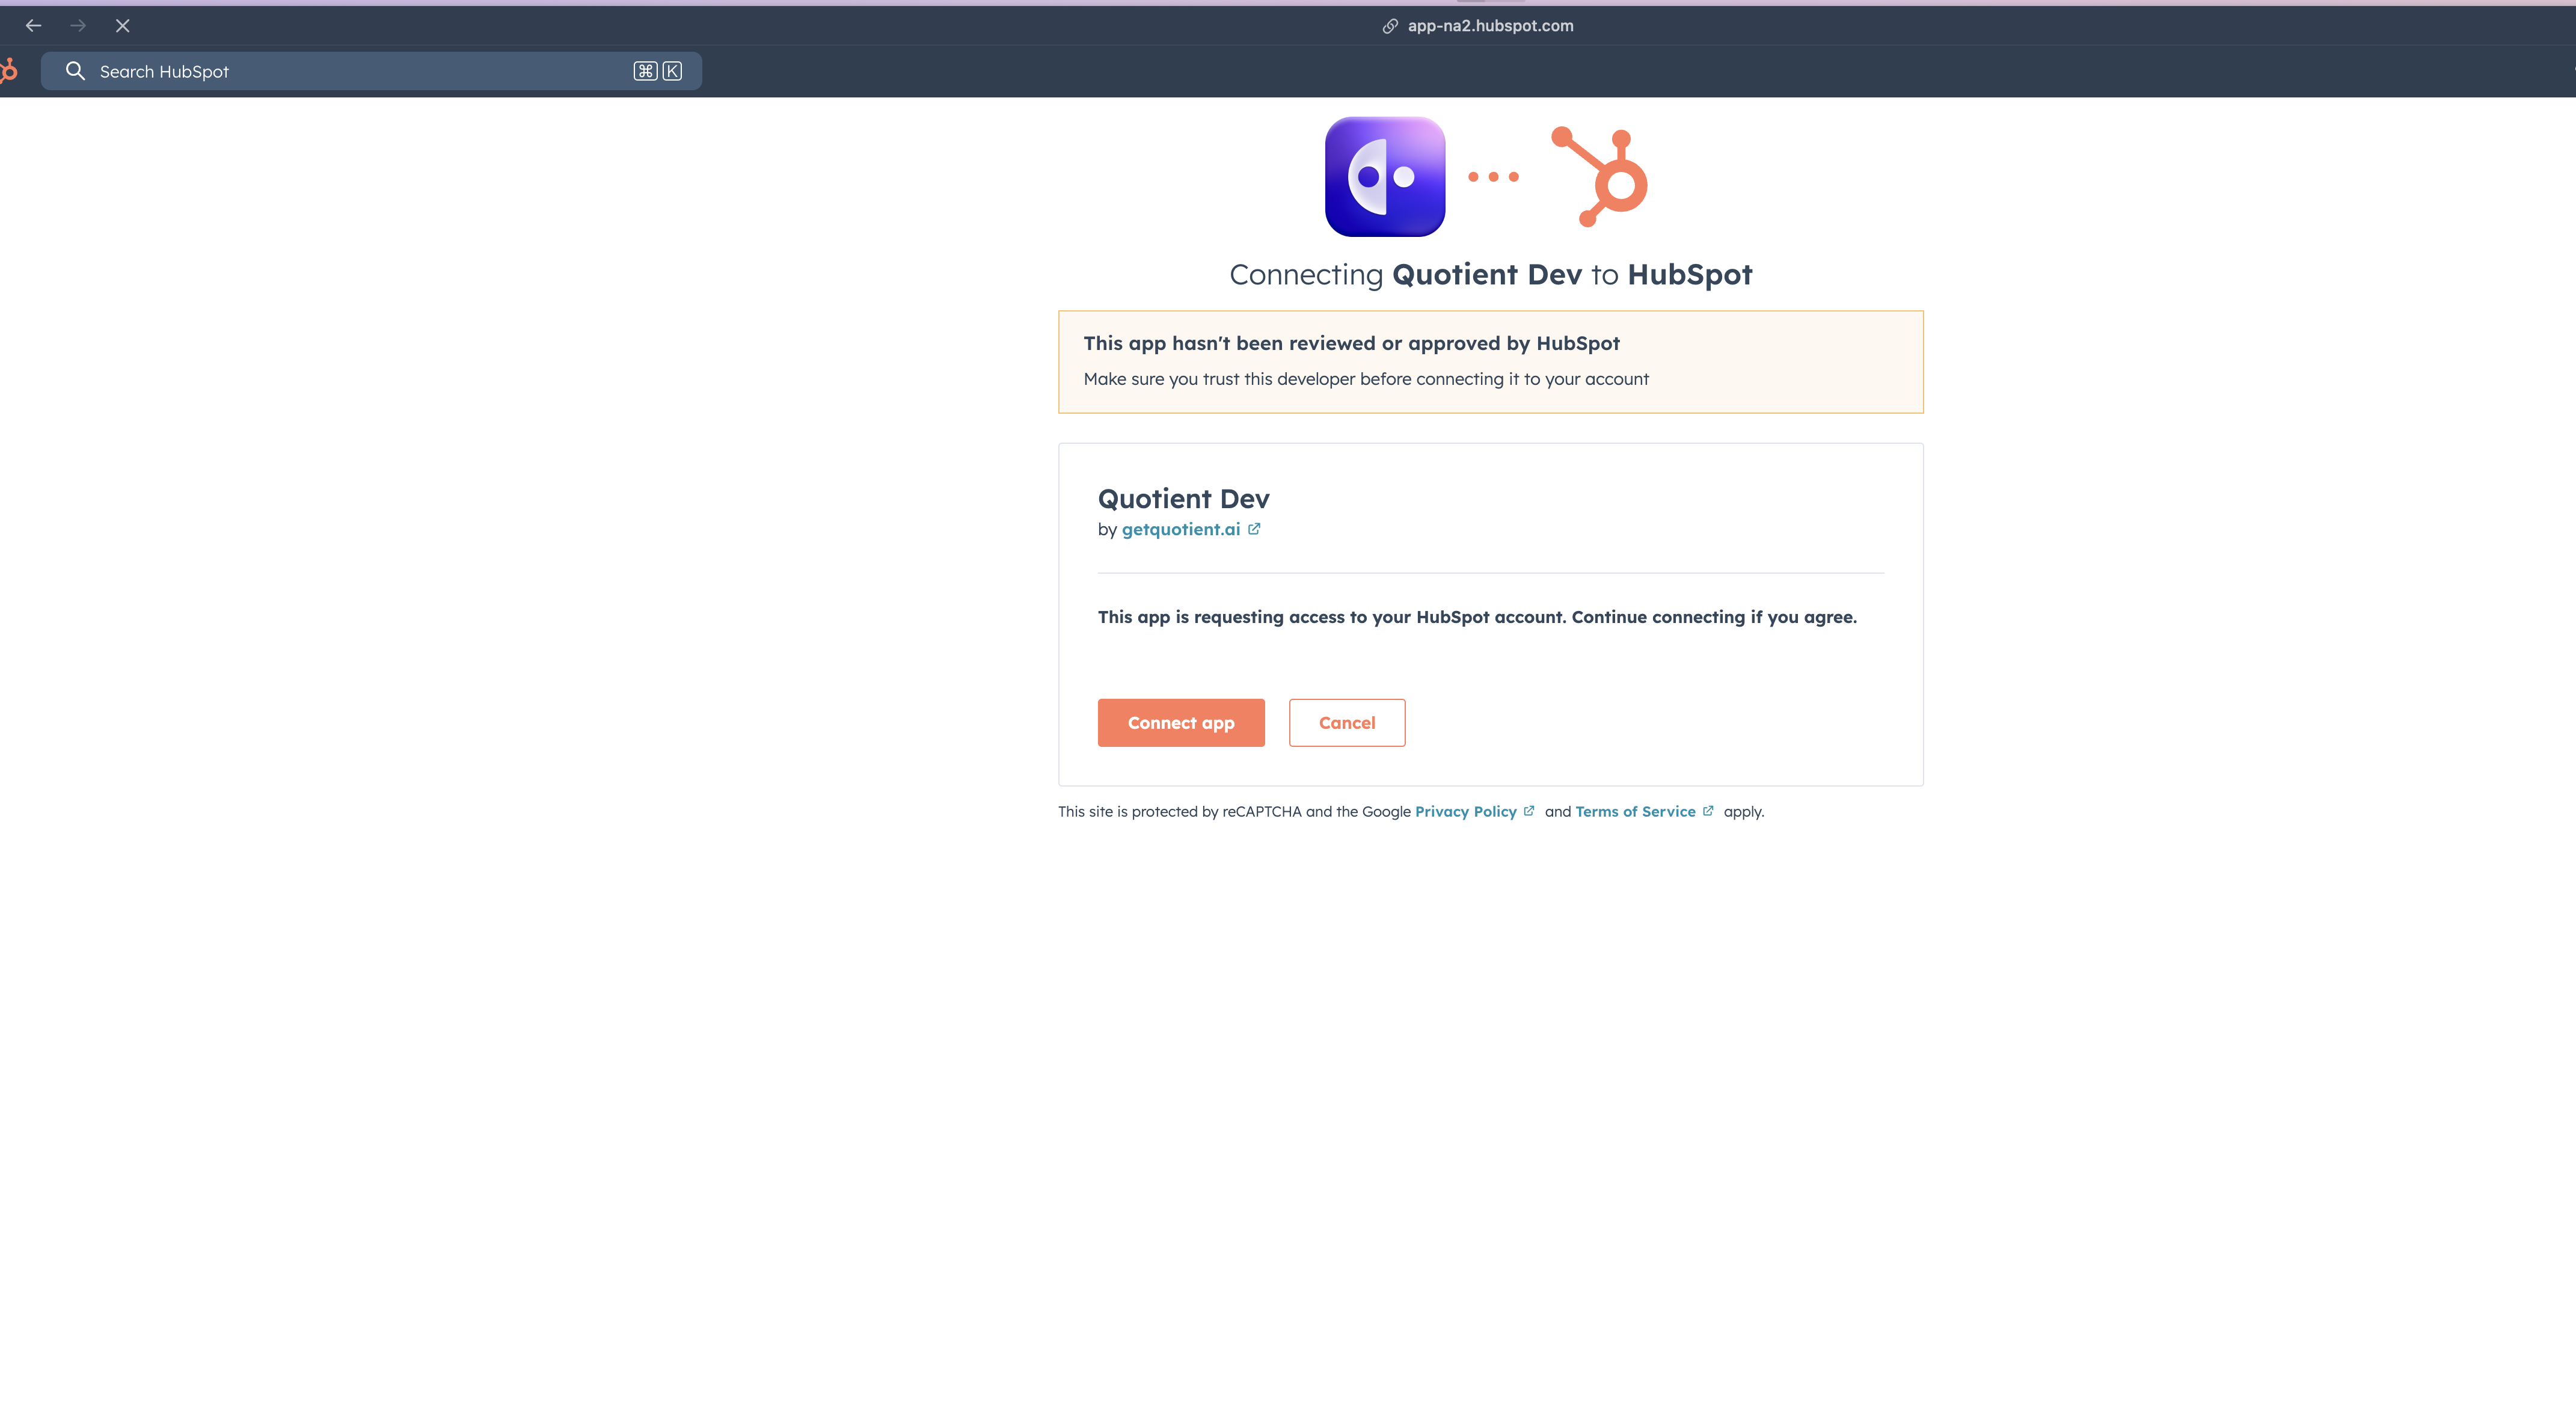
Secure Connection
Quotient uses secure authentication to connect with HubSpot. You'll be redirected to HubSpot's official login page to authorize the connection, ensuring your credentials remain safe.
Step 3: Review Permissions
After authorizing with HubSpot, you'll be redirected back to Quotient where you can review the permissions that were granted:
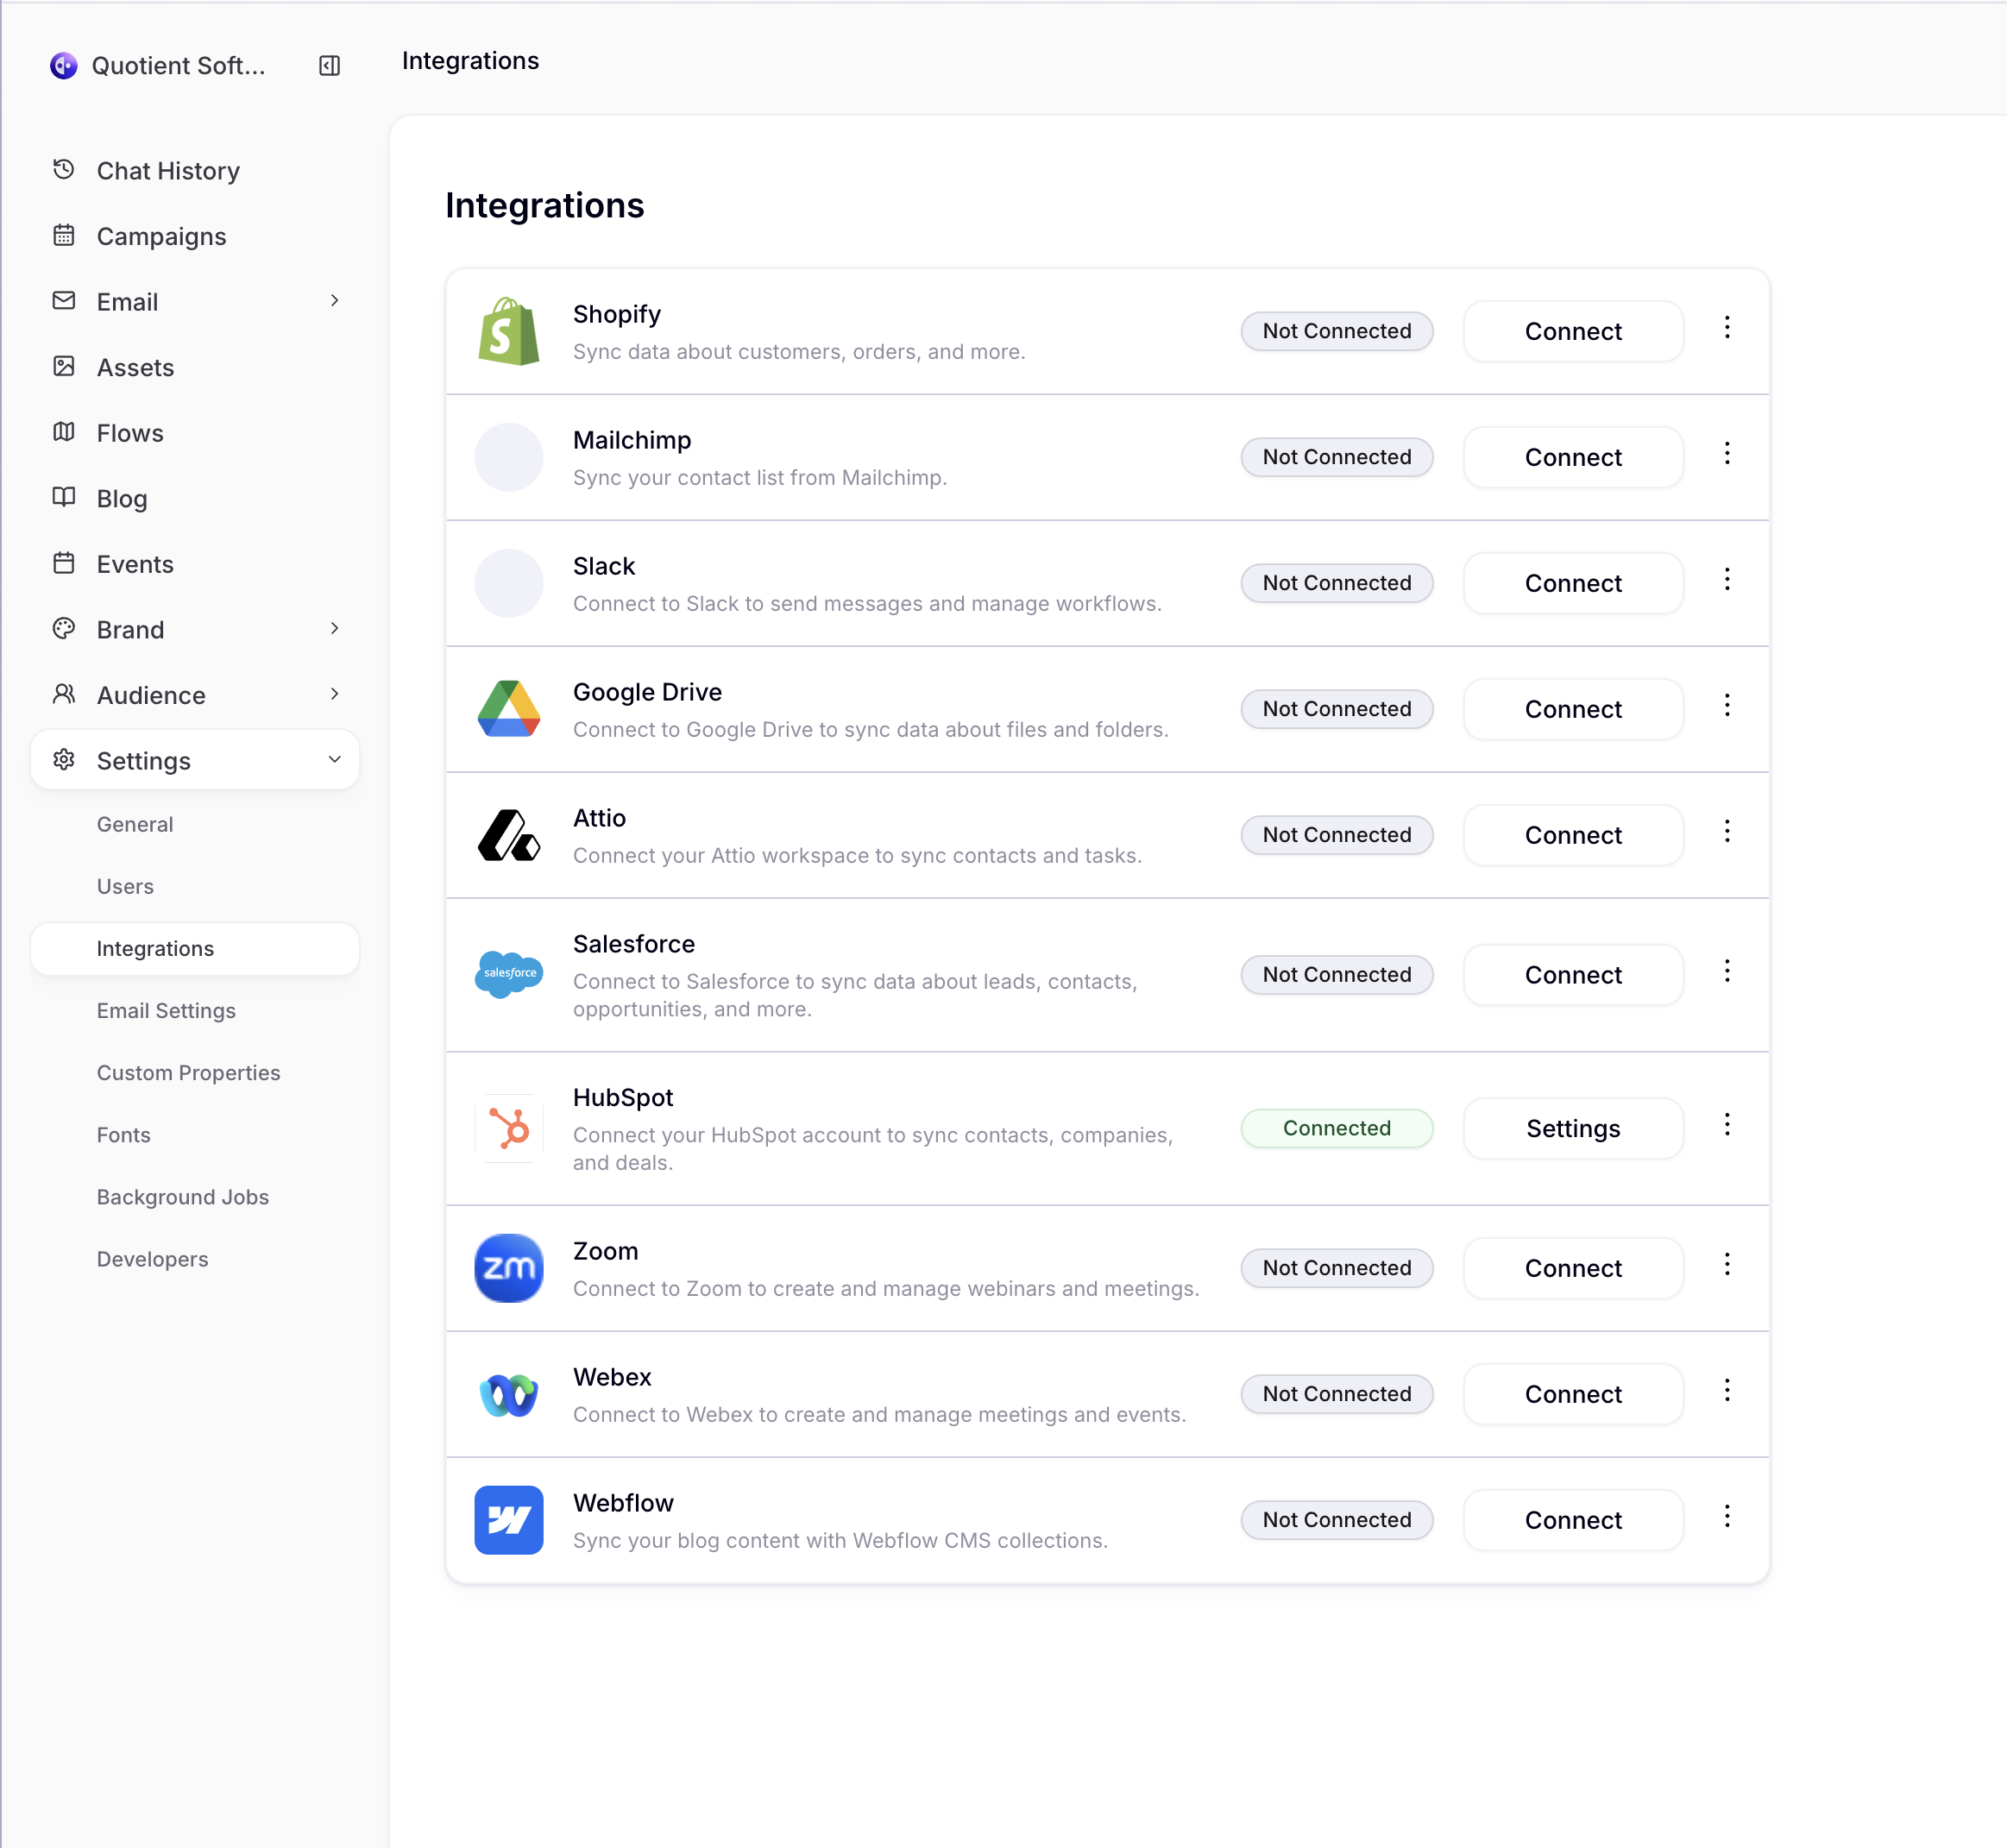
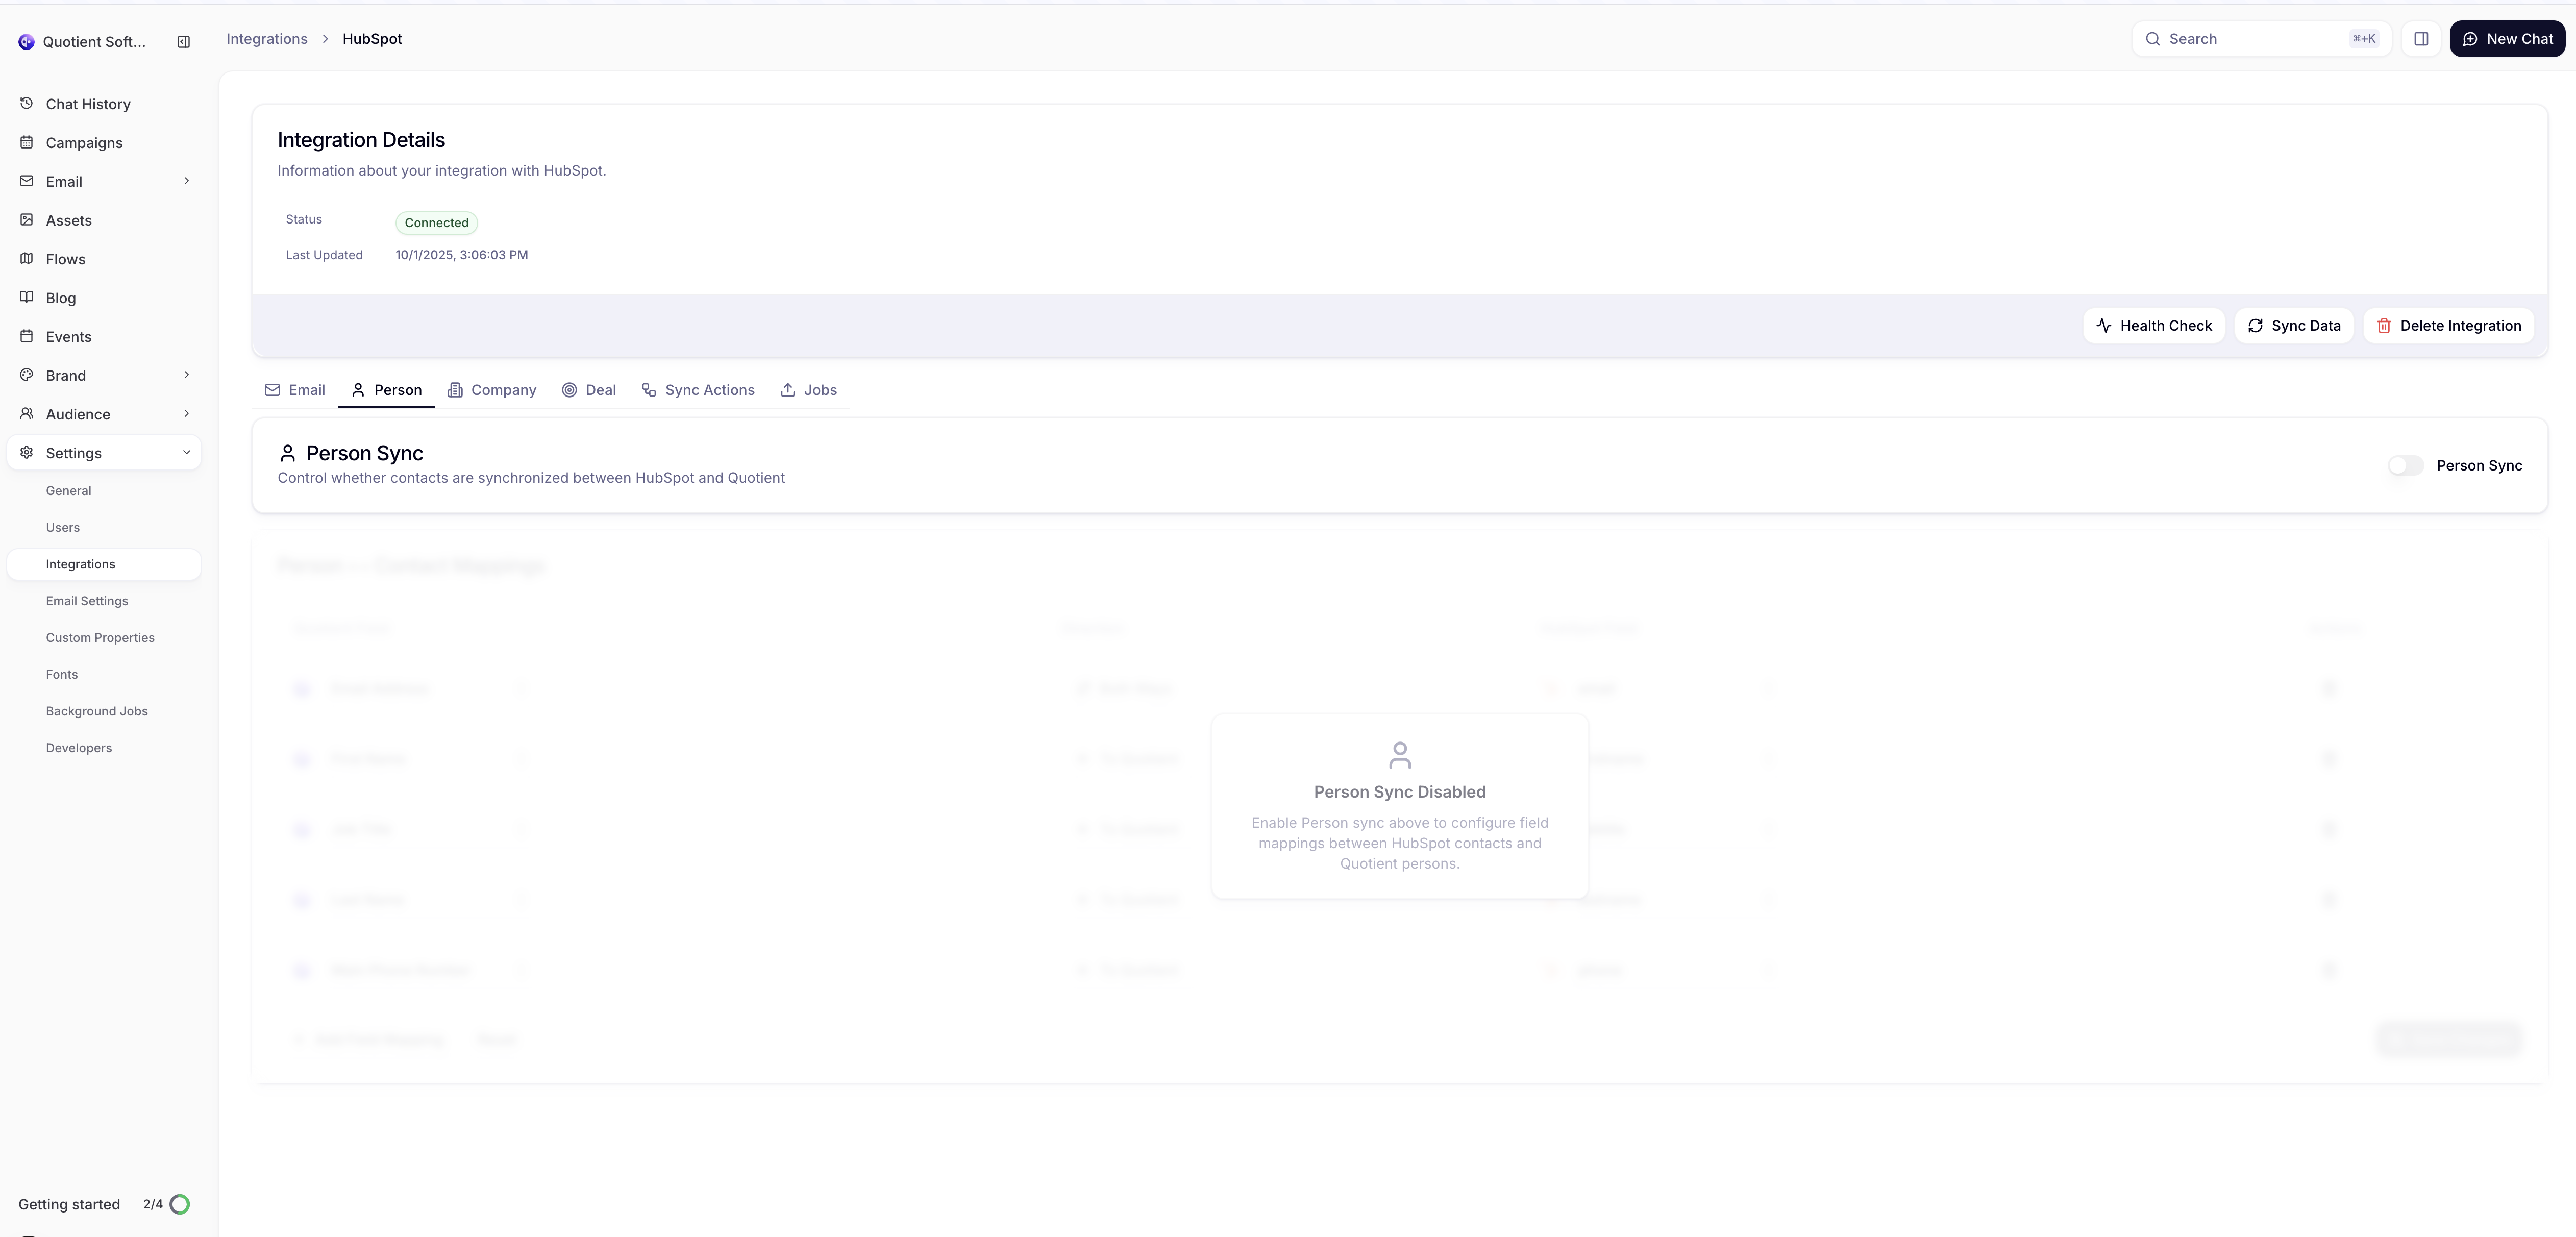
Step 4: Verify Connection
After authorization, you'll be redirected back to Quotient where you should see:
- ✅ Connection Status: "Connected" with your HubSpot portal name
- 📊 Account Info: Your HubSpot portal ID and connected user
- 🔧 Available Features: List of enabled capabilities based on your HubSpot plan
Initial Configuration
Sync Preferences
By default, all sync options are disabled to give you full control over what data is synchronized. You'll need to explicitly enable the objects you want to sync.
Available Sync Options
| Object Type | Description | Dependencies |
|---|---|---|
| Contacts → People | Sync HubSpot contacts as Quotient people | None |
| Companies | Sync HubSpot companies with Quotient | None |
| Deals | Import HubSpot deals (read-only) | None |
| Lists & Segments | Sync HubSpot lists and dynamic segments | Requires Contacts sync |
Enabling Sync Options
- In the HubSpot integration settings, toggle on the objects you want to sync
- Smart Dependencies: Enabling Lists automatically enables Contacts sync (required dependency)
- Confirmation: Review your selections and click Save Preferences
First Sync
After enabling sync preferences, Quotient will automatically trigger an initial synchronization:
- ETL Process: A background job will start importing your HubSpot data
- Progress Tracking: Monitor sync progress in the integration dashboard
- Completion: You'll receive a notification when the initial sync completes
Initial Sync Duration
The initial sync duration depends on the amount of data in your HubSpot account. Large datasets may take several hours to complete. You can continue using Quotient while the sync runs in the background.
Sync Schedule & Updates
Automated Sync Schedule
- Daily Automatic Sync: Complete synchronization runs every night at midnight
- Manual Sync: On-demand synchronization available in the integration settings
- Background Processing: Continuous monitoring and progress tracking
How Updates Work
Quotient keeps your data synchronized through scheduled processes. Changes made in HubSpot will appear in Quotient after the next sync cycle:
- New contacts, companies, and deals are imported during daily sync
- Modified information is updated during scheduled sync runs
- List membership changes are processed automatically
- You can trigger manual sync for immediate updates when needed
Verification & Testing
Verify Your Setup
After the initial sync completes, verify everything is working correctly:
- Check Data: Review synced contacts, companies, and deals in Quotient
- Test Updates: Make a small change in HubSpot and verify it appears in Quotient
- Review Mappings: Ensure field mappings are working as expected
Common Setup Issues
Connection Failed
- Verify you have admin permissions in HubSpot
- Check that your HubSpot plan includes the required features
- Ensure popup blockers aren't preventing the OAuth flow
No Data Syncing
- Confirm sync preferences are enabled for the desired objects
- Check that the initial ETL job completed successfully
- Verify your HubSpot account contains data to sync
Missing Fields
- Review field mappings in the integration settings
- Ensure custom properties exist in both systems
- Check data type compatibility between systems
Next Steps
Once your HubSpot integration is connected and syncing:
- Configure Object Sync - Fine-tune which objects are synchronized
- Set Up Field Mappings - Customize how data maps between systems
- Enable Email Sync - Sync email templates and broadcasts
- Configure Lists - Set up list and segment synchronization
Need Help? If you encounter issues during setup, check our troubleshooting guide or contact support.