Custom DNS
Learn how to set up your custom DNS in Quotient.
Email deliverability is critical to the success of your communications. Using a custom DNS for email not only reinforces your brand identity but also plays a vital role in ensuring that your messages reach inboxes reliably. This page provides an introduction to best practices for email deliverability through proper DNS configuration and outlines the process for setting up your DNS in Quotient.
Best Practices for Email Deliverability
Setting up a custom DNS is a cornerstone for improving email deliverability. Here are some key best practices:
-
Authenticate Your Domain:
Use SPF, DKIM, and DMARC records to verify that your emails are sent from trusted servers. This helps prevent spoofing and reduces the risk of your emails being marked as spam. -
Ensure Proper DNS Configuration:
Configure the necessary DNS records (MX, CNAME, TXT) correctly. Incorrect entries can lead to delays or failures in email delivery. -
Monitor and Maintain Your DNS Records:
Regularly review your DNS settings to ensure that all records are up-to-date. Changes in your infrastructure or email service may require DNS updates. -
Leverage a Custom DNS for Brand Consistency:
Custom DNS entries enhance your brand’s credibility and allow you greater control over email authentication, ultimately contributing to improved deliverability and user trust.
Setting Up Custom DNS in Quotient
This section will guide you through the process of configuring your DNS settings specifically in Quotient. Detailed instructions, screenshots, and troubleshooting tips will be provided to ensure a smooth setup experience.
-
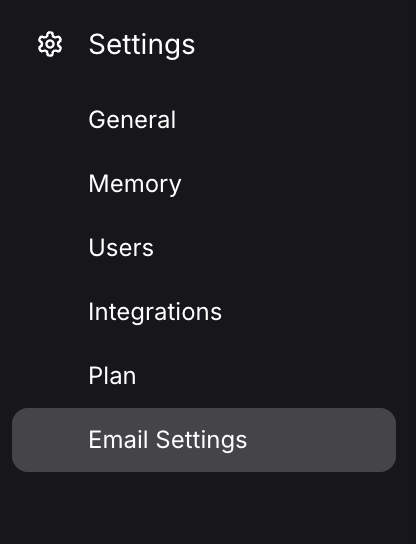
Navigate to the Email Settings via the left hand navigation.
-
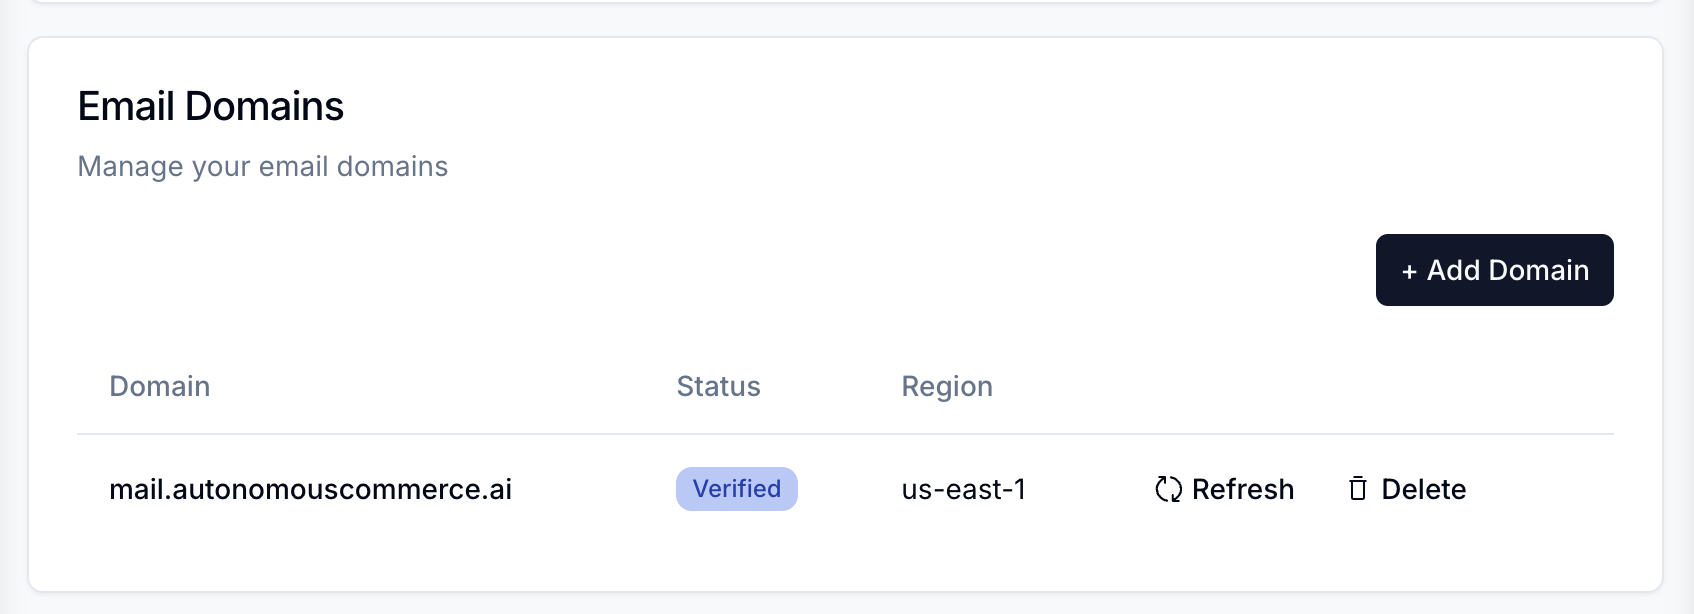
Scroll down to the Email Domains section.
-
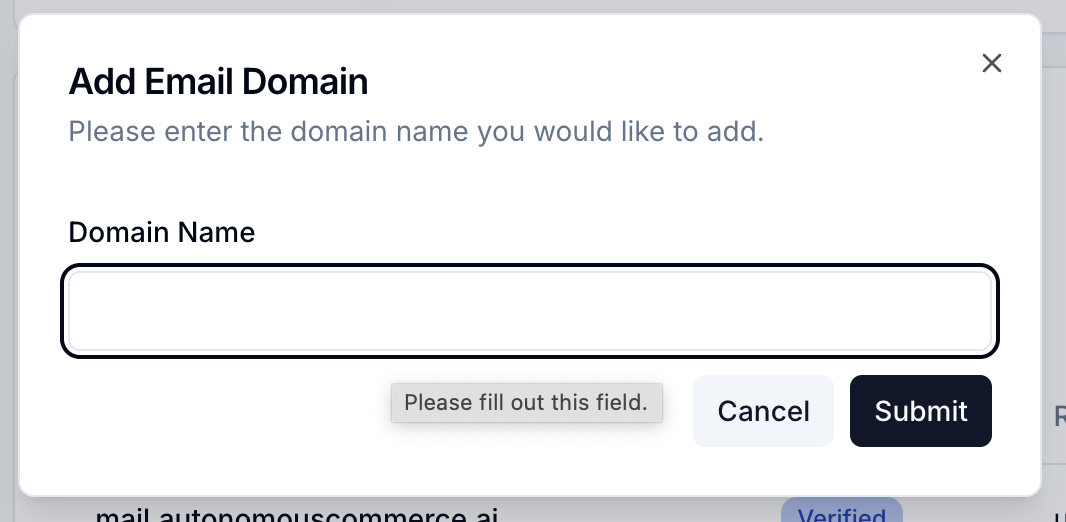
Click the "Add Domain" button to add a new domain. Fill out the domain you want to use as your "From" address.
-
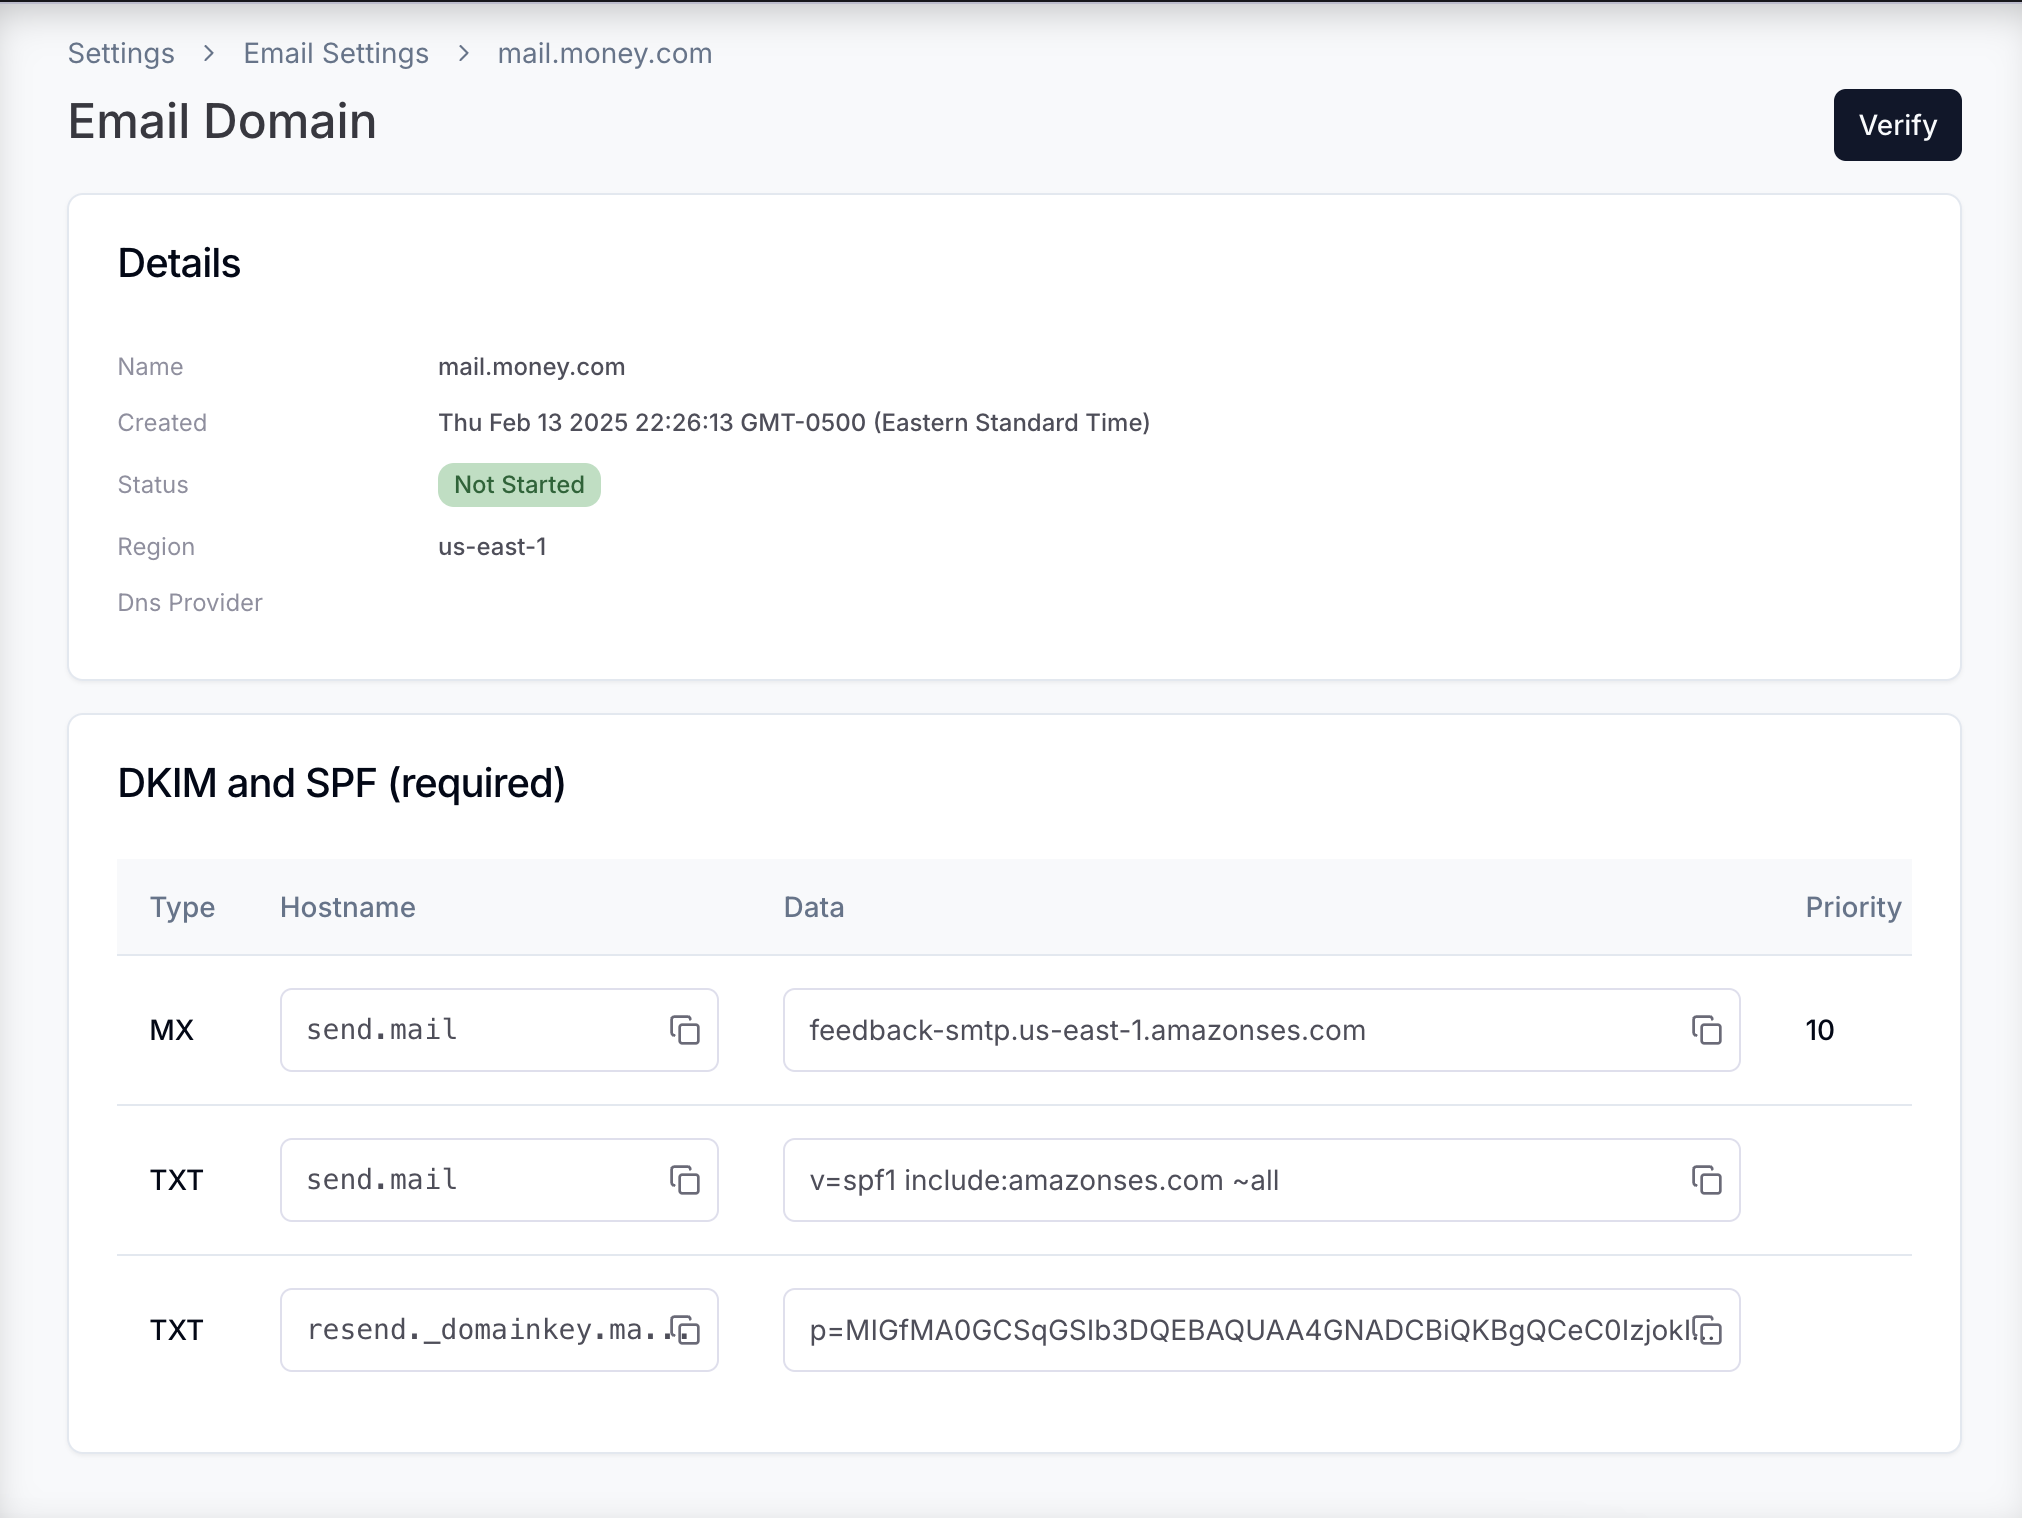
After you click "Add Domain", you will be redirected to the domain details page.
-
Copy the "Domain" and "MX Record" values to your DNS provider.
Here are the guides for the most popular DNS providers:
Once you have added the MX and TXT records to your DNS provider, navigate back to the email domain details page and click the "Verify" button.
-
Hit refresh on the email domain list or details. This can take a few minutes and up to a few hours to verify.

-
Once verified, you will see the domain details a verified status and you are free to begin sending email from your domain.