WordPress Setup Guide
Connect your WordPress site to Quotient in 5 minutes
Connecting your WordPress site to Quotient takes about 5 minutes. You'll need admin access to your WordPress dashboard and a self-hosted WordPress site (not WordPress.com). If you're not sure whether your site is self-hosted, don't worry - we'll help you figure that out as we go.
The connection process involves three main steps: updating your WordPress permalink settings, creating an Application Password for Quotient to use, and entering your credentials in Quotient. Let's walk through each one.
Step 1: Update Your WordPress Permalink Settings
WordPress needs to have "pretty URLs" enabled for Quotient to work properly. By default, some WordPress installations use "plain" permalinks (URLs that look like ?p=123), but Quotient requires the more readable "post name" format (URLs that look like /my-blog-post).
Log into your WordPress admin dashboard and navigate to Settings → Permalinks. You'll see several options for how WordPress structures your URLs. Select "Post name" if it's not already selected, then click "Save Changes" at the bottom of the page.
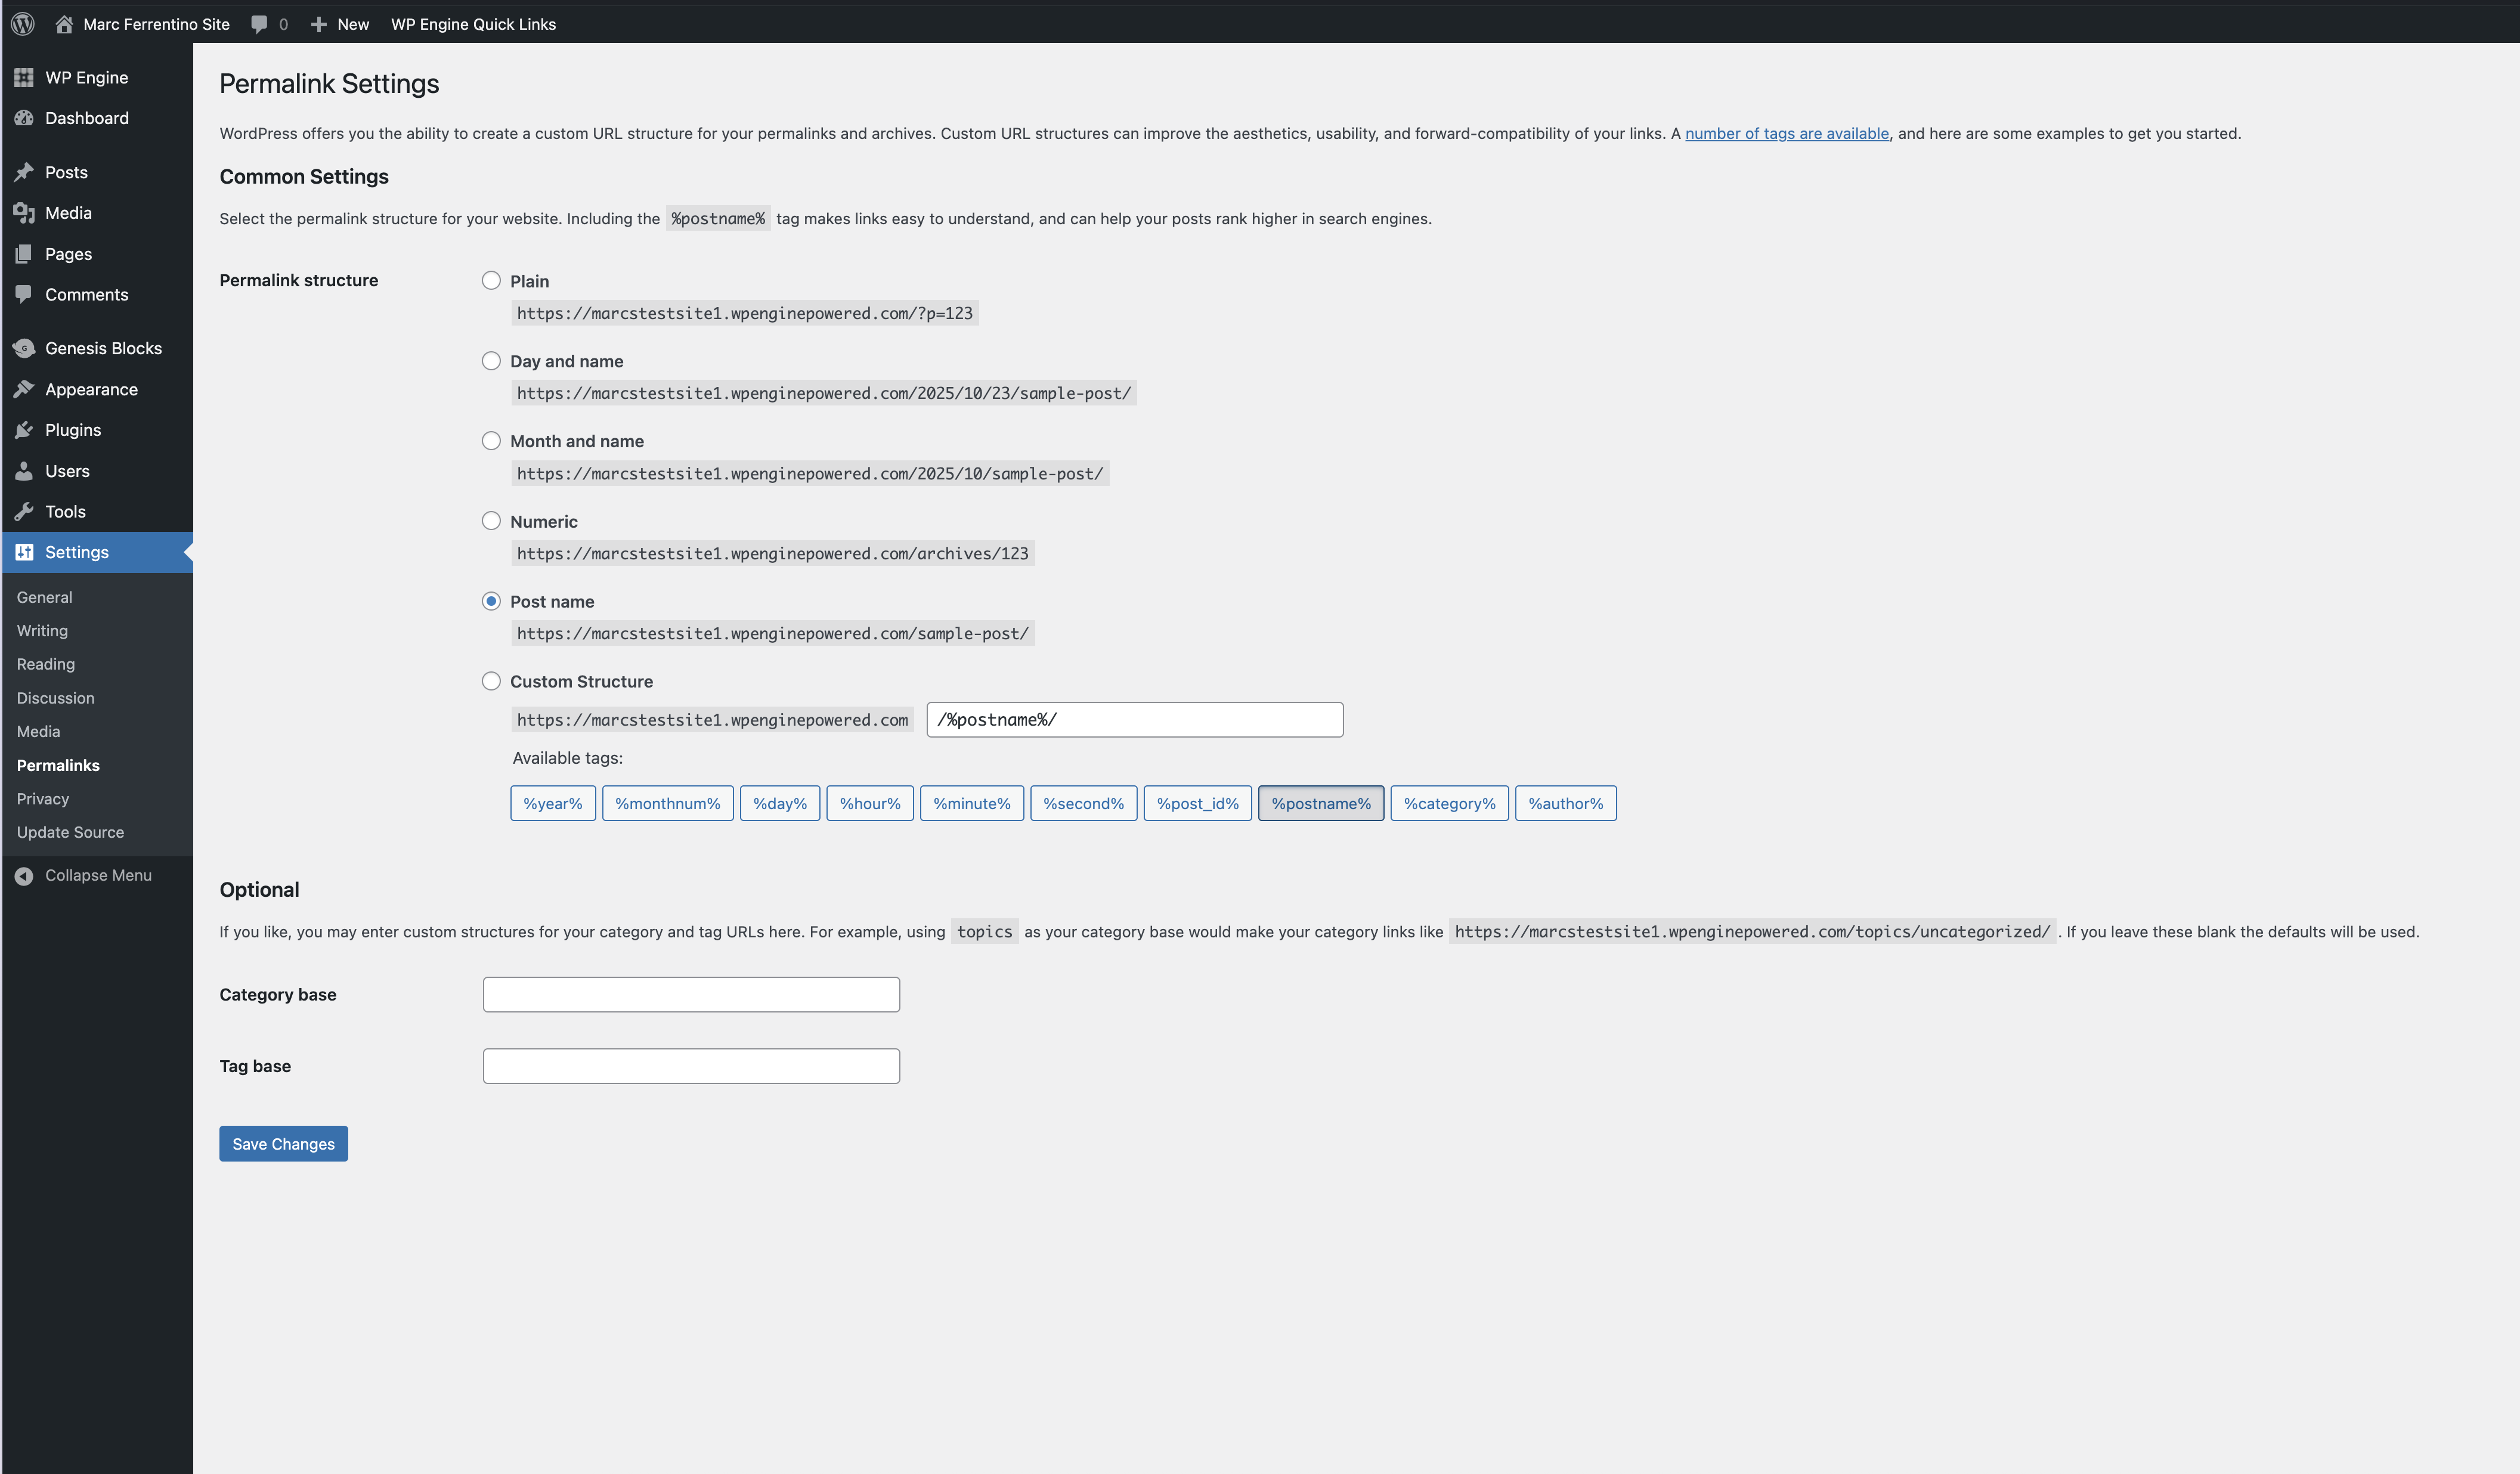
Don't worry - changing this setting won't break your existing links. WordPress automatically redirects old URLs to new ones, so any links to your site will continue to work.
Step 2: Create an Application Password
Application Passwords are a secure way for apps like Quotient to access your WordPress site without using your main login password. Think of it like creating a key specifically for Quotient - you can revoke it anytime without changing your main password.
In your WordPress admin, go to Users → Your Profile (or Users → Profile depending on your WordPress version). Scroll down until you see the "Application Passwords" section. Type "Quotient" in the name field so you'll remember what this password is for later, then click "Add New Application Password".
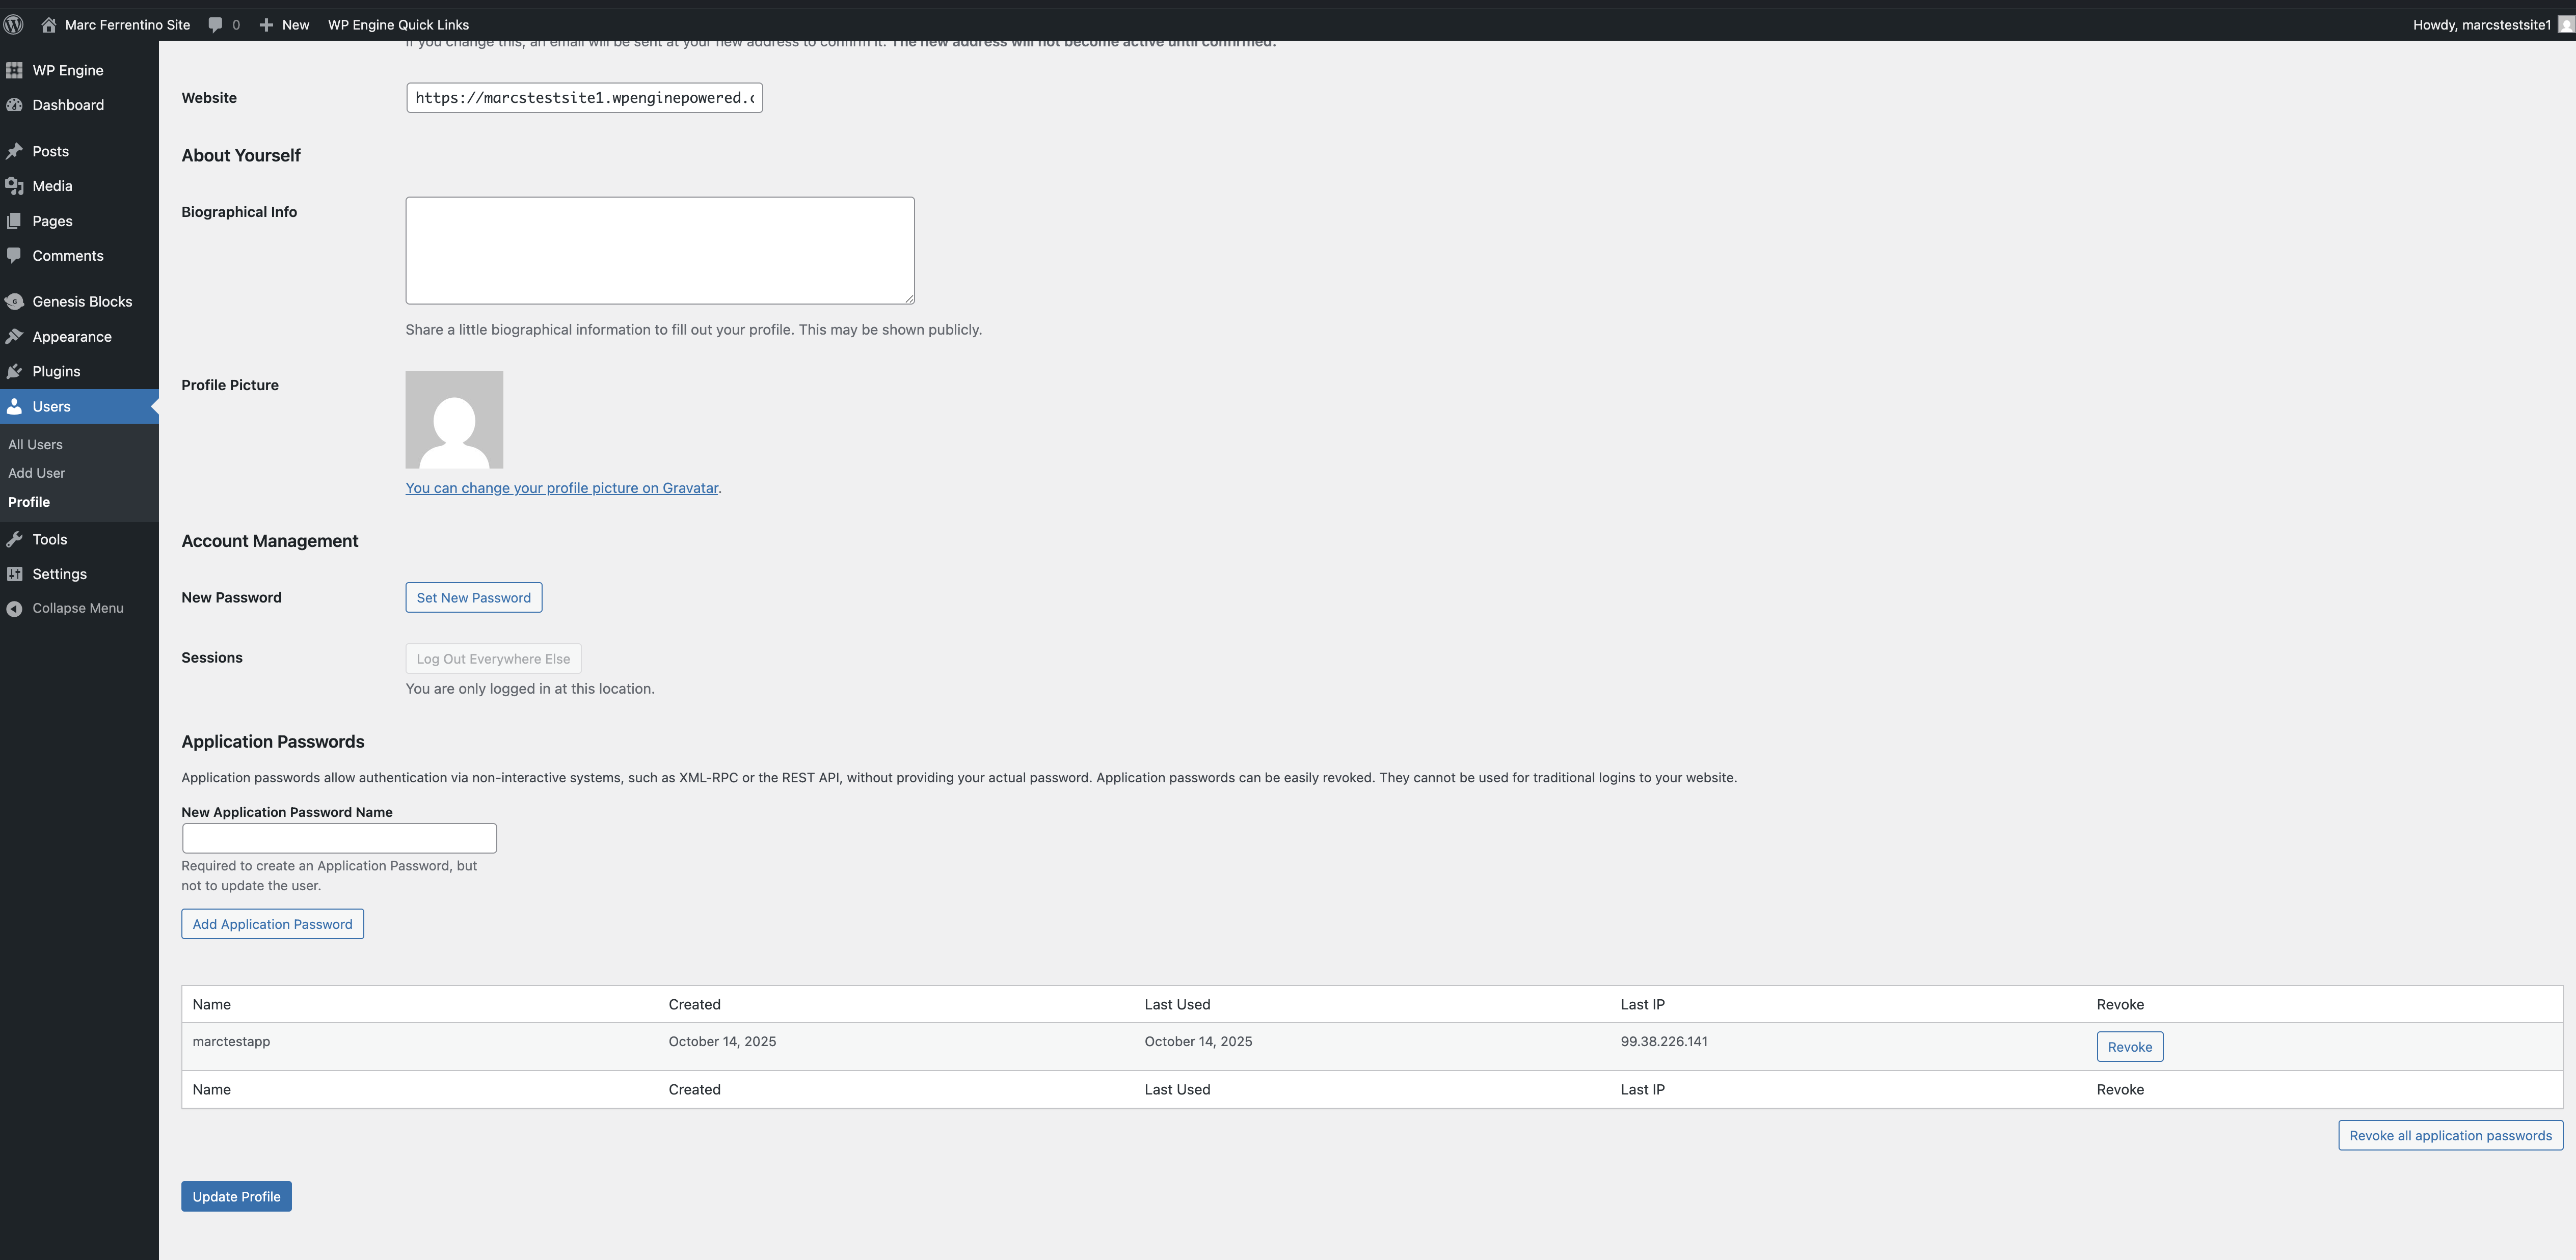
WordPress will generate a password that looks something like abcd efgh ijkl mnop qrst uvwx. Copy this password immediately and save it somewhere safe - you won't be able to see it again after you close this page.
Important
Save this password somewhere safe - you won't be able to see it again! If you lose it, you'll need to create a new one.
Step 3: Connect to Quotient
Now that you have your Application Password, you can connect your WordPress site to Quotient. In Quotient, navigate to Settings → Integrations and find the WordPress card. Click "Connect" to open the connection dialog.
You'll need to enter three pieces of information:
- Website URL: Your WordPress site's address, like
https://yoursite.com. Make sure to include thehttps://and don't add a trailing slash at the end. - Username: Your WordPress username - this is the same username you use to log into your WordPress admin dashboard.
- Password: The Application Password you just created in Step 2.
After you enter your credentials, click "Connect WordPress". Quotient will test the connection to make sure everything is working properly. This usually takes just a few seconds.
Understanding Field Mappings
Once you're connected, Quotient automatically configures field mappings that work for most WordPress sites. Field mappings determine which information from your Quotient blog goes into which fields on your WordPress site. For example, your Quotient blog title maps to the WordPress post title, your blog content maps to the WordPress post content, and so on.
The default mappings cover the essentials:
- Title → WordPress post title
- Content → WordPress post content
- Summary → WordPress excerpt (used for SEO and previews)
- Tags → WordPress tags
- Featured Image → WordPress featured image
Most users never need to change these mappings - they work great out of the box. However, if your WordPress site uses custom fields or you want to map additional information, you can customize the mappings in Settings → Integrations → WordPress under the "Field Mappings" tab.
You're All Set
That's it! Once your WordPress site is connected, you'll see a new "Publish to WordPress" button when you're viewing any blog post in Quotient. This button lets you send your finished content directly to WordPress without any copy-pasting or manual work.
Ready to publish your first blog? Check out the Publishing Guide to learn how to send your content to WordPress.
Troubleshooting Common Setup Issues
If you encounter problems during setup, here are the most common issues and their solutions:
"Connection failed" error - This usually means your permalinks aren't configured correctly, or there's an issue with your credentials. Double-check that you selected "Post name" in your permalink settings, that you're using your WordPress username (not "Quotient" or any other application name), and that you copied the Application Password exactly as shown.
"Permission denied" error - Your WordPress user account needs to be an Administrator or Editor to publish posts. If you're seeing this error, check your WordPress user role in Users → All Users and make sure you have the right permissions. If you're not an admin on the site, ask whoever manages your WordPress to grant you Editor or Administrator access.
If you're still having trouble, the Troubleshooting Guide has detailed solutions for these and other issues.