Conditional Components
How to create and use conditional components in emails
Overview
Conditional components allow you to show or hide email components based on email variable values.
Building Conditional Components
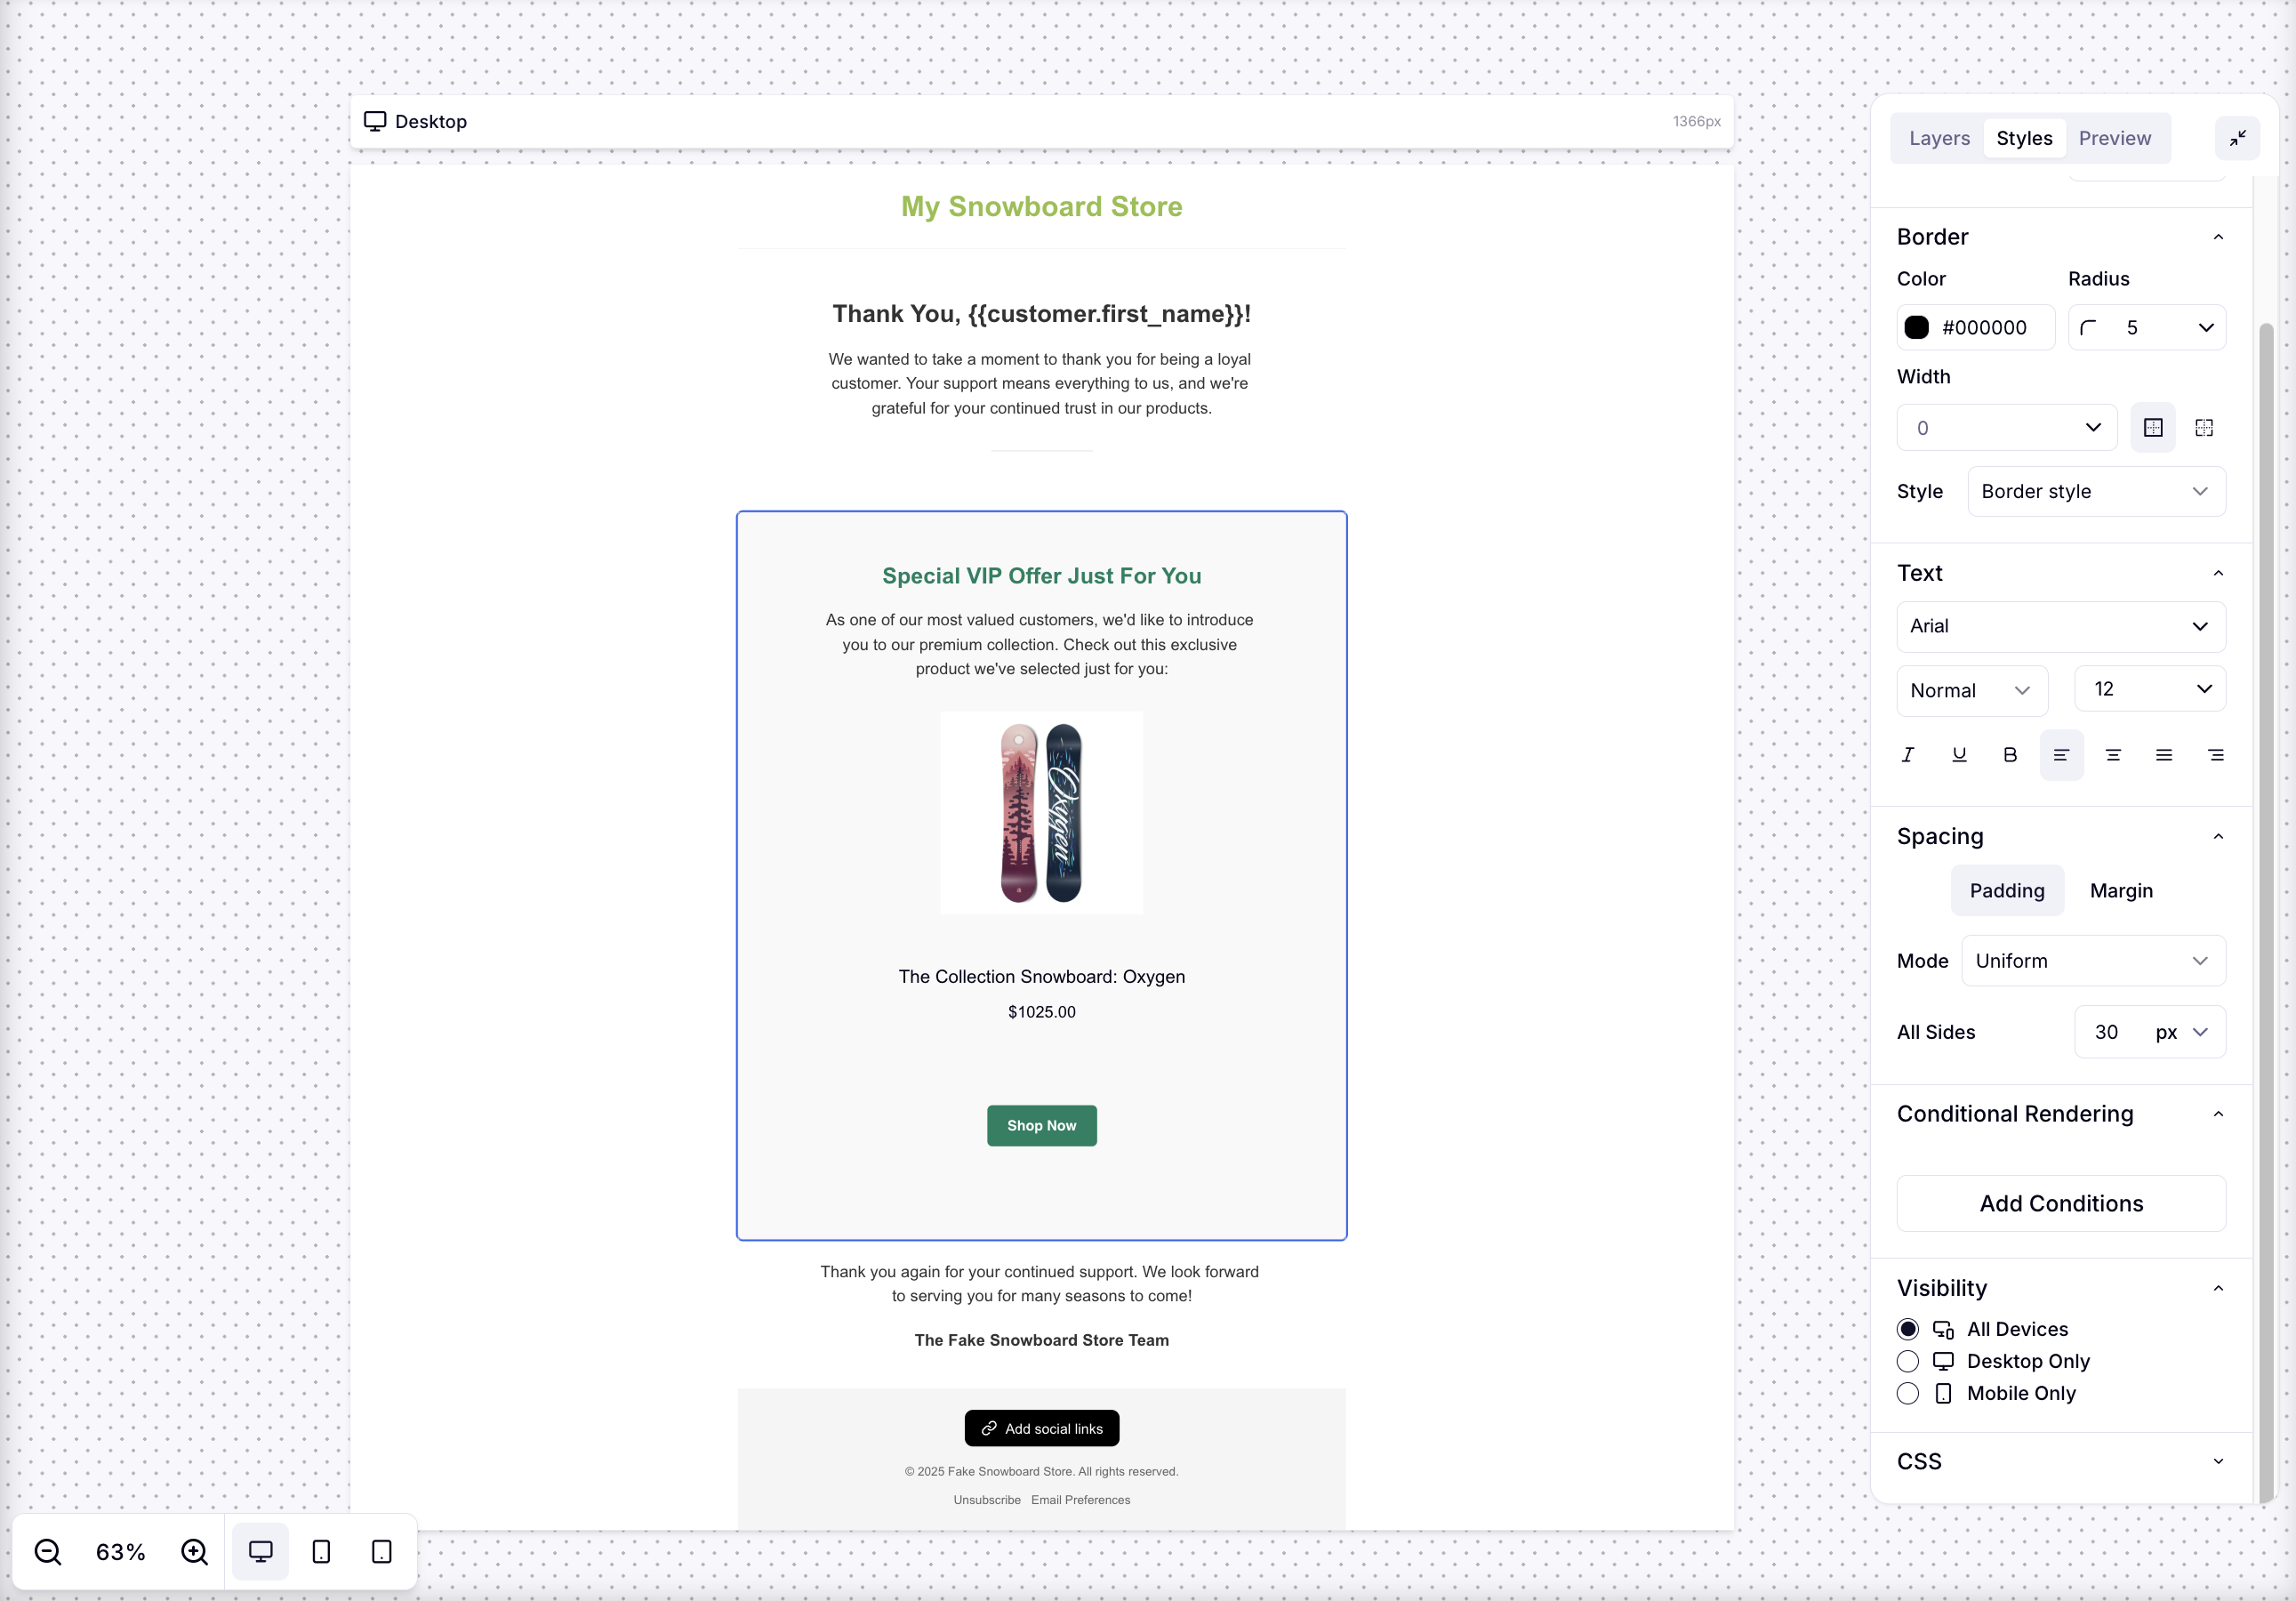
Navigate into the Email Template Editor and select a component that you wish to display conditionally. In the example below we are selecting the container of our "Special VIP Offer" component. After selecting the component, we'll navigate to the Conditional Rendering section in the Style Editor and click on the button in the Style Editor labeled "Add Conditions"
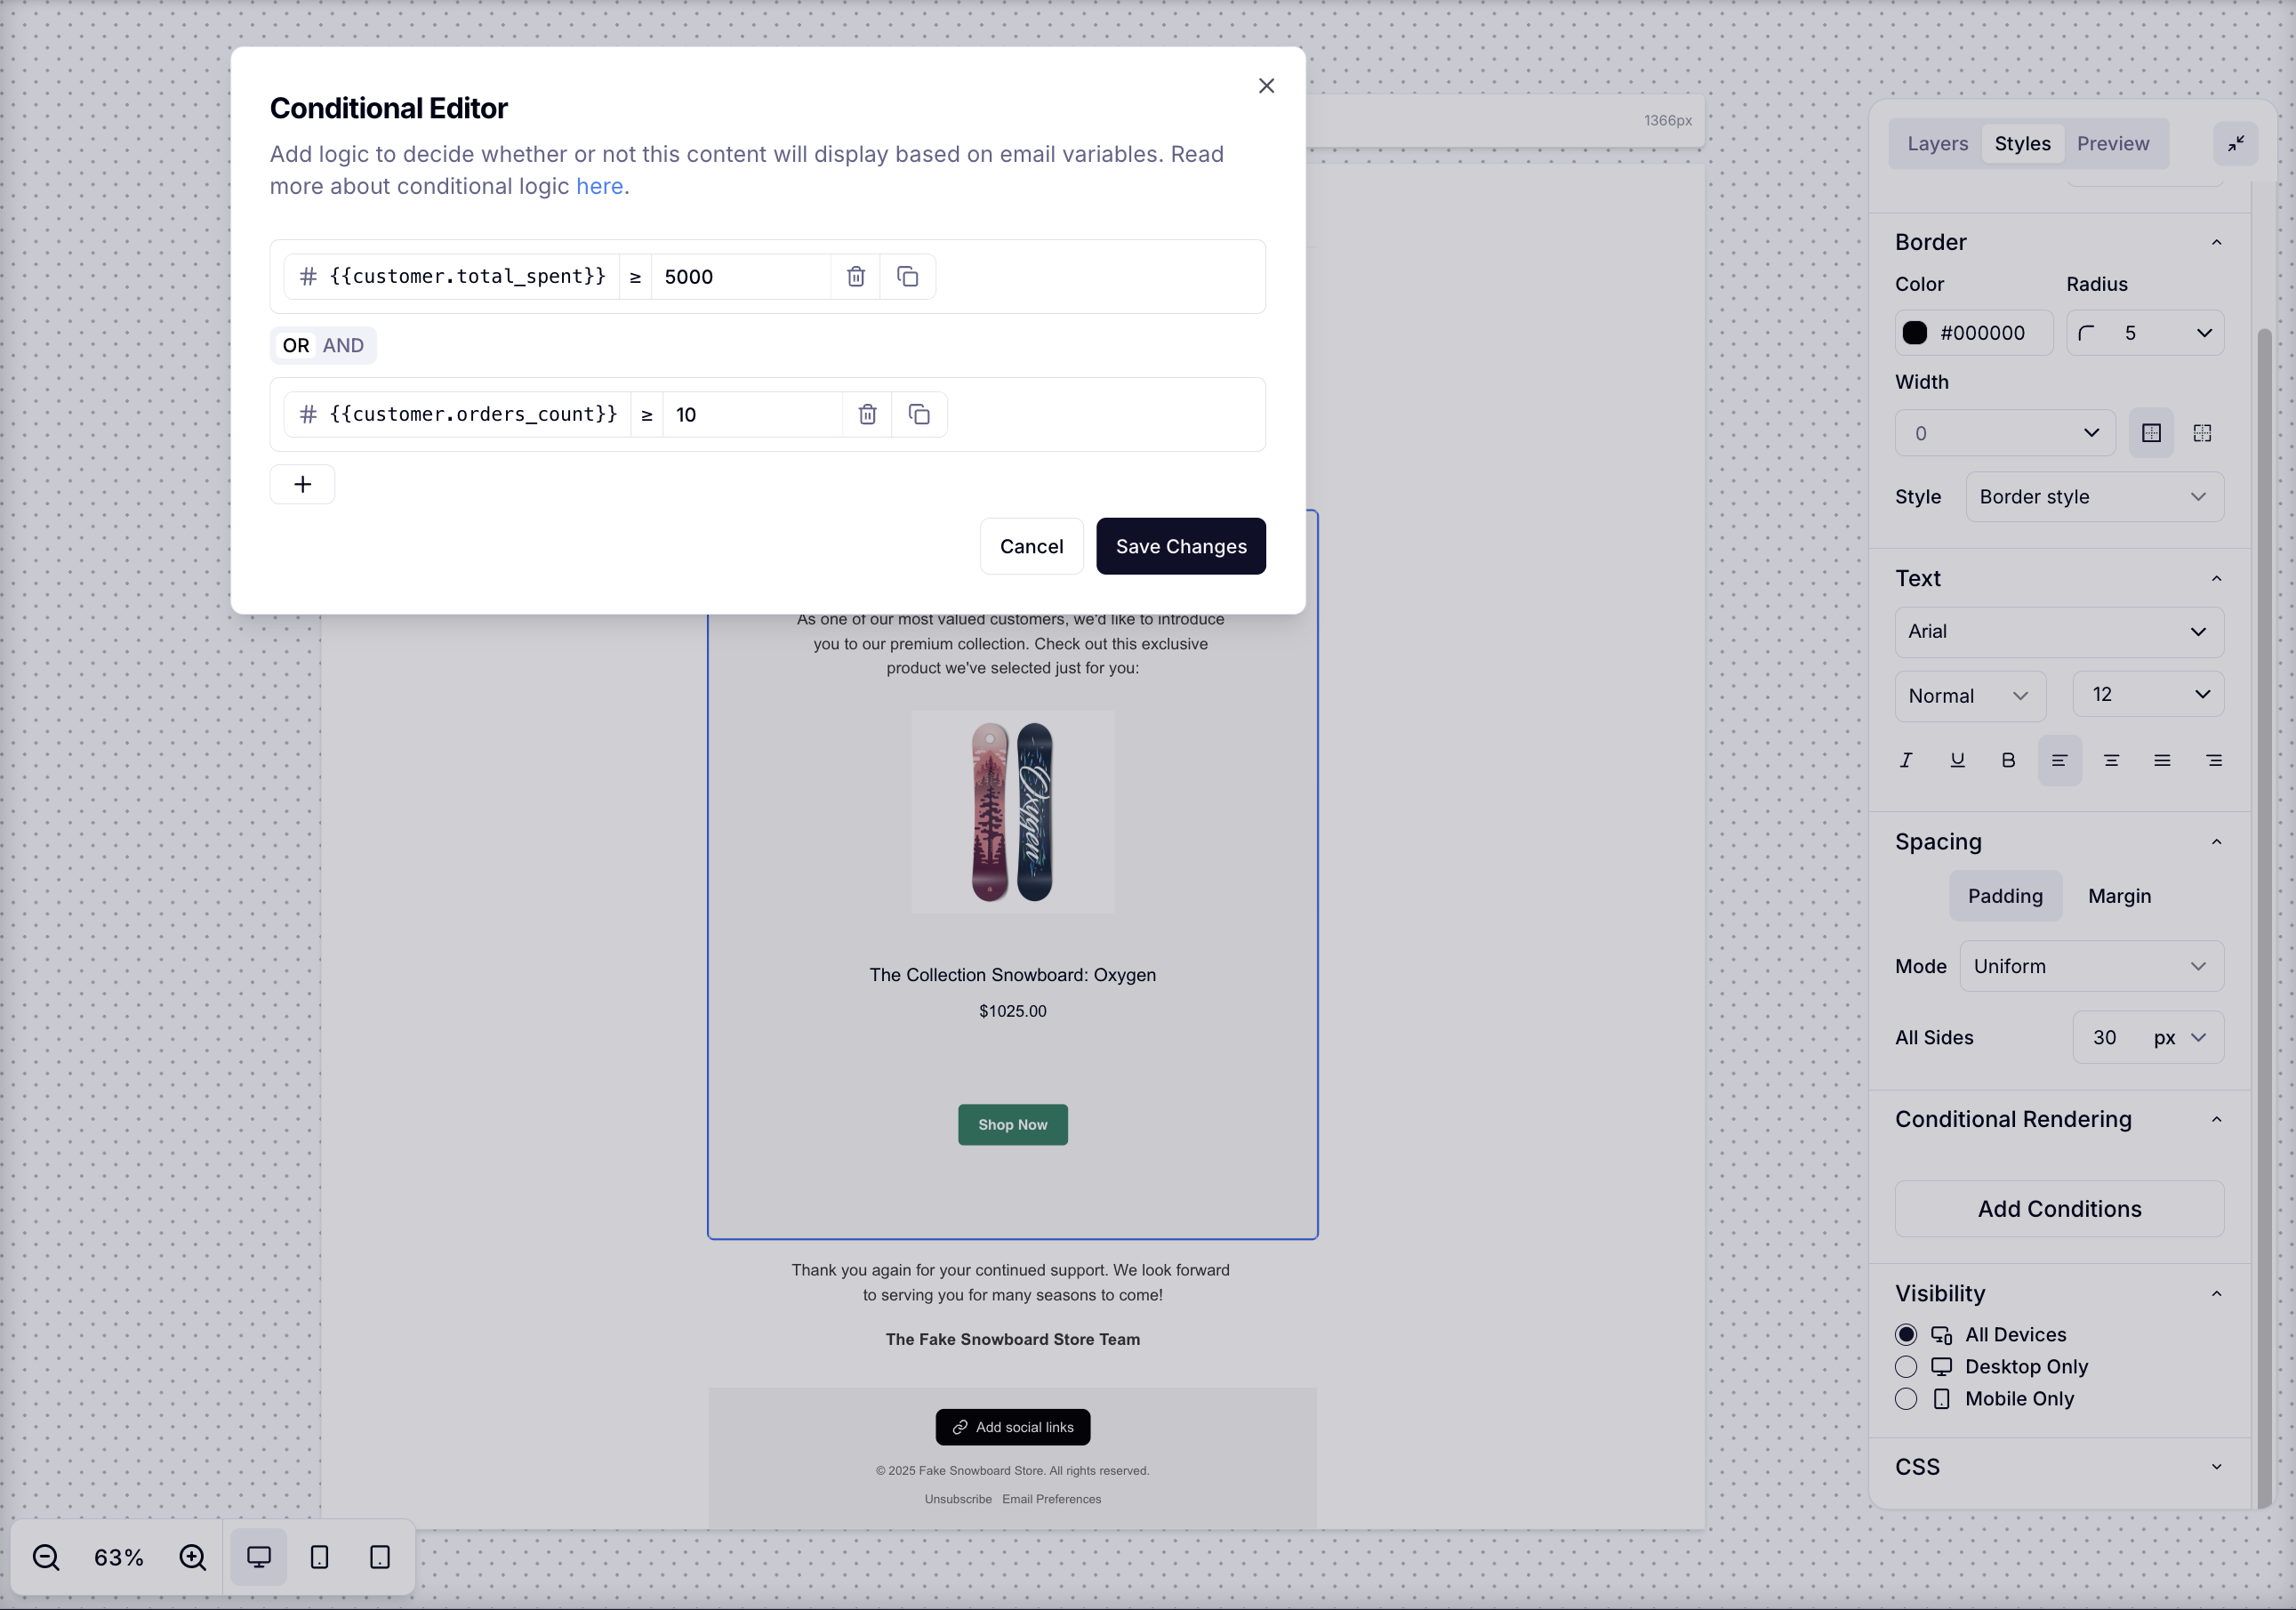
This will pull up our Conditional Editor where we can add, remove, and edit the conditions that control whether "Special VIP Offer" will display. Here, we've decided that we want this VIP section to display if the email recipient has spent over $5000 or has more than 10 orders. Other recipients will not see this section.
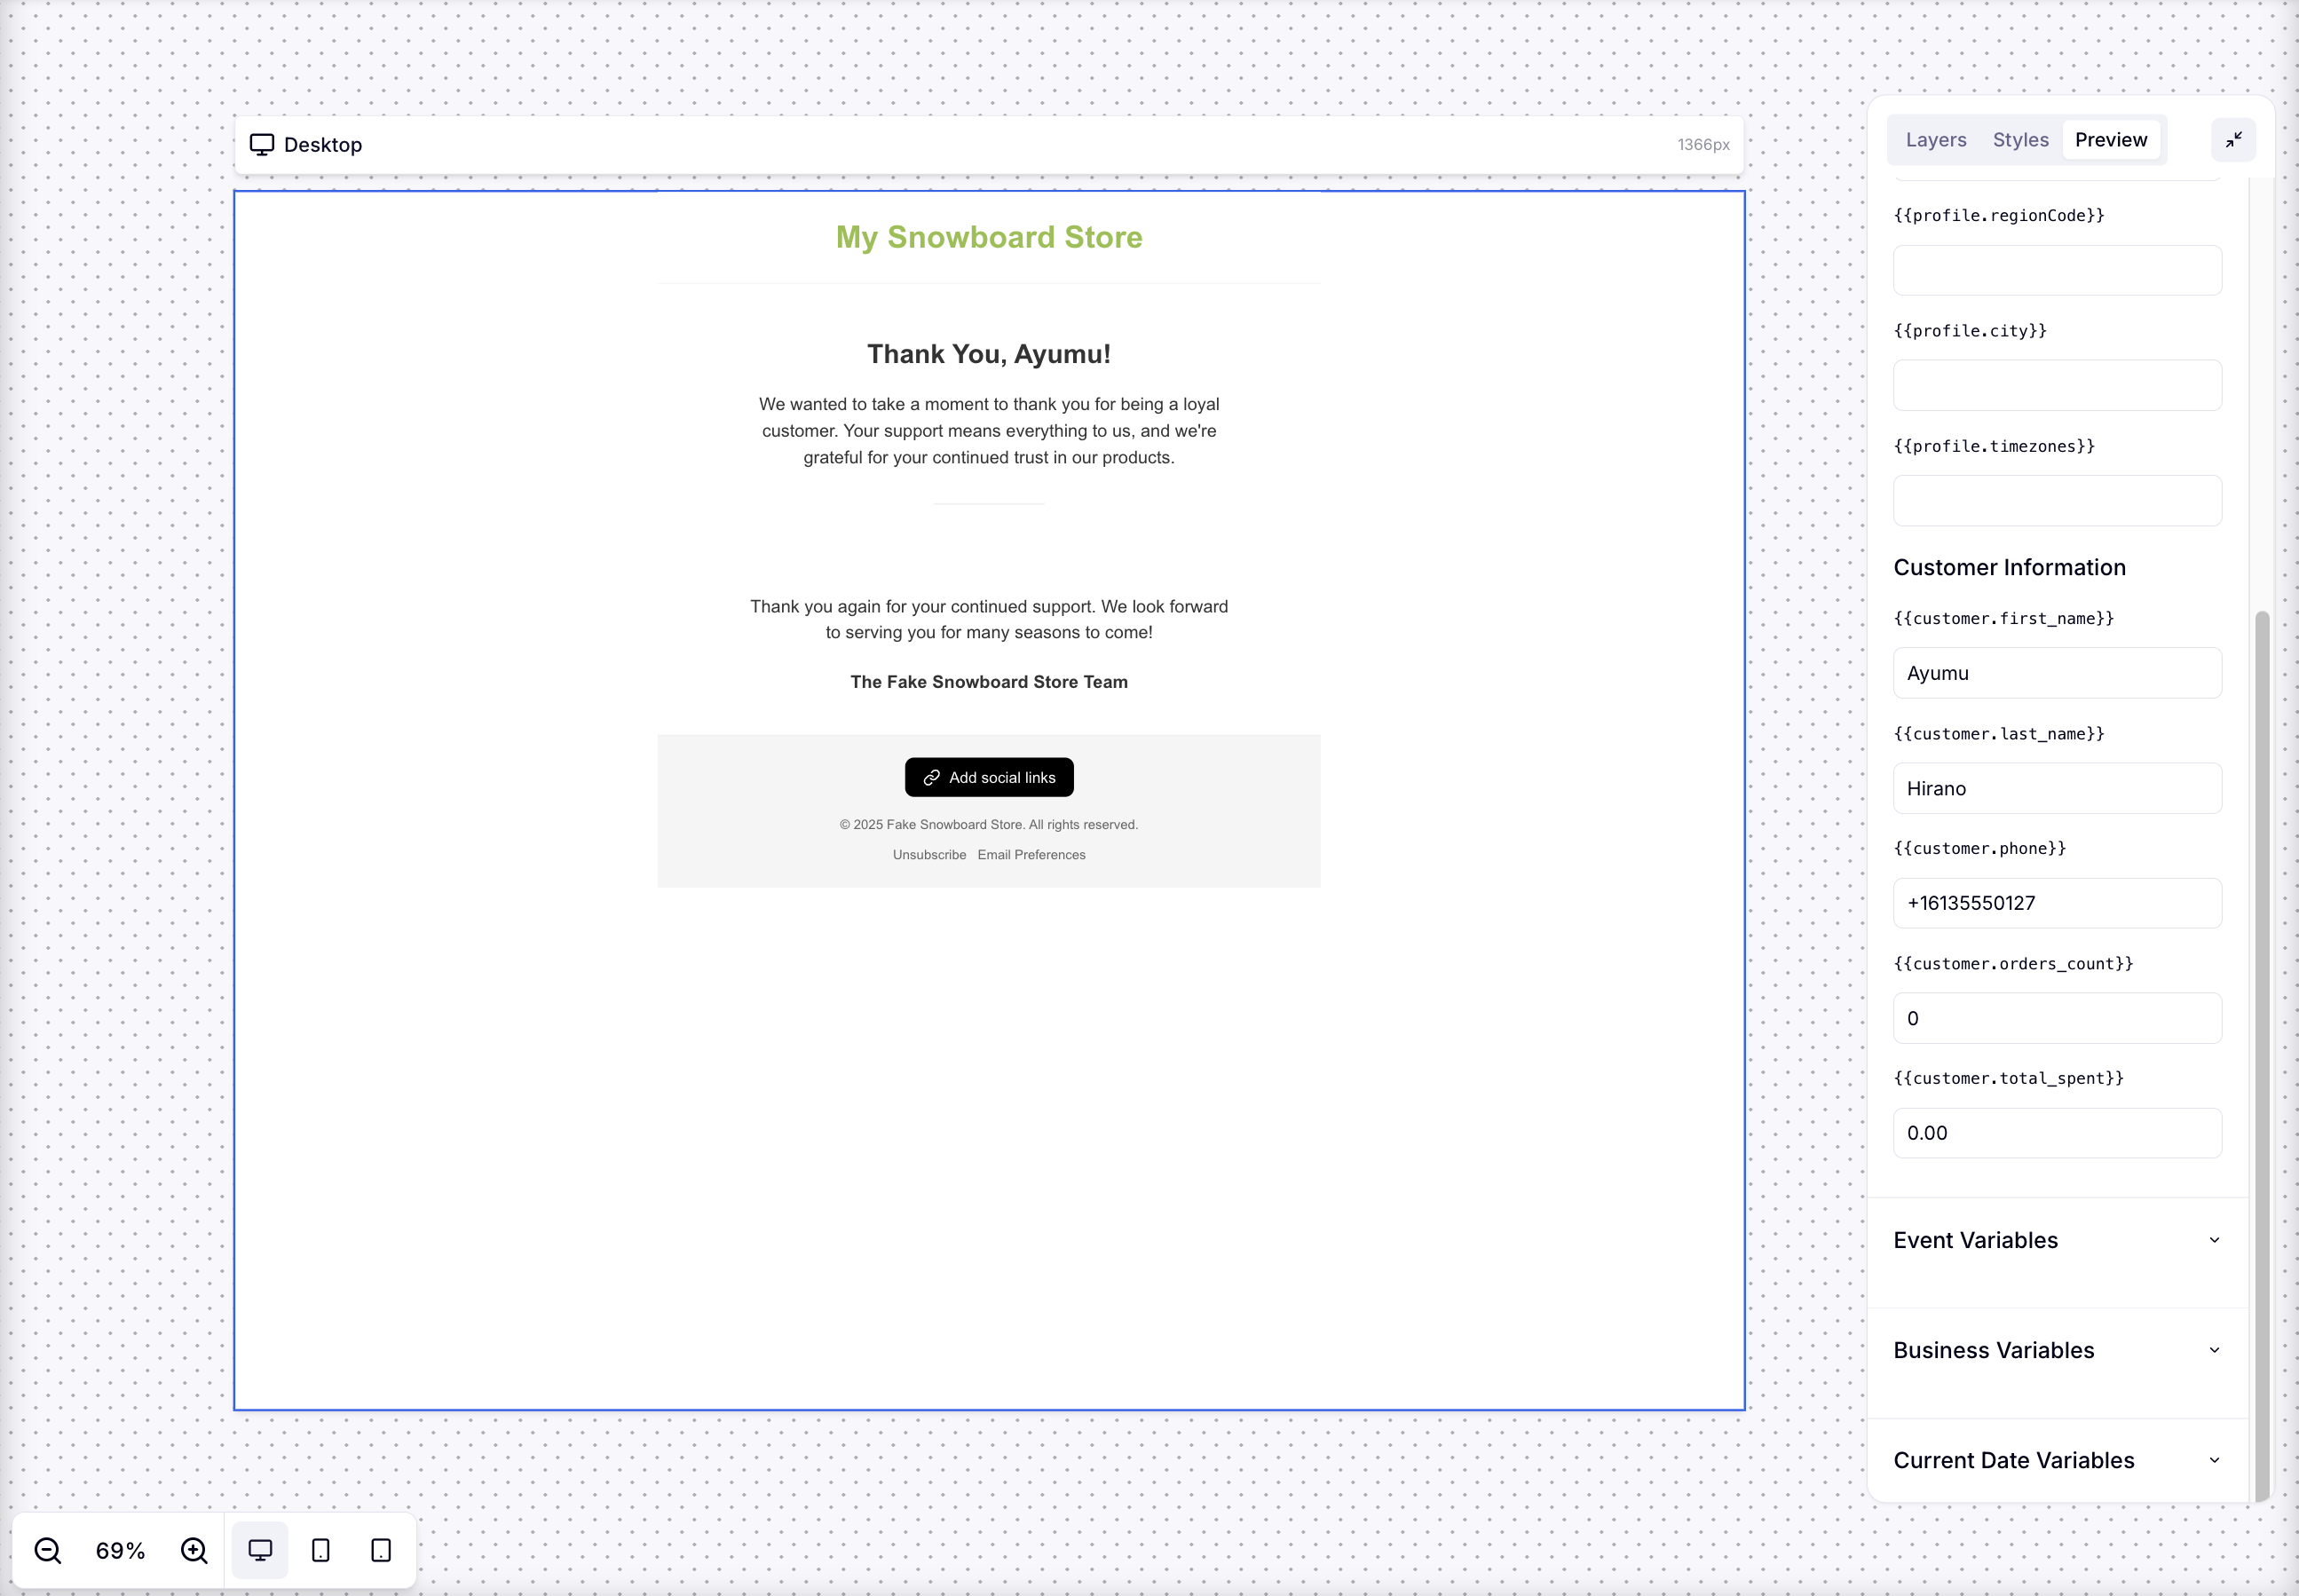
After creating the conditionals and saving our changes, we can navigate to the
Preview Tab to see how our email looks depending on our email variable values. In this case we are interested in {{customer.total_spent}} and
{{customer.order_count}}.
When we first navigate to the Preview Tab, we select a customer to test the email against, in this case "Ayumu Hirano." Ayumu has not spent or ordered with us, so the email that would be sent to her, does not contain our VIP section.
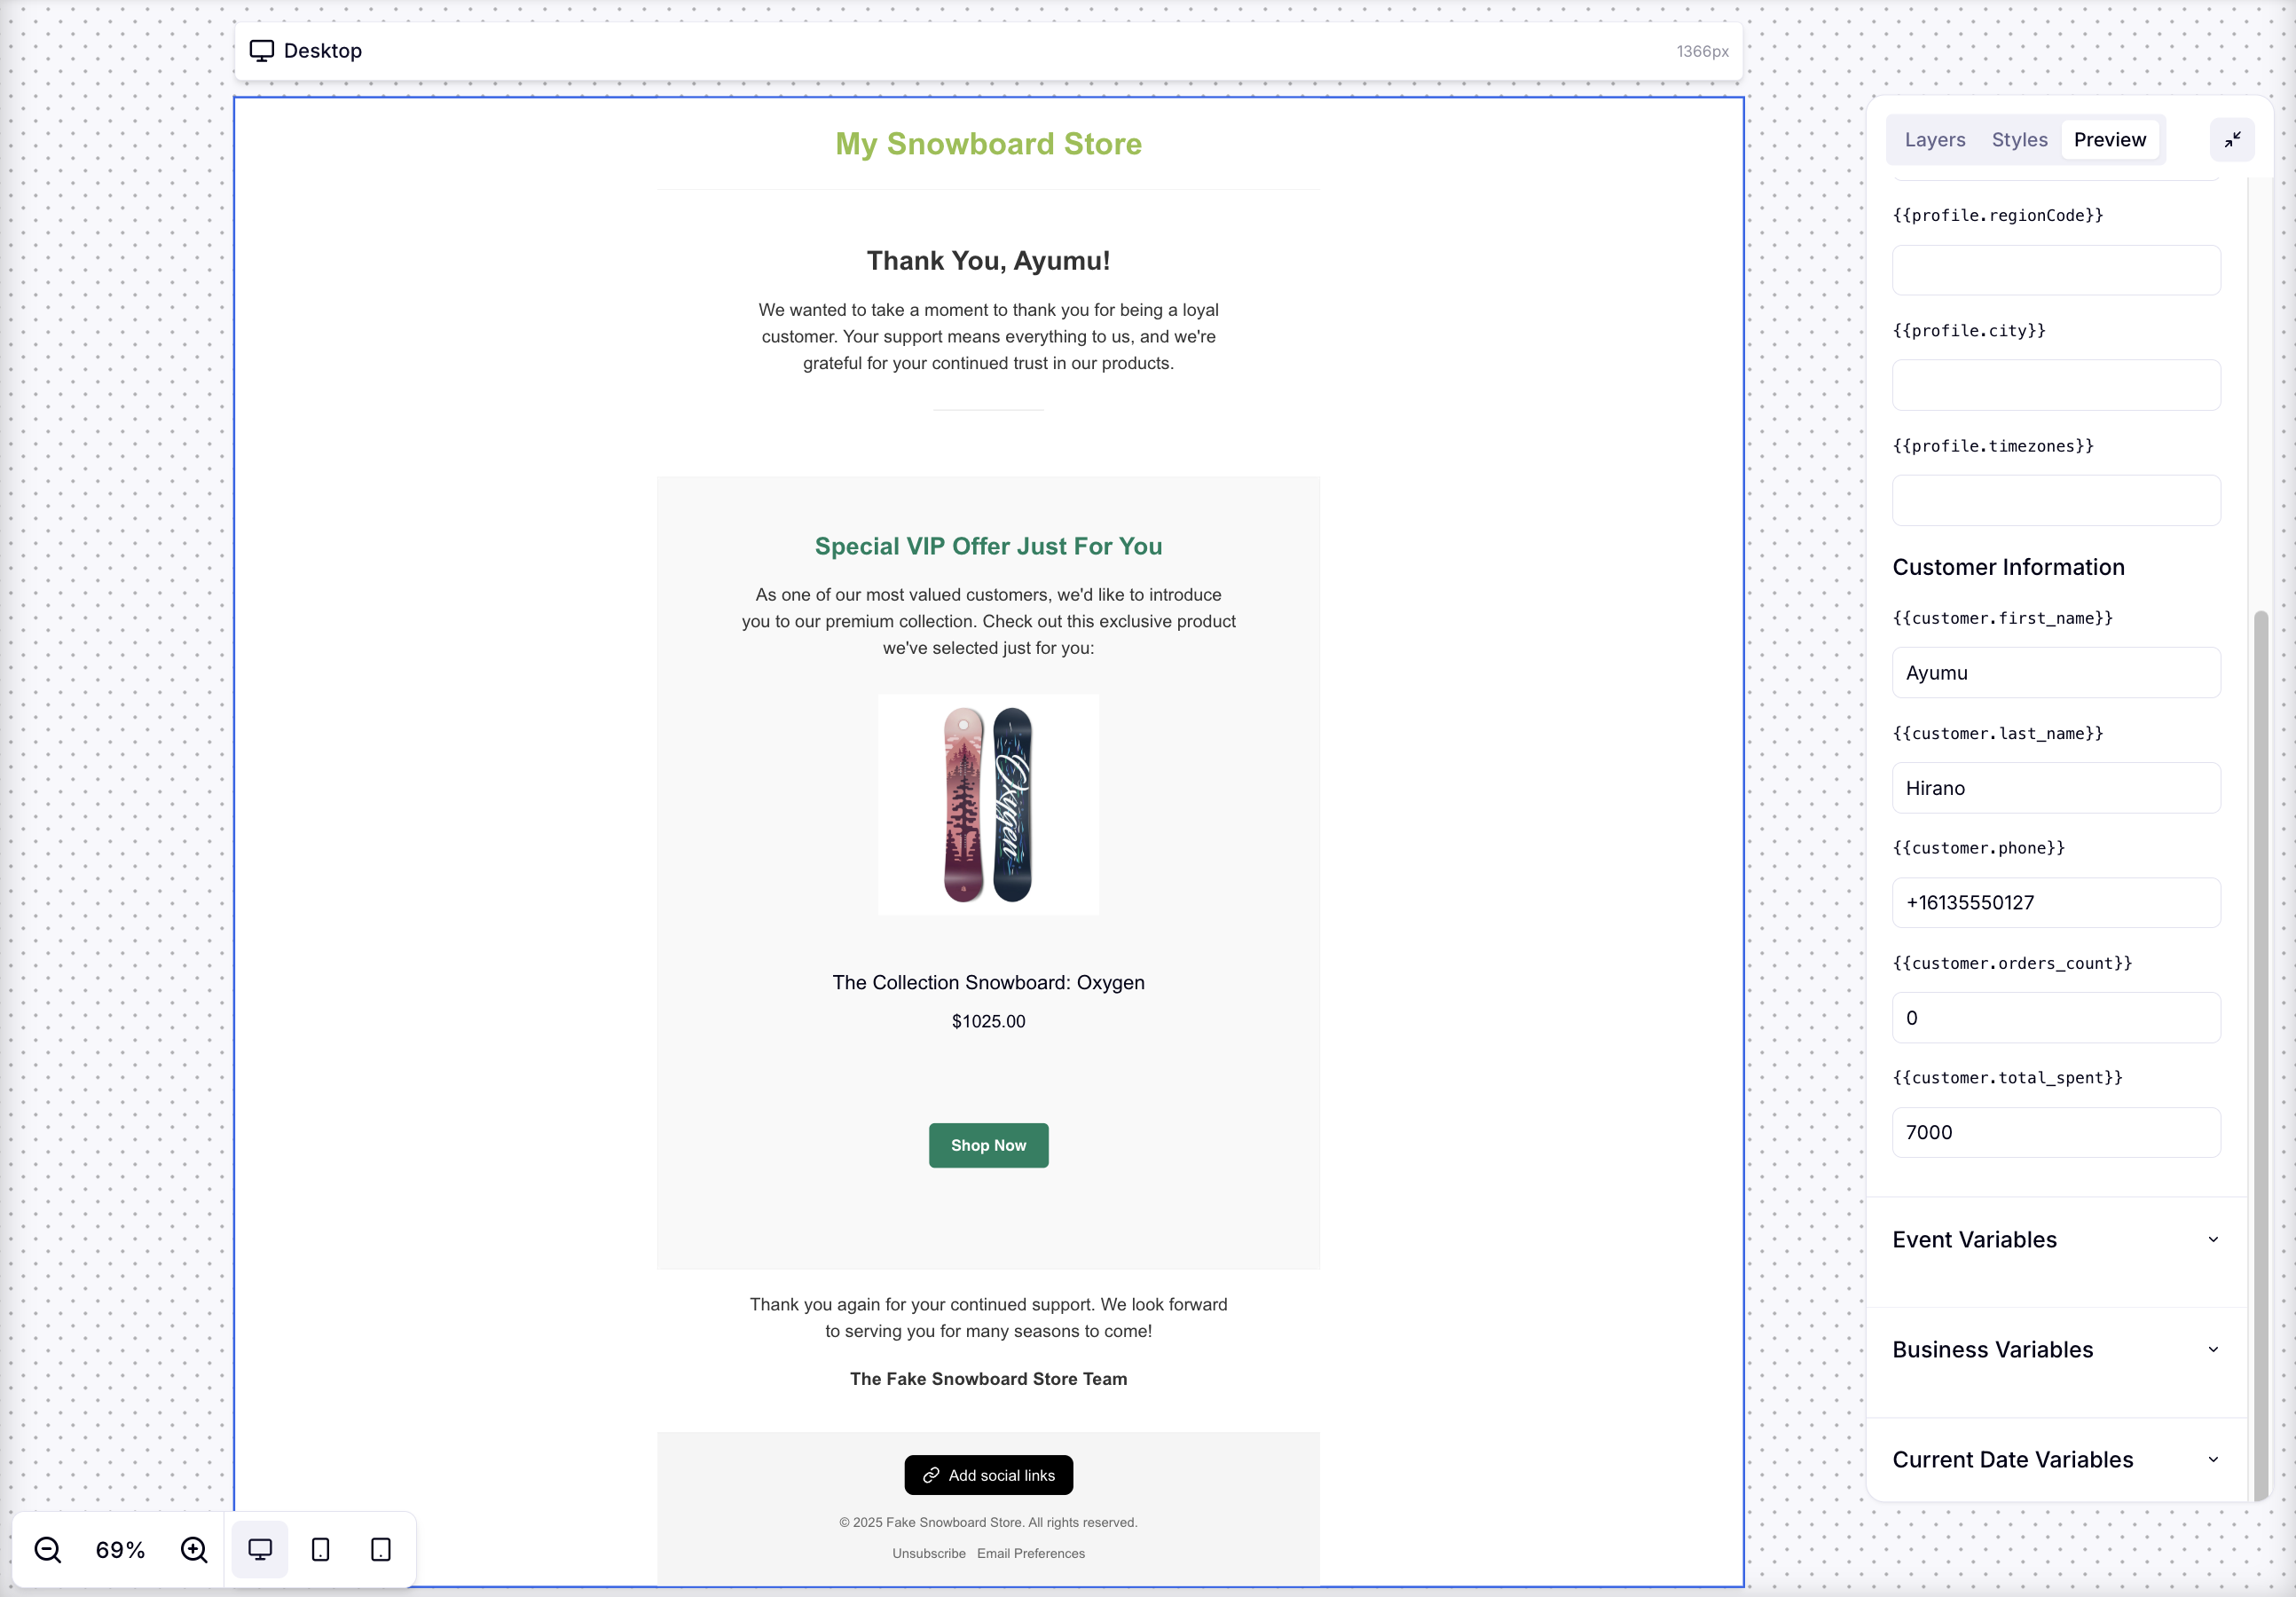
We'd like to see what the email would look like if Ayumu had satisfied our
conditions, so we'll adjust her {{customer.total_spent}} to $7000 (this
will not affect Ayumu's underlying data and is only applied for the preview).
As we can see, if Ayumu had spent $7000 with us, the email that she receives would contain our VIP section!