 Writing a blog is one of the best ways to attract interest in your brand and establish your business as a trusted leader in its space. More specifically, a blog serves several purposes within your marketing strategy:
- **Organic SEO:** Thoughtful, SEO-optimized blogs can help your brand rank for high-intent keywords in search engines like Google. Note that this can also help your brand get noticed by AI assistants like ChatGPT.
- **Thought Leadership:** An informative, high-quality blog establishes your brand as a thought leader in your industry. This helps establish your brand’s reputation and credibility, which is critical for selling your product.
- **Content that Sells without Selling:** A blog can help educate customers and prospects about the importance of your solution. The goal of a blog is not necessarily to sell your product directly, but rather to educate and promote understanding of the problem your business is trying to solve.
With Quotient, you can write and publish a blog from the same integrated platform you use to send email, plan events, and manage your brand.
## Core Concepts
**Posts**
A blog post is an individual article with a dedicated URL. Blog posts are written as **rich text**, which means you can apply basic formatting like bold/italics, headers, and lists, but more advanced formatting like fonts and text size are controlled in your publishing environment.
**Authors and Tags**
Each blog has one or more **authors** and can also optionally have **tags**. Authors are linked to Quotient users, so if you want someone to be listed as a blog author they must be a user in Quotient.
Tags are simply for organizational purposes to help users navigate your blog. For example you might have separate tags for…
- Company Updates
- Product Updates
- Industry Trends
**SEO Metadata**
Blogs also have additional metadata for SEO, such as…
- **Meta Description:** A short summary that appears in search results and helps improve click-through rates
- **Keywords:** Target keywords that help search engines understand your content's focus
- **Thumbnail Image:** The featured image that appears when your blog is shared on social media
- **Publish Date:** Helps search engines understand when content was published
This information is not necessarily visible on the page, but it helps search engines better understand the content and signals that it's fresh and relevant.
## Writing with Quotient
You can ask Quotient to write entire blogs for you, conduct research, or edit and proofread blogs you've written.
Quotient has access to your Knowledge Store, which is crucial for creating on-brand, on-message content. It also reads campaign briefs, ensuring that blogs fit into larger marketing campaigns.
Here are a few tips for getting the most out of Quotient when writing blogs:
- Submit samples of your writing to add to your Knowledge Store. This will help Quotient get a sense of your unique writing voice and preferences. Similarly, it can be helpful to put together an Author Profile for common blog authors.
- Give Quotient your rough notes or stream-of-consciousness voice messages and ask it to polish them up into a nicely formatted, professional blog post.
- Writing with Quotient is an iterative, back-and-forth process. You can ask it to draft the first version of the post, and then you can select portions of the text that you want to tweak using the “Ask for Changes” feature.
## Publishing Your Blog
Once you've written your blog, you have two options for publishing it to your website:
1. If you have a custom-built website using a framework like NextJS or Remix, you can use the Quotient Javascript SDK to fetch data from the blog and render it.
2. If you use Webflow, you can use our Webflow integration to sync blog posts from Quotient to Webflow’s CMS.
In the near future, we will be adding additional integrations to other web platforms like Framer and WordPress as well.
You can schedule your blog to publish at a specific date and time, or publish it immediately. You can also unpublish a blog after it has been published.
### Publishing Changes
Once your blog moves to the __Published__ status, it will be visible on your site.
However, you may often want to publish changes to an already-published blog. Changes you make to a published blog will **_not_** automatically sync to your website. To publish them, click the “Publish Changes” button in the upper right hand corner of the blog page.
-- End of: /blog
-- Start of: /campaign
---
title: Planning Campaigns
description: How to plan your campaign calendar with Quotient
order: 4
---
Writing a blog is one of the best ways to attract interest in your brand and establish your business as a trusted leader in its space. More specifically, a blog serves several purposes within your marketing strategy:
- **Organic SEO:** Thoughtful, SEO-optimized blogs can help your brand rank for high-intent keywords in search engines like Google. Note that this can also help your brand get noticed by AI assistants like ChatGPT.
- **Thought Leadership:** An informative, high-quality blog establishes your brand as a thought leader in your industry. This helps establish your brand’s reputation and credibility, which is critical for selling your product.
- **Content that Sells without Selling:** A blog can help educate customers and prospects about the importance of your solution. The goal of a blog is not necessarily to sell your product directly, but rather to educate and promote understanding of the problem your business is trying to solve.
With Quotient, you can write and publish a blog from the same integrated platform you use to send email, plan events, and manage your brand.
## Core Concepts
**Posts**
A blog post is an individual article with a dedicated URL. Blog posts are written as **rich text**, which means you can apply basic formatting like bold/italics, headers, and lists, but more advanced formatting like fonts and text size are controlled in your publishing environment.
**Authors and Tags**
Each blog has one or more **authors** and can also optionally have **tags**. Authors are linked to Quotient users, so if you want someone to be listed as a blog author they must be a user in Quotient.
Tags are simply for organizational purposes to help users navigate your blog. For example you might have separate tags for…
- Company Updates
- Product Updates
- Industry Trends
**SEO Metadata**
Blogs also have additional metadata for SEO, such as…
- **Meta Description:** A short summary that appears in search results and helps improve click-through rates
- **Keywords:** Target keywords that help search engines understand your content's focus
- **Thumbnail Image:** The featured image that appears when your blog is shared on social media
- **Publish Date:** Helps search engines understand when content was published
This information is not necessarily visible on the page, but it helps search engines better understand the content and signals that it's fresh and relevant.
## Writing with Quotient
You can ask Quotient to write entire blogs for you, conduct research, or edit and proofread blogs you've written.
Quotient has access to your Knowledge Store, which is crucial for creating on-brand, on-message content. It also reads campaign briefs, ensuring that blogs fit into larger marketing campaigns.
Here are a few tips for getting the most out of Quotient when writing blogs:
- Submit samples of your writing to add to your Knowledge Store. This will help Quotient get a sense of your unique writing voice and preferences. Similarly, it can be helpful to put together an Author Profile for common blog authors.
- Give Quotient your rough notes or stream-of-consciousness voice messages and ask it to polish them up into a nicely formatted, professional blog post.
- Writing with Quotient is an iterative, back-and-forth process. You can ask it to draft the first version of the post, and then you can select portions of the text that you want to tweak using the “Ask for Changes” feature.
## Publishing Your Blog
Once you've written your blog, you have two options for publishing it to your website:
1. If you have a custom-built website using a framework like NextJS or Remix, you can use the Quotient Javascript SDK to fetch data from the blog and render it.
2. If you use Webflow, you can use our Webflow integration to sync blog posts from Quotient to Webflow’s CMS.
In the near future, we will be adding additional integrations to other web platforms like Framer and WordPress as well.
You can schedule your blog to publish at a specific date and time, or publish it immediately. You can also unpublish a blog after it has been published.
### Publishing Changes
Once your blog moves to the __Published__ status, it will be visible on your site.
However, you may often want to publish changes to an already-published blog. Changes you make to a published blog will **_not_** automatically sync to your website. To publish them, click the “Publish Changes” button in the upper right hand corner of the blog page.
-- End of: /blog
-- Start of: /campaign
---
title: Planning Campaigns
description: How to plan your campaign calendar with Quotient
order: 4
---
 Campaigns help you organize your marketing efforts around a central theme or goal. A **[campaign](/s/most-recent-business/campaigns)** in Quotient is a coordinated collection of tasks and deliverables that work together toward a common objective. Think of campaigns as the strategic umbrella that organizes your marketing work across different channels and timeframes.
Grouping deliverables into campaigns is not a requirement in Quotient; you can still publish one-off blog posts or email broadcasts. But grouping things into campaigns helps ensure that your marketing has a consistent message, making it more effective.
Here are some examples of campaigns:
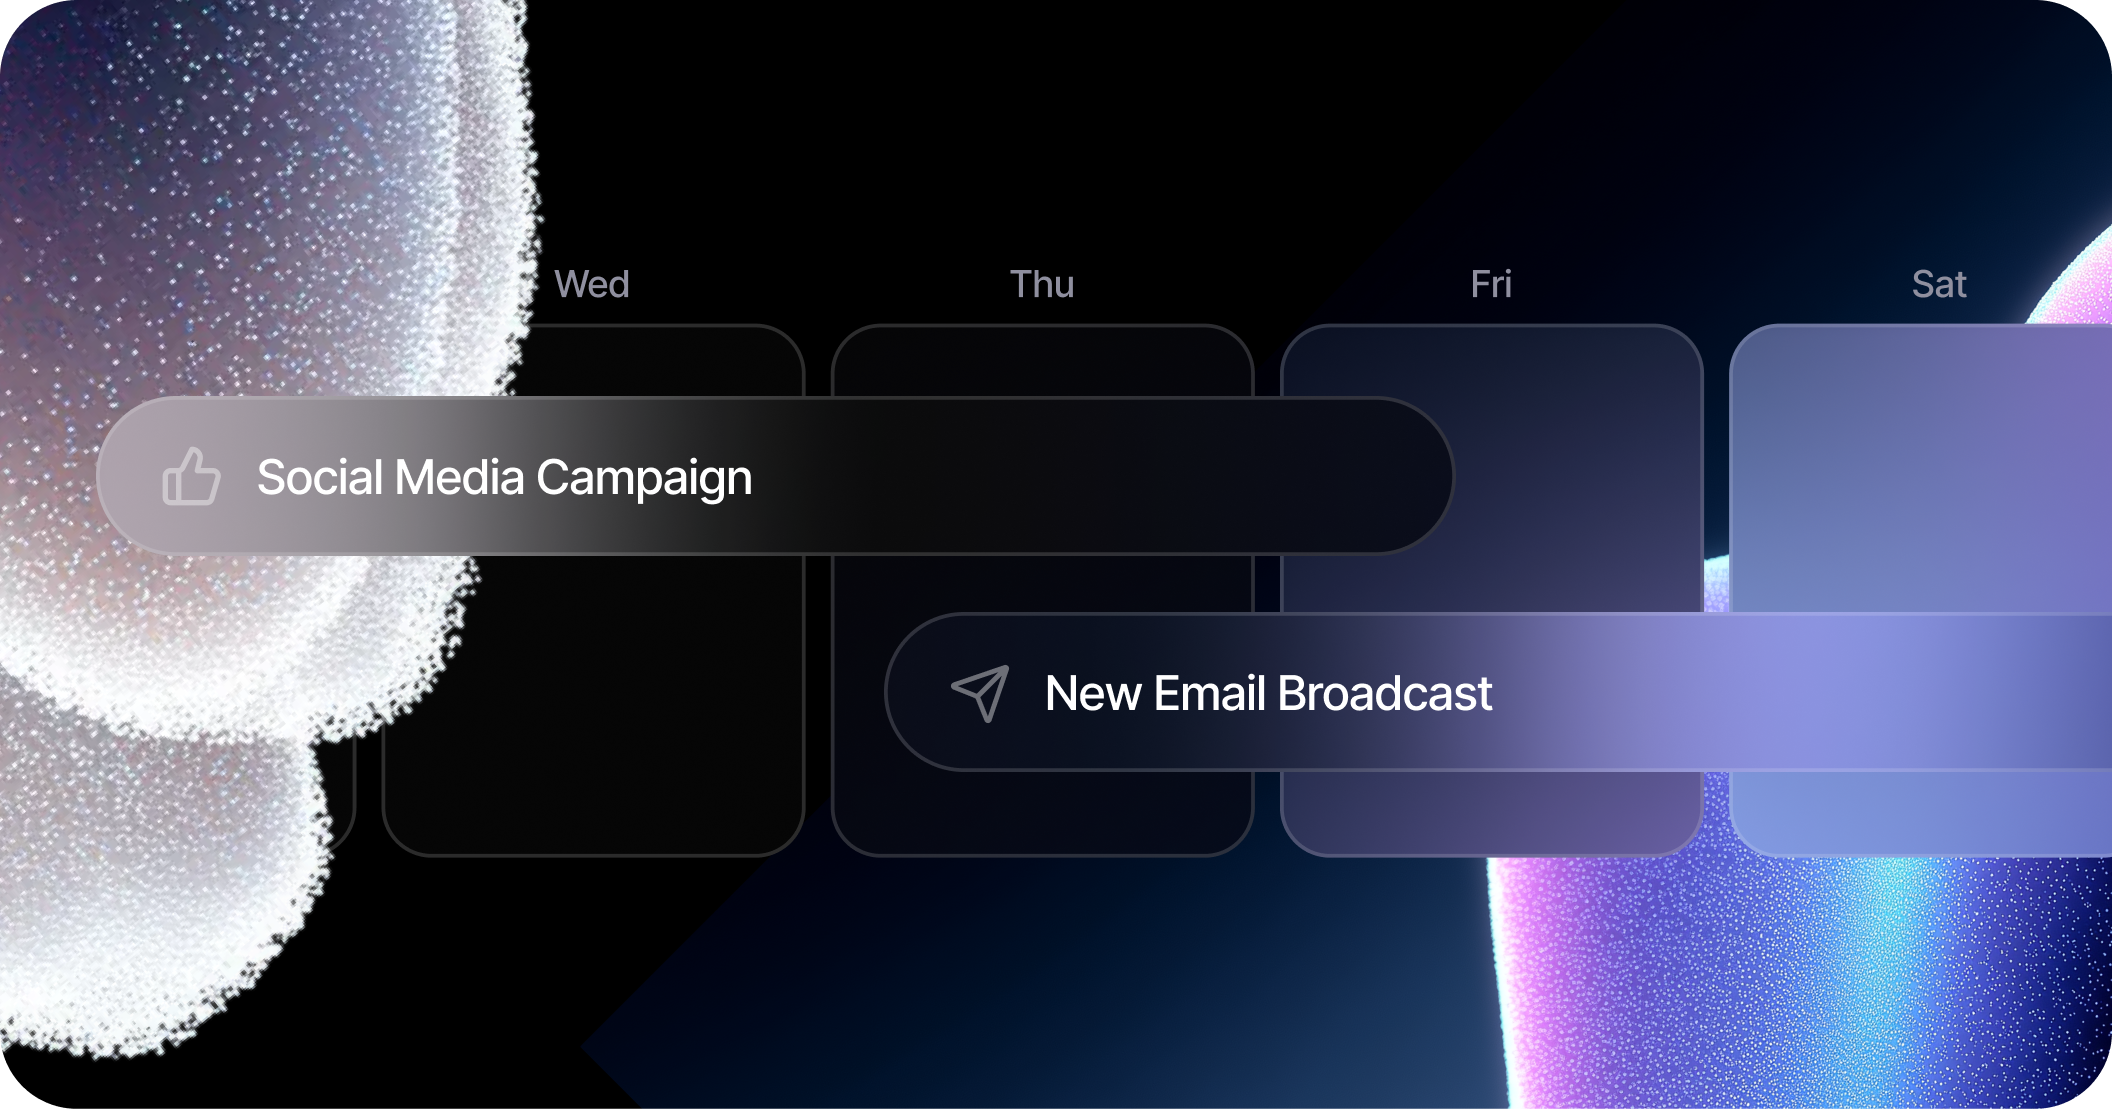
1. **New Feature Announcement:** When announcing an important new feature or launching a new product, it's common to write blogs, send email broadcasts, or host webinars promoting the new feature.
2. **Events:** Campaigns are often built around marketing events. For example, if you are hosting a webinar, or if your company is attending an industry conference, you might want to do a lot of marketing around that event, e.g. sending emails to customers before and after the event.
3. **Thought Leadership:** A specific topic, such as a new regulation or technological breakthrough, might be trending in your industry. To capitalize on interest, you might want to publish a series of blogs explaining your company's perspective on it.
## Core Concepts
### Tasks
Campaigns are organized as a series of tasks. Each task represents a specific piece of work that needs to be completed as part of the campaign. Tasks move through a workflow with four statuses:
- **To-do** - Task has been created but work hasn't started yet
- **In progress** - Task is actively being worked on
- **In review** - Task is complete and awaiting review or approval
- **Done** - Task is complete and approved
Tasks can represent many different types of work:
**Deliverable-Linked Tasks** - Work that's connected to creating specific marketing assets in Quotient:
- Writing a blog post
- Designing an email broadcast
- Setting up a marketing event
- Building an automated flow
- Creating a social media post
**Standalone Tasks** - Work that doesn't happen directly in Quotient:
- Shooting a video
- Taking screenshots of a new feature
- Getting legal approval
- Running paid ads
- Coordinating with external vendors
### Deliverables
When a task involves creating a marketing asset that will be distributed to your audience, it can be linked to a **deliverable**. Deliverables are the actual marketing assets created in Quotient:
- **Blog Posts** - Articles published on your website
- **Email Broadcasts** - Emails sent to your audience
- **Marketing Events** - Webinars, conferences, or in-person events
- **Flows** - Automated email sequences
- **Social Posts** - Content for X, LinkedIn, Instagram, Facebook, and TikTok
When you link a task to a deliverable (like "Write Q4 product announcement blog"), the task provides project management structure while the deliverable contains the actual content and publishing details.
### Briefs
Briefs are strategic memos that explain the purpose, message, and audience for a campaign. This information is critical for aligning both humans and Quotient on the strategy of a campaign. Quotient reads the brief for a campaign when creating content to ensure that the content is consistent with the theme and message of the campaign.
### Task Owners
Each task can have an **owner** - the human who's responsible for completing it. When you're the owner of a task, you'll get notifications about its progress as Quotient works on it, and you can track it on your personal task list.
## Planning Campaigns with Quotient
Ask Quotient to help you develop campaigns from inception to execution. It can create the campaign, write the initial brief, break down the work into tasks, and pick the right timeframe. Once you've agreed on the concept, Quotient will work through each task, creating the deliverables (like blogs, emails, or social posts) in new threads.
Here are some tips for getting the most out of Quotient when planning campaigns:
- You can ask Quotient to help you come up with ideas for campaigns, or if you already have a clear idea for a campaign you can ask it to break it down into actionable tasks.
- Ask Quotient to search the web and perform research, which is helpful for campaigns that have to do with current events or trending topics.
- Every company runs campaigns differently. Some prefer many small campaigns with just a few tasks and deliverables, while others prefer large campaigns with dozens of tasks and deliverables over several months. Tell Quotient about your preferred workflow and ask it to "remember" it in the future.
- If you're not happy with a campaign, tell Quotient what you'd like to change. It will update briefs and add or remove tasks until it looks right. Building campaigns is an iterative process and requires some back and forth.
-- End of: /campaign
-- Start of: /flow
---
title: Automating Workflows
description: Creating automated customer flows with Quotient.
order: 8
---
Campaigns help you organize your marketing efforts around a central theme or goal. A **[campaign](/s/most-recent-business/campaigns)** in Quotient is a coordinated collection of tasks and deliverables that work together toward a common objective. Think of campaigns as the strategic umbrella that organizes your marketing work across different channels and timeframes.
Grouping deliverables into campaigns is not a requirement in Quotient; you can still publish one-off blog posts or email broadcasts. But grouping things into campaigns helps ensure that your marketing has a consistent message, making it more effective.
Here are some examples of campaigns:
1. **New Feature Announcement:** When announcing an important new feature or launching a new product, it's common to write blogs, send email broadcasts, or host webinars promoting the new feature.
2. **Events:** Campaigns are often built around marketing events. For example, if you are hosting a webinar, or if your company is attending an industry conference, you might want to do a lot of marketing around that event, e.g. sending emails to customers before and after the event.
3. **Thought Leadership:** A specific topic, such as a new regulation or technological breakthrough, might be trending in your industry. To capitalize on interest, you might want to publish a series of blogs explaining your company's perspective on it.
## Core Concepts
### Tasks
Campaigns are organized as a series of tasks. Each task represents a specific piece of work that needs to be completed as part of the campaign. Tasks move through a workflow with four statuses:
- **To-do** - Task has been created but work hasn't started yet
- **In progress** - Task is actively being worked on
- **In review** - Task is complete and awaiting review or approval
- **Done** - Task is complete and approved
Tasks can represent many different types of work:
**Deliverable-Linked Tasks** - Work that's connected to creating specific marketing assets in Quotient:
- Writing a blog post
- Designing an email broadcast
- Setting up a marketing event
- Building an automated flow
- Creating a social media post
**Standalone Tasks** - Work that doesn't happen directly in Quotient:
- Shooting a video
- Taking screenshots of a new feature
- Getting legal approval
- Running paid ads
- Coordinating with external vendors
### Deliverables
When a task involves creating a marketing asset that will be distributed to your audience, it can be linked to a **deliverable**. Deliverables are the actual marketing assets created in Quotient:
- **Blog Posts** - Articles published on your website
- **Email Broadcasts** - Emails sent to your audience
- **Marketing Events** - Webinars, conferences, or in-person events
- **Flows** - Automated email sequences
- **Social Posts** - Content for X, LinkedIn, Instagram, Facebook, and TikTok
When you link a task to a deliverable (like "Write Q4 product announcement blog"), the task provides project management structure while the deliverable contains the actual content and publishing details.
### Briefs
Briefs are strategic memos that explain the purpose, message, and audience for a campaign. This information is critical for aligning both humans and Quotient on the strategy of a campaign. Quotient reads the brief for a campaign when creating content to ensure that the content is consistent with the theme and message of the campaign.
### Task Owners
Each task can have an **owner** - the human who's responsible for completing it. When you're the owner of a task, you'll get notifications about its progress as Quotient works on it, and you can track it on your personal task list.
## Planning Campaigns with Quotient
Ask Quotient to help you develop campaigns from inception to execution. It can create the campaign, write the initial brief, break down the work into tasks, and pick the right timeframe. Once you've agreed on the concept, Quotient will work through each task, creating the deliverables (like blogs, emails, or social posts) in new threads.
Here are some tips for getting the most out of Quotient when planning campaigns:
- You can ask Quotient to help you come up with ideas for campaigns, or if you already have a clear idea for a campaign you can ask it to break it down into actionable tasks.
- Ask Quotient to search the web and perform research, which is helpful for campaigns that have to do with current events or trending topics.
- Every company runs campaigns differently. Some prefer many small campaigns with just a few tasks and deliverables, while others prefer large campaigns with dozens of tasks and deliverables over several months. Tell Quotient about your preferred workflow and ask it to "remember" it in the future.
- If you're not happy with a campaign, tell Quotient what you'd like to change. It will update briefs and add or remove tasks until it looks right. Building campaigns is an iterative process and requires some back and forth.
-- End of: /campaign
-- Start of: /flow
---
title: Automating Workflows
description: Creating automated customer flows with Quotient.
order: 8
---
 Quotient allows you to automate common internal and external workflows throughout your marketing stack. You can easily put together automations such as…
- Sending automated sequences of marketing emails based, like a welcome series or account activation
- Sending highly personalized, AI generated emails tailored to each customer's recent activity and firmographics
- Updating a prospect's lead score when they signal high intent to purchase, e.g. by performing specific actions on your site
- Sending automated notifications to your team when a new customer signs up for your product or achieves a certain lead score
Automations like these help you engage with customers with personalized content at the right time, and they can also help automate repetitive work for your team.
## Core Concepts
**Flows**
[Flows](/s/most-recent-business/flows) are automated sequences of actions orchestrated by the Quotient platform. You can create flows using the flow editor or by chatting with Quotient. Every flow starts with a **trigger** and then proceeds through a series of **steps** until it's finished.
Flows can also optionally be scoped to a specific **segment** of people, which you can define dynamically in each flow.
**Trigger**
Triggers are events or schedules that initiate a flow. There are six different trigger types:
1. **Event Trigger:** Activates when a specific user action occurs (email subscribe, page view, add to cart, checkout complete). Responds to customer behavior.
2. **Schedule Trigger:** Runs at defined times and frequencies (daily, weekly, monthly). Used for recurring communications.
3. **Person Update Trigger:** Activates when a specific field in a customer profile changes. Can trigger on any change or only when matching a specific value.
4. **Person Created Trigger:** Activates when a new person record is added to Quotient. Used for initial contact sequences.
5. **Programmatic Trigger:** Activates via the Quotient API or SDK. Provides programmatic control over flow initiation.
6. **Marketing Event Trigger:** Activates when someone's participation status changes in a marketing event (webinar, conference). Tracks status changes like registered, attended, or no-show.
**Steps**
Once the trigger has been activated, the flow proceeds through a series of steps. There are eight different step types:
1. **Send Email:** Sends an email to the customer using a specified template. Can include dynamic variables for personalization.
2. **AI Email:** Uses artificial intelligence to dynamically decide whether to send an email and which template to use based on customer data and behavior.
3. **Delay:** Pauses the flow for a specified duration (minutes, hours, days, weeks, months). Controls timing between actions.
4. **Update Person:** Updates a field in the person's profile. Works with both standard fields and custom properties.
5. **Notify User:** Sends an internal notification to a team member. References users by USER-type fields on the person or company record.
6. **Update Lead Score:** Modifies the person's lead score using increment,
decrement, or set operations.
7. **Send to CRM:** Sends person data to connected CRM systems (Attio, Salesforce, HubSpot). Configurable for different CRM object types.
8. **HTTP Request:** Sends a custom request to any external URL, like a webhook, Zapier, or another tool in your stack. You can personalize the path, query parameters, and request body with customer data, though the destination domain itself must stay fixed.
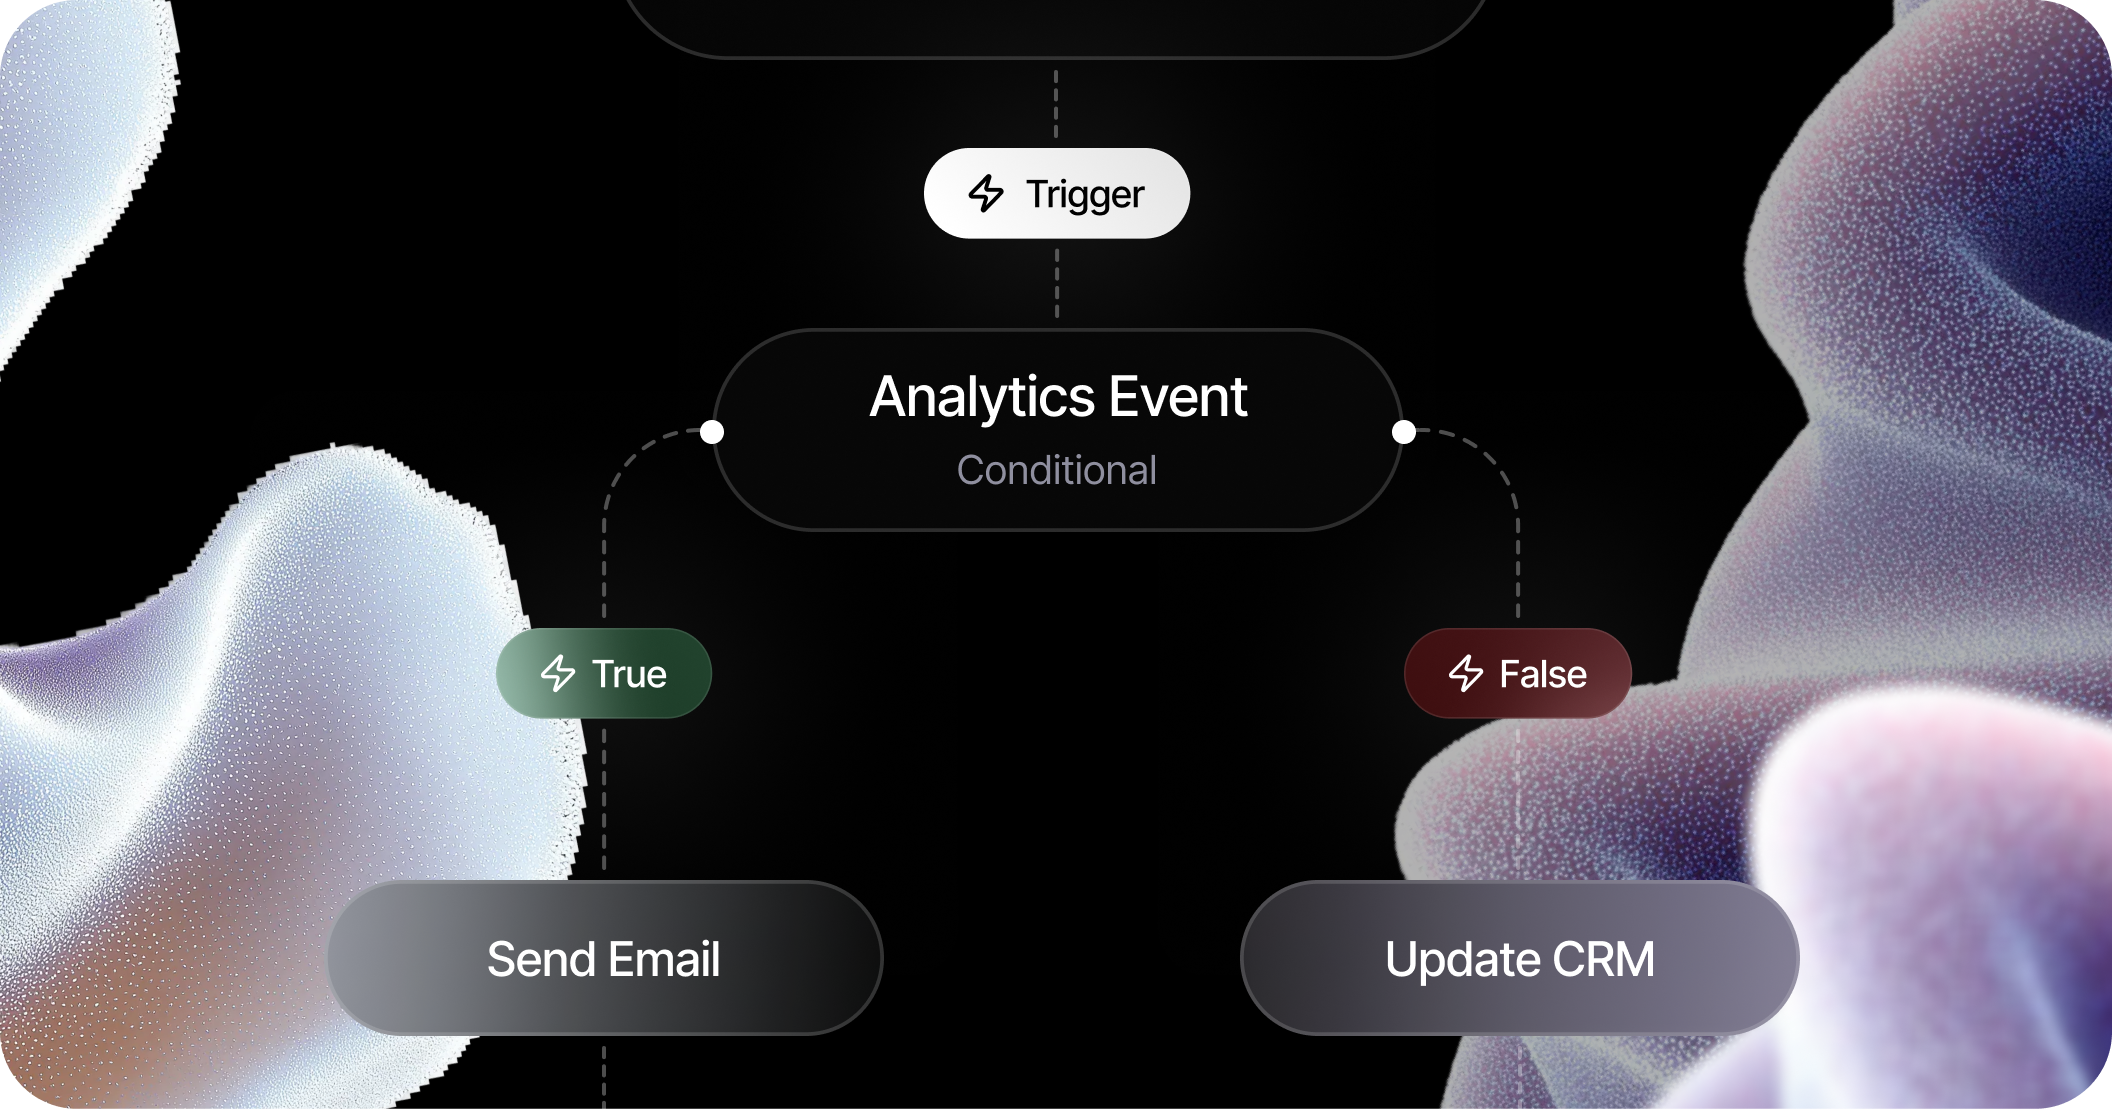
**Conditionals**
Conditional steps create branching paths in your flow based on either profile data or random sampling. They evaluate a statement about a person and route them down one of two paths: the "if true" branch or the "if false" branch.
Conditions can be based on:
- Profile properties (location, preferences)
- Behavioral history (pages viewed, purchases made)
- Email engagement metrics
- Random sampling (for A/B testing)
Conditionals transform flows from linear sequences into adaptive journeys that respond to each person's unique attributes and behaviors, allowing for targeted messaging without creating separate flows for each scenario.
## Building Flows with Quotient
Tell Quotient the business objective of your flow and it will help fill in the details, including creating any email templates or segments needed along the way.
Here are some tips for getting the most out of Quotient when building flows:
1. If there are specific email templates you want to use in your flow, @ mention them so that Quotient knows to use them.
2. If you are using Quotient to automate workflows with your CRM, make sure to explain how your CRM is set up, e.g. any custom fields you use for lead qualification.
## Common Use Cases
Flows are a versatile tool that can support a wide range of marketing automation needs. While most commonly used for customer communication, flows can also streamline internal processes and automate data management across your marketing stack.
Let's walk through a few of the most common use cases for flows.
### Sending Email to Users
The most common use case for flows is sending automated marketing emails to users. Whereas email broadcasts send a single blast email to many people all at once, flows allow for more personalized, timely messaging that reaches customers at specific moments in their buying journey.
These flows typically leverage the **Send Email** step to deliver targeted messages, often combined with **Delay** steps to control timing and **Conditional** steps to create personalized paths based on customer behavior.
Here are some examples:
- **Welcome Series** - Automatically send a sequence of emails to new subscribers introducing your product or service, typically spaced over several days or weeks. Uses **Send Email** and **Delay** steps with an **Event** trigger for new subscribers.
- **Customer Activation** - Guide new users through key features with timely, targeted emails based on their activity (or lack thereof) in your product. Combines **Send Email** steps with **Conditional** logic to check user activity.
- **Customer Winback** - Re-engage inactive customers with personalized offers or content based on their previous purchase history and browsing behavior. Uses **Schedule** triggers with **Conditional** steps to identify inactive users.
### AI Personalized Email
AI Personalized Email steps are an especially powerful feature of flows in Quotient. These steps allow you to use AI to predict the best email to send a user based on their recent behavior - plus the instructions you provide.
This helps improve conversion rates and improve outreach to customers who may not have been addressed by more deterministic, logic-based flows.
An AI Personalized Email step accepts two main parameters:
**Instructions** - A single block of instructions you wish to provide the AI. You can give the AI whatever instructions you like here. For example:
- "Send promotional emails only to users who have opened emails in the last 30 days"
- "Prioritize product recommendations from categories the user has previously purchased"
- "Avoid sending more than 2 emails per week to any user"
**Available Templates** - A list of templates that the AI can choose from. The AI will only choose from a list of pre-approved templates for this particular flow.
Based on these, the AI will choose whether to send a template at all and, if so, which template to send.
It is common to use AI Personalized Email steps in conjunction with schedule triggers. For example you might have a flow that is triggered at 9:00 am every Monday for any users that have not opened an email in the past two weeks. In this flow you could instruct the AI to choose from a set of templates in an effort to re-engage the customer.
### Sending Data to the CRM
CRM integration flows automate the synchronization of customer data between Quotient and your CRM system, ensuring your sales and customer success teams always have access to the most current and relevant information.
These flows typically use the **Send to CRM** step to sync data with systems like Attio, Salesforce, and HubSpot, often combined with **Update Lead Score** and **Update Person** steps to track customer progression.
Here are some examples:
- **Lead Score Updates** - Automatically increment a prospect's lead score when they perform specific high-value actions like downloading resources or visiting pricing pages. Uses **Update Lead Score** steps with **Event** triggers for high-value actions.
- **Deal Stage Progression** \- Move leads through your sales pipeline based on their behavior and engagement with your marketing materials. Uses **Conditional** steps to check engagement levels before **Send to CRM** steps.
### Notifying Your Team
Quotient can also send notifications via email or Slack to your team when certain events happen. This is helpful for getting your team's attention when someone performs an action that your team should know about - e.g. a new signup or a cancellation.
These flows use the **Notify User** step to send internal notifications to team members, often triggered by **Event** or **Person Update** triggers that signal important customer actions.
- **New Account Alerts** - Notify relevant team members when a new customer signs up, including essential information about the customer's profile and initial activity. Uses **Notify User** steps with **Person Created** triggers.
- **Lead Qualification Notifications** - Alert sales representatives when a prospect reaches a specified lead score threshold or performs high-intent actions. Combines **Notify User** steps with **Person Update** triggers monitoring lead score changes.
- **Customer Milestone Notifications** - Keep customer success teams informed when accounts reach important usage milestones or when accounts show signs of churn risk. Uses **Conditional** steps to check milestone criteria before **Notify User** steps.
-- End of: /flow
-- Start of: /index
---
title: Introduction
description: Getting started with Quotient
order: 0
---
Quotient allows you to automate common internal and external workflows throughout your marketing stack. You can easily put together automations such as…
- Sending automated sequences of marketing emails based, like a welcome series or account activation
- Sending highly personalized, AI generated emails tailored to each customer's recent activity and firmographics
- Updating a prospect's lead score when they signal high intent to purchase, e.g. by performing specific actions on your site
- Sending automated notifications to your team when a new customer signs up for your product or achieves a certain lead score
Automations like these help you engage with customers with personalized content at the right time, and they can also help automate repetitive work for your team.
## Core Concepts
**Flows**
[Flows](/s/most-recent-business/flows) are automated sequences of actions orchestrated by the Quotient platform. You can create flows using the flow editor or by chatting with Quotient. Every flow starts with a **trigger** and then proceeds through a series of **steps** until it's finished.
Flows can also optionally be scoped to a specific **segment** of people, which you can define dynamically in each flow.
**Trigger**
Triggers are events or schedules that initiate a flow. There are six different trigger types:
1. **Event Trigger:** Activates when a specific user action occurs (email subscribe, page view, add to cart, checkout complete). Responds to customer behavior.
2. **Schedule Trigger:** Runs at defined times and frequencies (daily, weekly, monthly). Used for recurring communications.
3. **Person Update Trigger:** Activates when a specific field in a customer profile changes. Can trigger on any change or only when matching a specific value.
4. **Person Created Trigger:** Activates when a new person record is added to Quotient. Used for initial contact sequences.
5. **Programmatic Trigger:** Activates via the Quotient API or SDK. Provides programmatic control over flow initiation.
6. **Marketing Event Trigger:** Activates when someone's participation status changes in a marketing event (webinar, conference). Tracks status changes like registered, attended, or no-show.
**Steps**
Once the trigger has been activated, the flow proceeds through a series of steps. There are eight different step types:
1. **Send Email:** Sends an email to the customer using a specified template. Can include dynamic variables for personalization.
2. **AI Email:** Uses artificial intelligence to dynamically decide whether to send an email and which template to use based on customer data and behavior.
3. **Delay:** Pauses the flow for a specified duration (minutes, hours, days, weeks, months). Controls timing between actions.
4. **Update Person:** Updates a field in the person's profile. Works with both standard fields and custom properties.
5. **Notify User:** Sends an internal notification to a team member. References users by USER-type fields on the person or company record.
6. **Update Lead Score:** Modifies the person's lead score using increment,
decrement, or set operations.
7. **Send to CRM:** Sends person data to connected CRM systems (Attio, Salesforce, HubSpot). Configurable for different CRM object types.
8. **HTTP Request:** Sends a custom request to any external URL, like a webhook, Zapier, or another tool in your stack. You can personalize the path, query parameters, and request body with customer data, though the destination domain itself must stay fixed.
**Conditionals**
Conditional steps create branching paths in your flow based on either profile data or random sampling. They evaluate a statement about a person and route them down one of two paths: the "if true" branch or the "if false" branch.
Conditions can be based on:
- Profile properties (location, preferences)
- Behavioral history (pages viewed, purchases made)
- Email engagement metrics
- Random sampling (for A/B testing)
Conditionals transform flows from linear sequences into adaptive journeys that respond to each person's unique attributes and behaviors, allowing for targeted messaging without creating separate flows for each scenario.
## Building Flows with Quotient
Tell Quotient the business objective of your flow and it will help fill in the details, including creating any email templates or segments needed along the way.
Here are some tips for getting the most out of Quotient when building flows:
1. If there are specific email templates you want to use in your flow, @ mention them so that Quotient knows to use them.
2. If you are using Quotient to automate workflows with your CRM, make sure to explain how your CRM is set up, e.g. any custom fields you use for lead qualification.
## Common Use Cases
Flows are a versatile tool that can support a wide range of marketing automation needs. While most commonly used for customer communication, flows can also streamline internal processes and automate data management across your marketing stack.
Let's walk through a few of the most common use cases for flows.
### Sending Email to Users
The most common use case for flows is sending automated marketing emails to users. Whereas email broadcasts send a single blast email to many people all at once, flows allow for more personalized, timely messaging that reaches customers at specific moments in their buying journey.
These flows typically leverage the **Send Email** step to deliver targeted messages, often combined with **Delay** steps to control timing and **Conditional** steps to create personalized paths based on customer behavior.
Here are some examples:
- **Welcome Series** - Automatically send a sequence of emails to new subscribers introducing your product or service, typically spaced over several days or weeks. Uses **Send Email** and **Delay** steps with an **Event** trigger for new subscribers.
- **Customer Activation** - Guide new users through key features with timely, targeted emails based on their activity (or lack thereof) in your product. Combines **Send Email** steps with **Conditional** logic to check user activity.
- **Customer Winback** - Re-engage inactive customers with personalized offers or content based on their previous purchase history and browsing behavior. Uses **Schedule** triggers with **Conditional** steps to identify inactive users.
### AI Personalized Email
AI Personalized Email steps are an especially powerful feature of flows in Quotient. These steps allow you to use AI to predict the best email to send a user based on their recent behavior - plus the instructions you provide.
This helps improve conversion rates and improve outreach to customers who may not have been addressed by more deterministic, logic-based flows.
An AI Personalized Email step accepts two main parameters:
**Instructions** - A single block of instructions you wish to provide the AI. You can give the AI whatever instructions you like here. For example:
- "Send promotional emails only to users who have opened emails in the last 30 days"
- "Prioritize product recommendations from categories the user has previously purchased"
- "Avoid sending more than 2 emails per week to any user"
**Available Templates** - A list of templates that the AI can choose from. The AI will only choose from a list of pre-approved templates for this particular flow.
Based on these, the AI will choose whether to send a template at all and, if so, which template to send.
It is common to use AI Personalized Email steps in conjunction with schedule triggers. For example you might have a flow that is triggered at 9:00 am every Monday for any users that have not opened an email in the past two weeks. In this flow you could instruct the AI to choose from a set of templates in an effort to re-engage the customer.
### Sending Data to the CRM
CRM integration flows automate the synchronization of customer data between Quotient and your CRM system, ensuring your sales and customer success teams always have access to the most current and relevant information.
These flows typically use the **Send to CRM** step to sync data with systems like Attio, Salesforce, and HubSpot, often combined with **Update Lead Score** and **Update Person** steps to track customer progression.
Here are some examples:
- **Lead Score Updates** - Automatically increment a prospect's lead score when they perform specific high-value actions like downloading resources or visiting pricing pages. Uses **Update Lead Score** steps with **Event** triggers for high-value actions.
- **Deal Stage Progression** \- Move leads through your sales pipeline based on their behavior and engagement with your marketing materials. Uses **Conditional** steps to check engagement levels before **Send to CRM** steps.
### Notifying Your Team
Quotient can also send notifications via email or Slack to your team when certain events happen. This is helpful for getting your team's attention when someone performs an action that your team should know about - e.g. a new signup or a cancellation.
These flows use the **Notify User** step to send internal notifications to team members, often triggered by **Event** or **Person Update** triggers that signal important customer actions.
- **New Account Alerts** - Notify relevant team members when a new customer signs up, including essential information about the customer's profile and initial activity. Uses **Notify User** steps with **Person Created** triggers.
- **Lead Qualification Notifications** - Alert sales representatives when a prospect reaches a specified lead score threshold or performs high-intent actions. Combines **Notify User** steps with **Person Update** triggers monitoring lead score changes.
- **Customer Milestone Notifications** - Keep customer success teams informed when accounts reach important usage milestones or when accounts show signs of churn risk. Uses **Conditional** steps to check milestone criteria before **Notify User** steps.
-- End of: /flow
-- Start of: /index
---
title: Introduction
description: Getting started with Quotient
order: 0
---
 ## What is Quotient?
Quotient is an **AI demand marketing platform.** "Demand marketing refers to all the activities that attract customers to your business, such as…
- Writing online content like blogs or social media posts
- Sending emails to customers or prospects
- Hosting in-person or online events like webinars and trade shows
- Building an authoritative brand that customers recognize and trust
With Quotient, you can do all of this from a single integrated platform \- write blogs and emails, plan campaigns and events, and manage your brand information, all powered by AI.
## Working with Quotient
You can chat with Quotient to get things done, just like you would with a coworker. If you've used products like ChatGPT or Claude, the experience will feel familiar. Simply tell Quotient what you want, and it takes care of the rest.
Quotient understands your brand and learns your business's preferences and workflows over time through [memory](/docs/memory). You can ask it to do virtually any marketing task on the platform, from writing blog posts and composing emails to planning campaigns, building customer segments, and creating automated workflows.
## Quotient's Interface
Quotient's interface has two main parts:
1. The **app panel** \- a traditional graphical user interface where you can manage campaigns, write blogs, compose emails, etc.
2. The **chat panel** \- a conversational interface on the right side of the app panel where you can chat with Quotient.
As a general rule, everything that you can do in the app panel you can _also_ do by asking Quotient in the chat panel, and vice versa.
When you chat with Quotient, it understands what page you're on in the app panel and can "see" what you're looking at. This makes it easy to collaborate side by side, much like you would with a human coworker.
## Next Up
## What is Quotient?
Quotient is an **AI demand marketing platform.** "Demand marketing refers to all the activities that attract customers to your business, such as…
- Writing online content like blogs or social media posts
- Sending emails to customers or prospects
- Hosting in-person or online events like webinars and trade shows
- Building an authoritative brand that customers recognize and trust
With Quotient, you can do all of this from a single integrated platform \- write blogs and emails, plan campaigns and events, and manage your brand information, all powered by AI.
## Working with Quotient
You can chat with Quotient to get things done, just like you would with a coworker. If you've used products like ChatGPT or Claude, the experience will feel familiar. Simply tell Quotient what you want, and it takes care of the rest.
Quotient understands your brand and learns your business's preferences and workflows over time through [memory](/docs/memory). You can ask it to do virtually any marketing task on the platform, from writing blog posts and composing emails to planning campaigns, building customer segments, and creating automated workflows.
## Quotient's Interface
Quotient's interface has two main parts:
1. The **app panel** \- a traditional graphical user interface where you can manage campaigns, write blogs, compose emails, etc.
2. The **chat panel** \- a conversational interface on the right side of the app panel where you can chat with Quotient.
As a general rule, everything that you can do in the app panel you can _also_ do by asking Quotient in the chat panel, and vice versa.
When you chat with Quotient, it understands what page you're on in the app panel and can "see" what you're looking at. This makes it easy to collaborate side by side, much like you would with a human coworker.
## Next Up
 To do great marketing, Quotient needs context about your business — the same kind of context you'd give a new hire before they could do useful work. **[Memory](/s/most-recent-business/memory)** is where that context lives.
Memory is a collection of documents that Quotient draws on whenever it writes content, proposes campaigns, or gives strategic advice. The more you teach Quotient about your business, the more relevant and on-brand its output becomes.
This isn't so different from a human marketing agency. To do good work, an agency spends time learning your brand, your customers, and how you like to operate. The same goes for Quotient — except instead of onboarding calls and brand decks, the knowledge lives in memory, and Quotient can draw on all of it instantly.
## What Goes in Memory
Memory is broader than just brand information. It captures anything that helps Quotient do better marketing for your business. Most memories fall into three categories.
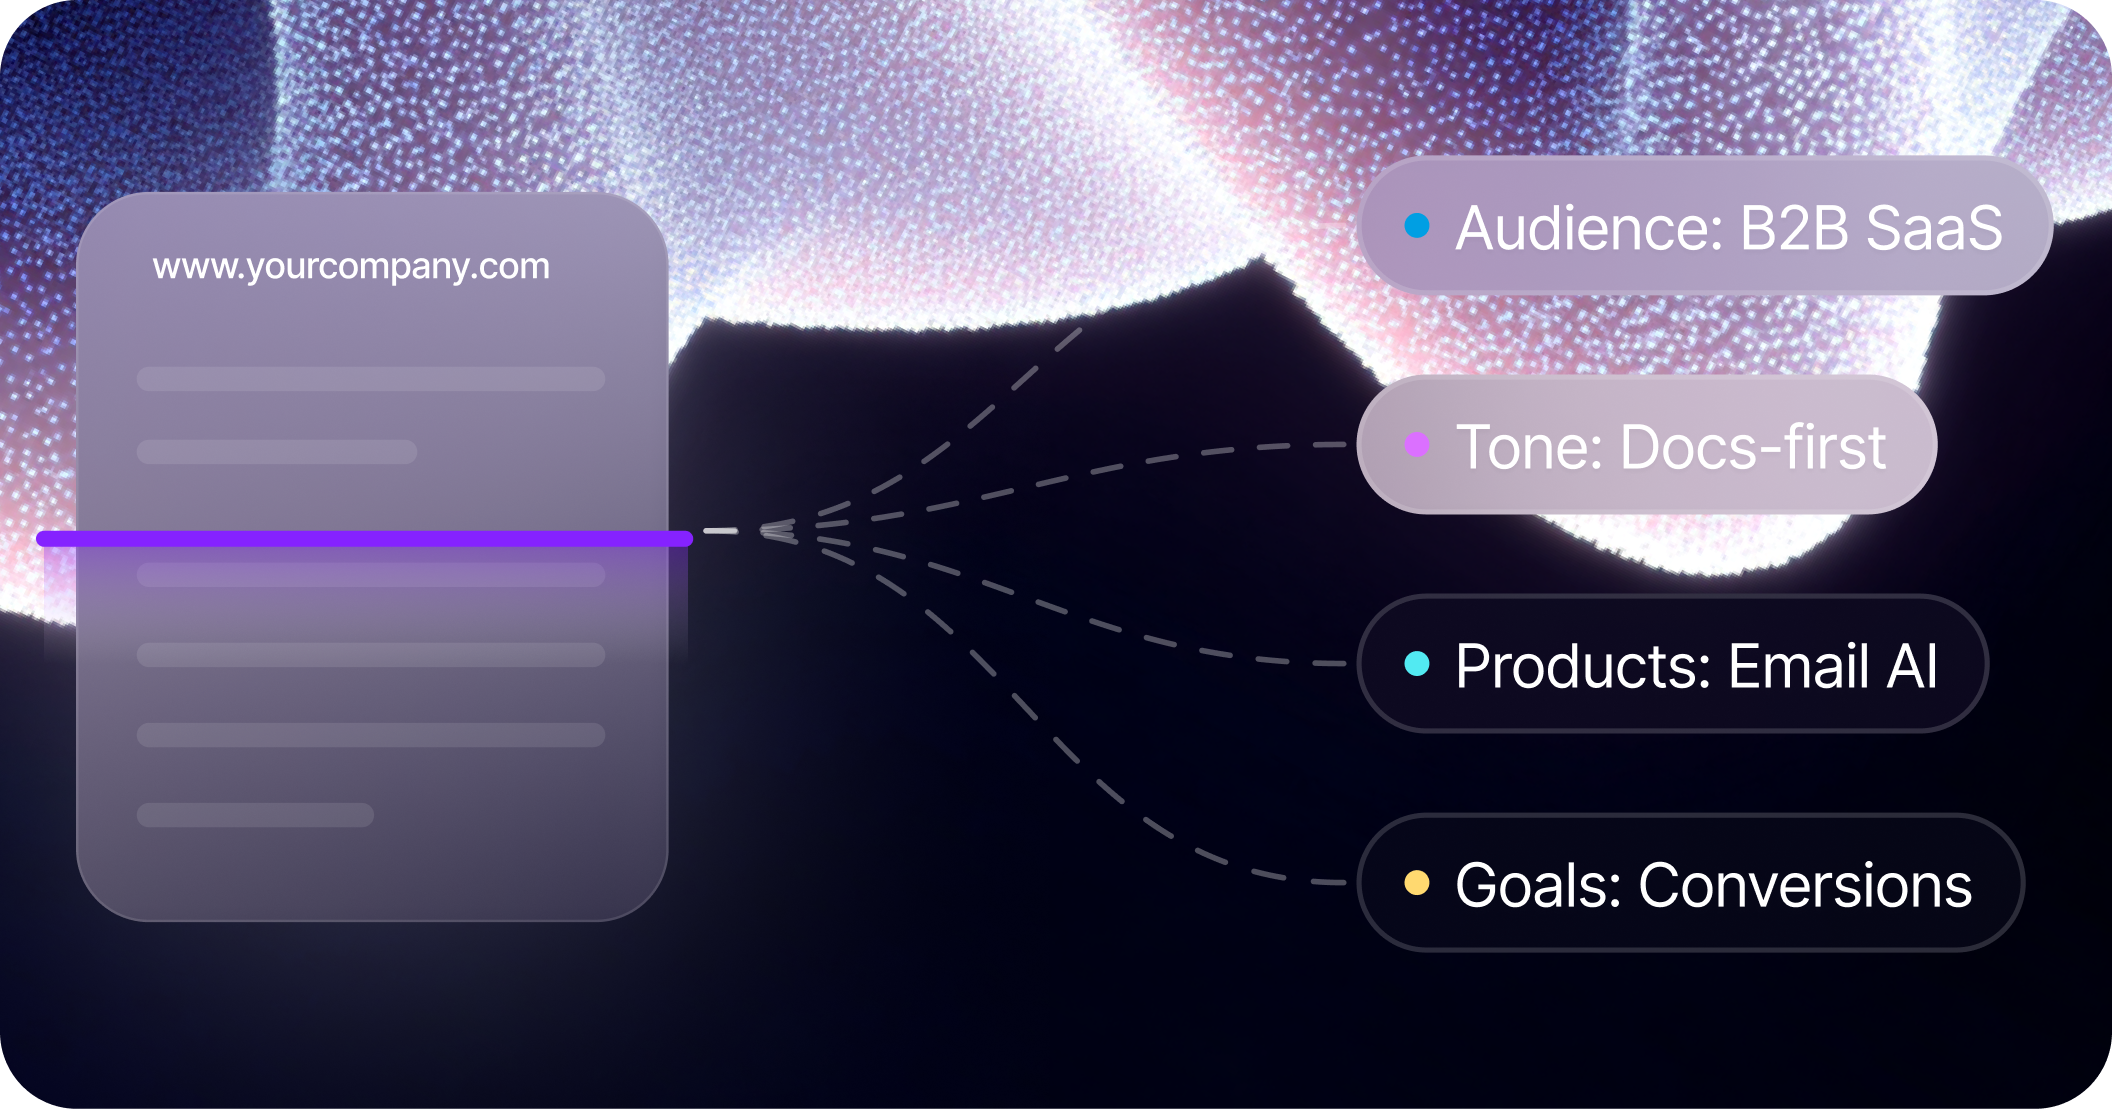
**Brand fundamentals.** Who you are, what you sell, who you sell to, and how you talk about it. Think product overviews, ideal customer profiles, competitive positioning, and brand voice guidelines. This is typically the first thing you'll build when you get started with Quotient.
**Workflows and playbooks.** How your team actually gets marketing done. If you have a specific process for running product launches, publishing a weekly changelog, or planning quarterly campaigns, you can capture that in a memory document. When you later ask Quotient to kick off a product launch, it already knows what deliverables to produce, what the campaign structure should look like, and which channels to use — because your playbook told it so.
**Preferences.** Individual or team-level preferences about how work should be done. For example, you might create a memory that describes how a specific team member likes to write social media posts — their preferred tone, length, and formatting. Quotient is often smart enough to create these on your behalf. If you say something like "going forward, I want my blog posts to always include a summary at the top," Quotient will save that as a memory automatically.
## Common Memory Documents
Here are examples of documents that most businesses should have:
- **Ideal Customer Profile (ICP):** Your target customers — demographics, pain points, decision-making process, and what drives them to your solution. Helps Quotient create more targeted content.
- **Competitors and Battle Cards:** Profiles of your main competitors — positioning, pricing, strengths, weaknesses, and key differentiators. Enables Quotient to highlight your unique advantages.
- **Product Overview:** Core functionality, key features, integrations, and what makes your product different. Ensures Quotient accurately represents your capabilities.
- **Value Proposition:** Your main benefits and supporting pillars — the core reasons customers choose you. Gives Quotient consistent messaging frameworks.
- **Brand Voice and Style Guide:** Your brand personality, tone, writing preferences, and communication style, with examples of on-brand vs. off-brand copy.
- **Customer Success Stories:** Case studies, testimonials, and key metrics. Gives Quotient concrete proof points to draw on.
- **Messaging Framework:** Tested headlines, taglines, content themes, and words or phrases to avoid.
- **Campaign Playbooks:** Step-by-step workflows for recurring campaigns — a product launch playbook, a webinar planning checklist, or a process for assembling weekly newsletters. These help Quotient follow your team's established process rather than improvising from scratch.
## Pinned Memories
Not all memories are surfaced to Quotient at all times.
When you ask Quotient to do something, the system identifies
which memories are most relevant to the task at hand and
pulls them in automatically. This keeps the agent focused
and avoids overwhelming it with context that isn't useful for
the current job.
**Pinned memories** override this behavior.
When you pin a memory, it is always visible to Quotient — regardless of the task.
This is useful for foundational context that the agent needs in every
interaction, not just specific ones.
Good candidates for pinning:
- **Brand Voice and Style Guide** — so every piece of content stays on-brand
- **Value Proposition** — so Quotient always knows how to position your product
- **Key Preferences** — company-wide rules like "never use the word 'synergy'"
or "always link to the pricing page in bottom-of-funnel content"
You can pin or unpin a memory at any time from the memory detail page.
Pinned memories are marked with a pin icon in the memory list so you can
see at a glance which ones are always active.
Pin sparingly — if everything is pinned, the benefit is lost.
Memories that are only relevant to specific channels or tasks
(like an email-specific style guide or a single campaign playbook)
are better left unpinned. Quotient's relevance system will still
surface them when they're needed. Reserve pinning for the handful
of documents that truly represent your business fundamentals.
## Tags
Tags help you organize memories by area or by author,
so that Quotient can more easily identify which memories are relevant to each task.
There are two types of tags: **platform tags** and **user tags**.
### Platform Tags
Platform tags correspond to a platform area or topic. They help Quotient understand which memories apply to which kind of work. When Quotient is working on a task tied to a specific area, it will prioritize memories with matching tags — so the right guidelines show up at the right time without you having to think about it.
The available platform tags are:
| Tag | Use it for |
|---|---|
| **email** | Email campaign preferences — subject line style, send cadence, CTA placement |
| **blog** | Blog writing guidelines — structure, length, formatting conventions |
| **social** | Social media preferences — tone, hashtags, platform-specific conventions |
| **tone** | General voice and tone guidelines that apply across channels |
| **audience** | Target audience definitions and segmentation context |
| **brand** | Core brand identity — positioning, messaging, visual guidelines |
| **competitors** | Competitive intelligence — battle cards, positioning against alternatives |
| **products** | Product details — features, use cases, pricing context |
**Example:** You create a memory called "Email Best Practices" that describes your
preferred subject line style, send cadence, and CTA placement.
You tag it with **email**. Now, whenever Quotient drafts an email
campaign, this memory is automatically prioritized — but it won't
clutter the context when Quotient is writing a blog post.
### User Tags
User tags correspond to a specific user or author in Quotient.
These are useful when different team members have different
preferences or responsibilities.
**Example:** Your teammate Sarah prefers a conversational,
first-person tone in her blog posts, while your teammate
James writes in a more formal, third-person style. You create
separate "Writing Preferences" memories for each and tag them
with **Sarah** and **James** respectively. When Sarah asks
Quotient to draft a post, her preferences are applied
automatically — and the same for James.
### Combining Tags
You can apply multiple tags to a single memory.
By combining platform and user tags, you can
build a memory system that gives Quotient the right
context for the right person on the right channel — without
anyone having to specify it at task time.
For example, a memory tagged with both **Sarah** and **social** would
contain Sarah's specific preferences for social posts, and
would be surfaced when Sarah asks Quotient to draft something
for LinkedIn — but not when James does, and not when Sarah
asks for help with an email.
## Building Your Memory
Building memory is not a one-time activity — it evolves alongside your business.
As your product, positioning, and strategy change, your memory should too.
Here are the most common ways to get started:
1. **Ask Quotient to interview you.** This is often the best starting point.
Ask Quotient to conduct an interview about your brand, and it will ask
the right questions to help you articulate your ICP, value proposition,
competitive positioning, and more. It's a great way to get knowledge
that's locked in your head down on paper.
2. **Share your website.** Tell Quotient which URLs to look at, and it will
visit your site, read about your product and company, and use what it
finds to bootstrap your memory. (Note that Quotient can only access public URLs.)
3. **Upload documents.** If you have PDFs, Word documents, or slide decks
about your brand, upload them to chat and ask Quotient to synthesize
them into memory documents. Copy and paste works too.
4. **Ask Quotient to research.** Tell Quotient to search the web on your behalf.
A common use case is researching competitors and building battle cards
that assess your strengths and weaknesses relative to each one.
5. **Connect external tools.** Useful context often lives in other systems —
product briefs in Notion, feature specs in Linear, messaging docs in Google Drive.
You can use [MCP connections](/docs/mcp/connecting-tools) to give Quotient access
to these tools, making it easy to pull relevant context into memory.
Think of memory as a living wiki for your business — the single source of
truth for everything Quotient needs to know to do great work.
-- End of: /memory
-- Start of: /navigating
---
title: Navigating Quotient
description: How to get around the platform
order: 2
---
To do great marketing, Quotient needs context about your business — the same kind of context you'd give a new hire before they could do useful work. **[Memory](/s/most-recent-business/memory)** is where that context lives.
Memory is a collection of documents that Quotient draws on whenever it writes content, proposes campaigns, or gives strategic advice. The more you teach Quotient about your business, the more relevant and on-brand its output becomes.
This isn't so different from a human marketing agency. To do good work, an agency spends time learning your brand, your customers, and how you like to operate. The same goes for Quotient — except instead of onboarding calls and brand decks, the knowledge lives in memory, and Quotient can draw on all of it instantly.
## What Goes in Memory
Memory is broader than just brand information. It captures anything that helps Quotient do better marketing for your business. Most memories fall into three categories.
**Brand fundamentals.** Who you are, what you sell, who you sell to, and how you talk about it. Think product overviews, ideal customer profiles, competitive positioning, and brand voice guidelines. This is typically the first thing you'll build when you get started with Quotient.
**Workflows and playbooks.** How your team actually gets marketing done. If you have a specific process for running product launches, publishing a weekly changelog, or planning quarterly campaigns, you can capture that in a memory document. When you later ask Quotient to kick off a product launch, it already knows what deliverables to produce, what the campaign structure should look like, and which channels to use — because your playbook told it so.
**Preferences.** Individual or team-level preferences about how work should be done. For example, you might create a memory that describes how a specific team member likes to write social media posts — their preferred tone, length, and formatting. Quotient is often smart enough to create these on your behalf. If you say something like "going forward, I want my blog posts to always include a summary at the top," Quotient will save that as a memory automatically.
## Common Memory Documents
Here are examples of documents that most businesses should have:
- **Ideal Customer Profile (ICP):** Your target customers — demographics, pain points, decision-making process, and what drives them to your solution. Helps Quotient create more targeted content.
- **Competitors and Battle Cards:** Profiles of your main competitors — positioning, pricing, strengths, weaknesses, and key differentiators. Enables Quotient to highlight your unique advantages.
- **Product Overview:** Core functionality, key features, integrations, and what makes your product different. Ensures Quotient accurately represents your capabilities.
- **Value Proposition:** Your main benefits and supporting pillars — the core reasons customers choose you. Gives Quotient consistent messaging frameworks.
- **Brand Voice and Style Guide:** Your brand personality, tone, writing preferences, and communication style, with examples of on-brand vs. off-brand copy.
- **Customer Success Stories:** Case studies, testimonials, and key metrics. Gives Quotient concrete proof points to draw on.
- **Messaging Framework:** Tested headlines, taglines, content themes, and words or phrases to avoid.
- **Campaign Playbooks:** Step-by-step workflows for recurring campaigns — a product launch playbook, a webinar planning checklist, or a process for assembling weekly newsletters. These help Quotient follow your team's established process rather than improvising from scratch.
## Pinned Memories
Not all memories are surfaced to Quotient at all times.
When you ask Quotient to do something, the system identifies
which memories are most relevant to the task at hand and
pulls them in automatically. This keeps the agent focused
and avoids overwhelming it with context that isn't useful for
the current job.
**Pinned memories** override this behavior.
When you pin a memory, it is always visible to Quotient — regardless of the task.
This is useful for foundational context that the agent needs in every
interaction, not just specific ones.
Good candidates for pinning:
- **Brand Voice and Style Guide** — so every piece of content stays on-brand
- **Value Proposition** — so Quotient always knows how to position your product
- **Key Preferences** — company-wide rules like "never use the word 'synergy'"
or "always link to the pricing page in bottom-of-funnel content"
You can pin or unpin a memory at any time from the memory detail page.
Pinned memories are marked with a pin icon in the memory list so you can
see at a glance which ones are always active.
Pin sparingly — if everything is pinned, the benefit is lost.
Memories that are only relevant to specific channels or tasks
(like an email-specific style guide or a single campaign playbook)
are better left unpinned. Quotient's relevance system will still
surface them when they're needed. Reserve pinning for the handful
of documents that truly represent your business fundamentals.
## Tags
Tags help you organize memories by area or by author,
so that Quotient can more easily identify which memories are relevant to each task.
There are two types of tags: **platform tags** and **user tags**.
### Platform Tags
Platform tags correspond to a platform area or topic. They help Quotient understand which memories apply to which kind of work. When Quotient is working on a task tied to a specific area, it will prioritize memories with matching tags — so the right guidelines show up at the right time without you having to think about it.
The available platform tags are:
| Tag | Use it for |
|---|---|
| **email** | Email campaign preferences — subject line style, send cadence, CTA placement |
| **blog** | Blog writing guidelines — structure, length, formatting conventions |
| **social** | Social media preferences — tone, hashtags, platform-specific conventions |
| **tone** | General voice and tone guidelines that apply across channels |
| **audience** | Target audience definitions and segmentation context |
| **brand** | Core brand identity — positioning, messaging, visual guidelines |
| **competitors** | Competitive intelligence — battle cards, positioning against alternatives |
| **products** | Product details — features, use cases, pricing context |
**Example:** You create a memory called "Email Best Practices" that describes your
preferred subject line style, send cadence, and CTA placement.
You tag it with **email**. Now, whenever Quotient drafts an email
campaign, this memory is automatically prioritized — but it won't
clutter the context when Quotient is writing a blog post.
### User Tags
User tags correspond to a specific user or author in Quotient.
These are useful when different team members have different
preferences or responsibilities.
**Example:** Your teammate Sarah prefers a conversational,
first-person tone in her blog posts, while your teammate
James writes in a more formal, third-person style. You create
separate "Writing Preferences" memories for each and tag them
with **Sarah** and **James** respectively. When Sarah asks
Quotient to draft a post, her preferences are applied
automatically — and the same for James.
### Combining Tags
You can apply multiple tags to a single memory.
By combining platform and user tags, you can
build a memory system that gives Quotient the right
context for the right person on the right channel — without
anyone having to specify it at task time.
For example, a memory tagged with both **Sarah** and **social** would
contain Sarah's specific preferences for social posts, and
would be surfaced when Sarah asks Quotient to draft something
for LinkedIn — but not when James does, and not when Sarah
asks for help with an email.
## Building Your Memory
Building memory is not a one-time activity — it evolves alongside your business.
As your product, positioning, and strategy change, your memory should too.
Here are the most common ways to get started:
1. **Ask Quotient to interview you.** This is often the best starting point.
Ask Quotient to conduct an interview about your brand, and it will ask
the right questions to help you articulate your ICP, value proposition,
competitive positioning, and more. It's a great way to get knowledge
that's locked in your head down on paper.
2. **Share your website.** Tell Quotient which URLs to look at, and it will
visit your site, read about your product and company, and use what it
finds to bootstrap your memory. (Note that Quotient can only access public URLs.)
3. **Upload documents.** If you have PDFs, Word documents, or slide decks
about your brand, upload them to chat and ask Quotient to synthesize
them into memory documents. Copy and paste works too.
4. **Ask Quotient to research.** Tell Quotient to search the web on your behalf.
A common use case is researching competitors and building battle cards
that assess your strengths and weaknesses relative to each one.
5. **Connect external tools.** Useful context often lives in other systems —
product briefs in Notion, feature specs in Linear, messaging docs in Google Drive.
You can use [MCP connections](/docs/mcp/connecting-tools) to give Quotient access
to these tools, making it easy to pull relevant context into memory.
Think of memory as a living wiki for your business — the single source of
truth for everything Quotient needs to know to do great work.
-- End of: /memory
-- Start of: /navigating
---
title: Navigating Quotient
description: How to get around the platform
order: 2
---
 Quotient keeps two things side by side: your work, and a conversation about it.
There's a fair amount on screen, so here are the shortcuts and small tricks that
make moving between them feel quick instead of busy.
## The Command Menu (⌘ + K)
The fastest way to get anywhere in Quotient is the command menu. Press `⌘ + K`
(or `Ctrl + K` on Windows and Linux) from anywhere, then start typing.
Quotient keeps two things side by side: your work, and a conversation about it.
There's a fair amount on screen, so here are the shortcuts and small tricks that
make moving between them feel quick instead of busy.
## The Command Menu (⌘ + K)
The fastest way to get anywhere in Quotient is the command menu. Press `⌘ + K`
(or `Ctrl + K` on Windows and Linux) from anywhere, then start typing.
 Quotient's Slack integration lets you receive notifications and interact with
Quotient directly from your Slack workspace. There are two main capabilities:
1. **Notifications** — Receive updates about your marketing activities directly
in Slack
2. **Talking to Quotient** — Chat with Quotient without leaving
Slack
## Getting Started
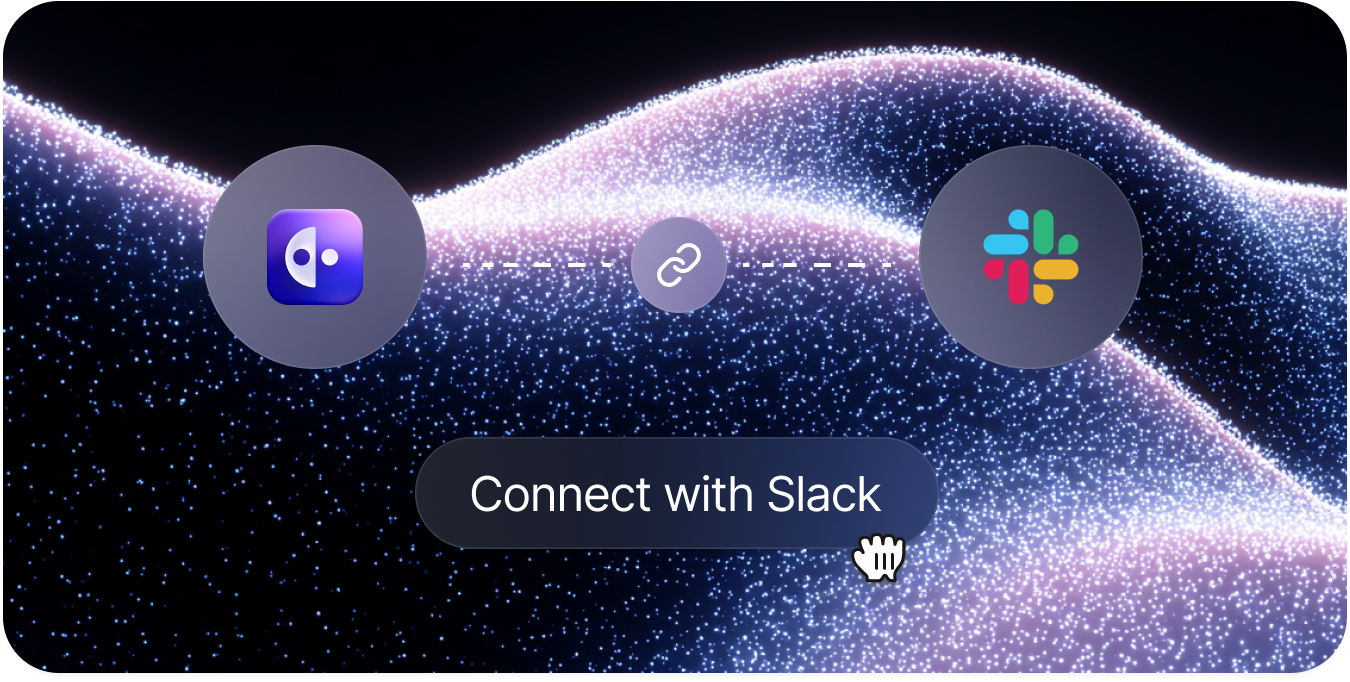
To enable the Slack integration, navigate to **[Integrations > Slack](/s/most-recent-business/integrations)** in
Quotient and click **Connect to Slack**. You'll be prompted to authorize
Quotient to access your Slack workspace. Once connected, you can start receiving
notifications and chatting with Quotient immediately.
## Notifications
Quotient can send you notifications about important events—like when it
completes a task or needs your input—directly to Slack. These notifications
arrive as direct messages from the Quotient bot, keeping your channels
clutter-free while ensuring you never miss an important update.
### Configuring Notification Preferences
You can customize which notifications you receive in Slack from your
notification preferences. Navigate to **[Settings > Notifications](/s/most-recent-business/preferences?tab=notifications)** to control
exactly what types of updates Quotient sends you.
For each notification type, you can choose:
- **Immediate** — Receive the notification in Slack right away
- **None** — Don't send this notification type to Slack (you may still receive
it via email)
## Talking to Quotient in Slack
You can interact with Quotient directly from any Slack channel or
direct message—just mention **@Quotient** and start chatting.
### How It Works
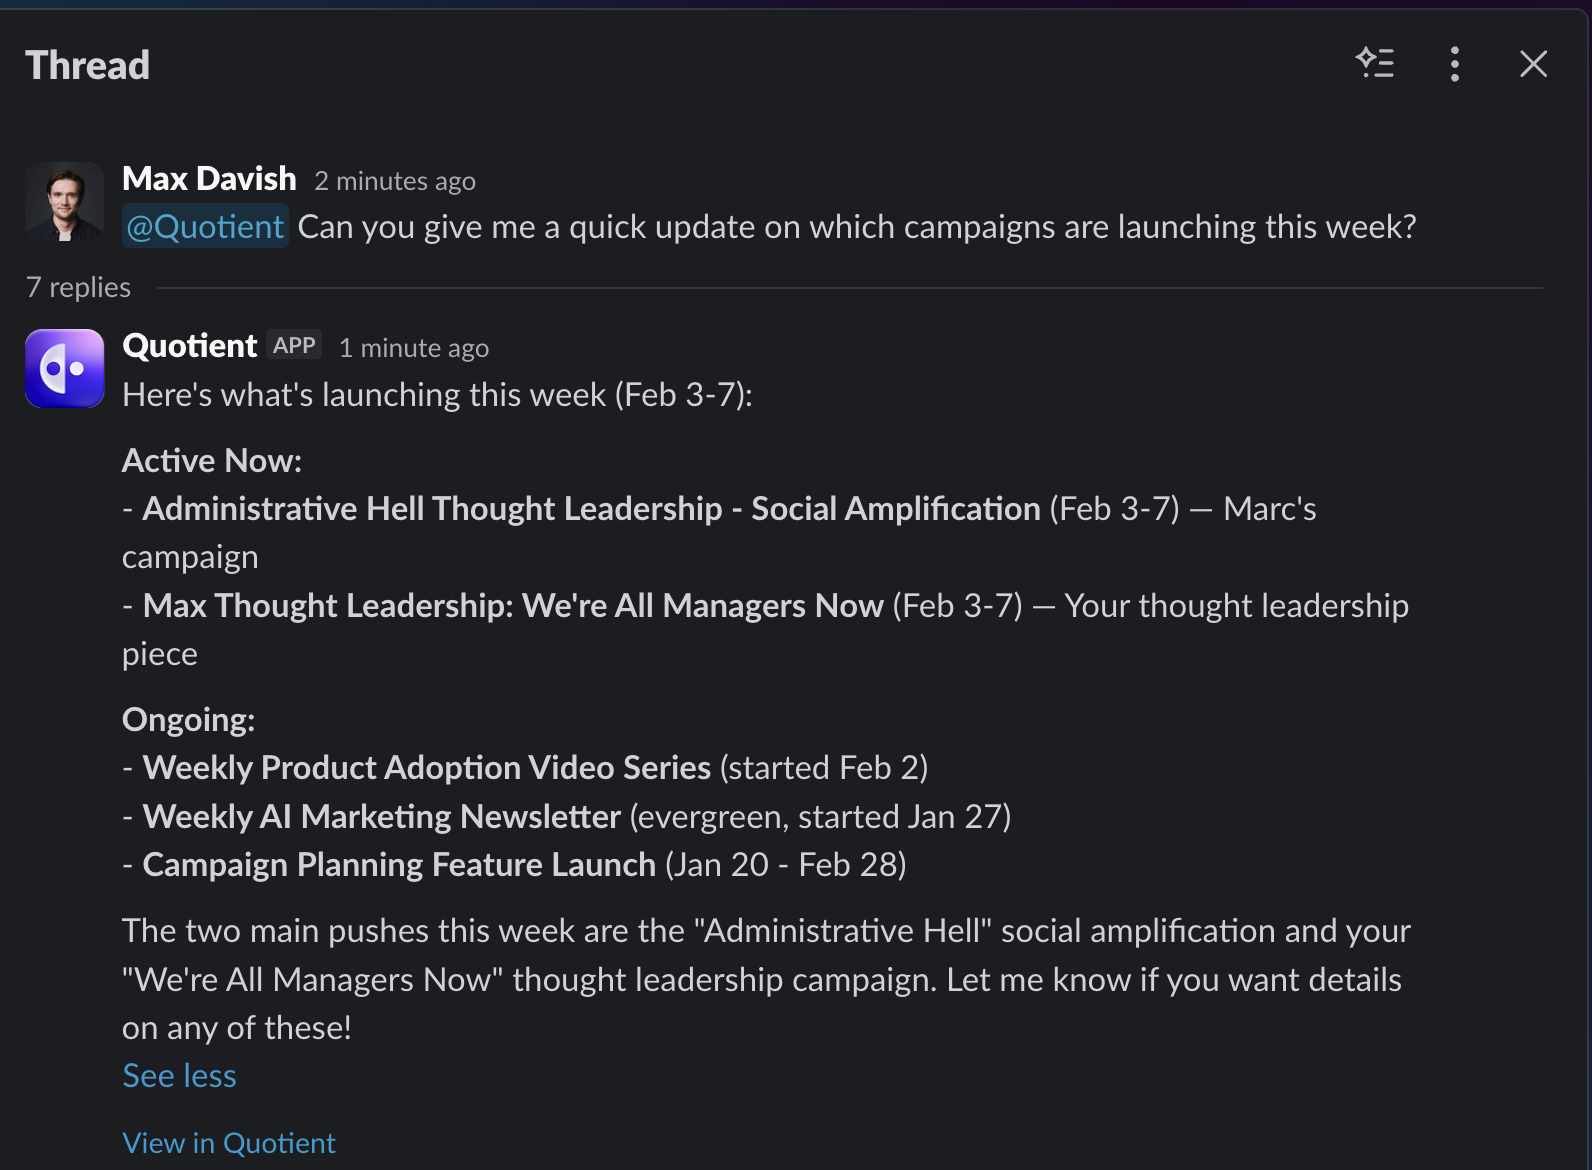
When you mention @Quotient in Slack, here's what happens:
1. **Quotient processes your request** — Your message is sent to Quotient, which
works on your request
2. **A thread is created in Quotient** — The conversation becomes a thread in
Quotient that you can view anytime
3. **You get a response in Slack** — Once processing is complete, Quotient
replies in the same Slack thread with a summary of what was accomplished
The entire conversation—including all the work Quotient did—is visible in
the Quotient app. Just click the "View in Quotient" link in the response to see the full
thread.
### Using Conversation Context
When you mention @Quotient mid-thread, it can see the full conversation history
leading up to your message. This means you can discuss ideas with colleagues
first, then bring Quotient in to execute.
For example:
Quotient's Slack integration lets you receive notifications and interact with
Quotient directly from your Slack workspace. There are two main capabilities:
1. **Notifications** — Receive updates about your marketing activities directly
in Slack
2. **Talking to Quotient** — Chat with Quotient without leaving
Slack
## Getting Started
To enable the Slack integration, navigate to **[Integrations > Slack](/s/most-recent-business/integrations)** in
Quotient and click **Connect to Slack**. You'll be prompted to authorize
Quotient to access your Slack workspace. Once connected, you can start receiving
notifications and chatting with Quotient immediately.
## Notifications
Quotient can send you notifications about important events—like when it
completes a task or needs your input—directly to Slack. These notifications
arrive as direct messages from the Quotient bot, keeping your channels
clutter-free while ensuring you never miss an important update.
### Configuring Notification Preferences
You can customize which notifications you receive in Slack from your
notification preferences. Navigate to **[Settings > Notifications](/s/most-recent-business/preferences?tab=notifications)** to control
exactly what types of updates Quotient sends you.
For each notification type, you can choose:
- **Immediate** — Receive the notification in Slack right away
- **None** — Don't send this notification type to Slack (you may still receive
it via email)
## Talking to Quotient in Slack
You can interact with Quotient directly from any Slack channel or
direct message—just mention **@Quotient** and start chatting.
### How It Works
When you mention @Quotient in Slack, here's what happens:
1. **Quotient processes your request** — Your message is sent to Quotient, which
works on your request
2. **A thread is created in Quotient** — The conversation becomes a thread in
Quotient that you can view anytime
3. **You get a response in Slack** — Once processing is complete, Quotient
replies in the same Slack thread with a summary of what was accomplished
The entire conversation—including all the work Quotient did—is visible in
the Quotient app. Just click the "View in Quotient" link in the response to see the full
thread.

### Using Conversation Context
When you mention @Quotient mid-thread, it can see the full conversation history
leading up to your message. This means you can discuss ideas with colleagues
first, then bring Quotient in to execute.
For example:
Marc
I have an idea for a new campaign. We should target our enterprise customers with content about our new analytics features.
Alex
Love it. Let's do a blog post and some LinkedIn posts from our company page.
Marc
Perfect.{" "} @Quotient{" "} make it happen!
Quotient{" "}
APP
Done! I've created a campaign called "Enterprise Analytics Launch" with:
- Blog post: "5 Ways Advanced Analytics Transforms Enterprise Marketing"
- LinkedIn post from Company page
- LinkedIn post from Marc's profile
 You can chat with Quotient in plain English, just like you would with a coworker. Tell it what you want, and it will help you get it done. If you've used products like ChatGPT or Claude, the experience will feel familiar.
However, working with AI is different from working with a human in a few key ways. The most important concept to understand is **context.**
## Context and Tools
"Context" refers to the information that is available to Quotient. Unlike humans, Quotient starts each conversation fresh - it doesn't remember what you told it yesterday. It has to be explicitly provided with the information it needs to do its job.
This means you should be explicit about what you want and provide all necessary context in each conversation. Knowing what context Quotient has and doesn't have will help you interact with it more effectively.
When you talk to Quotient, its context will automatically include…
- Information about your brand stored in the Knowledge Store
- The conversation history within that chat thread
- An understanding of the Quotient platform itself
- Specialized knowledge relevant to the task at hand (e.g. when writing a blog, Quotient draws on expertise in SEO-optimized content)
However, Quotient's context does _not_ include...
- Knowledge of current events, like today's front page news or what's currently trending in your industry
- Any information about your brand or business that is not reflected in the Knowledge Store
- Memory of past interactions with you (if you tell Quotient about a new product feature in one conversation, it won't remember that information in future conversations unless you add it to the Knowledge Store)
To get additional information, Quotient can use **tools** to look things up. Tools allow Quotient to interact with the outside world, including the Quotient platform, the open internet, and other integrated systems.
Quotient can use tools to find information to add to its existing context, such as…
- Searching the web and visiting web pages
- Looking up a person or company from your Quotient audience
- Looking up all currently active campaigns in Quotient
In addition to looking up information, tools can also perform actions, such as…
- Creating a new campaign
- Editing a blog
- Deleting an email broadcast
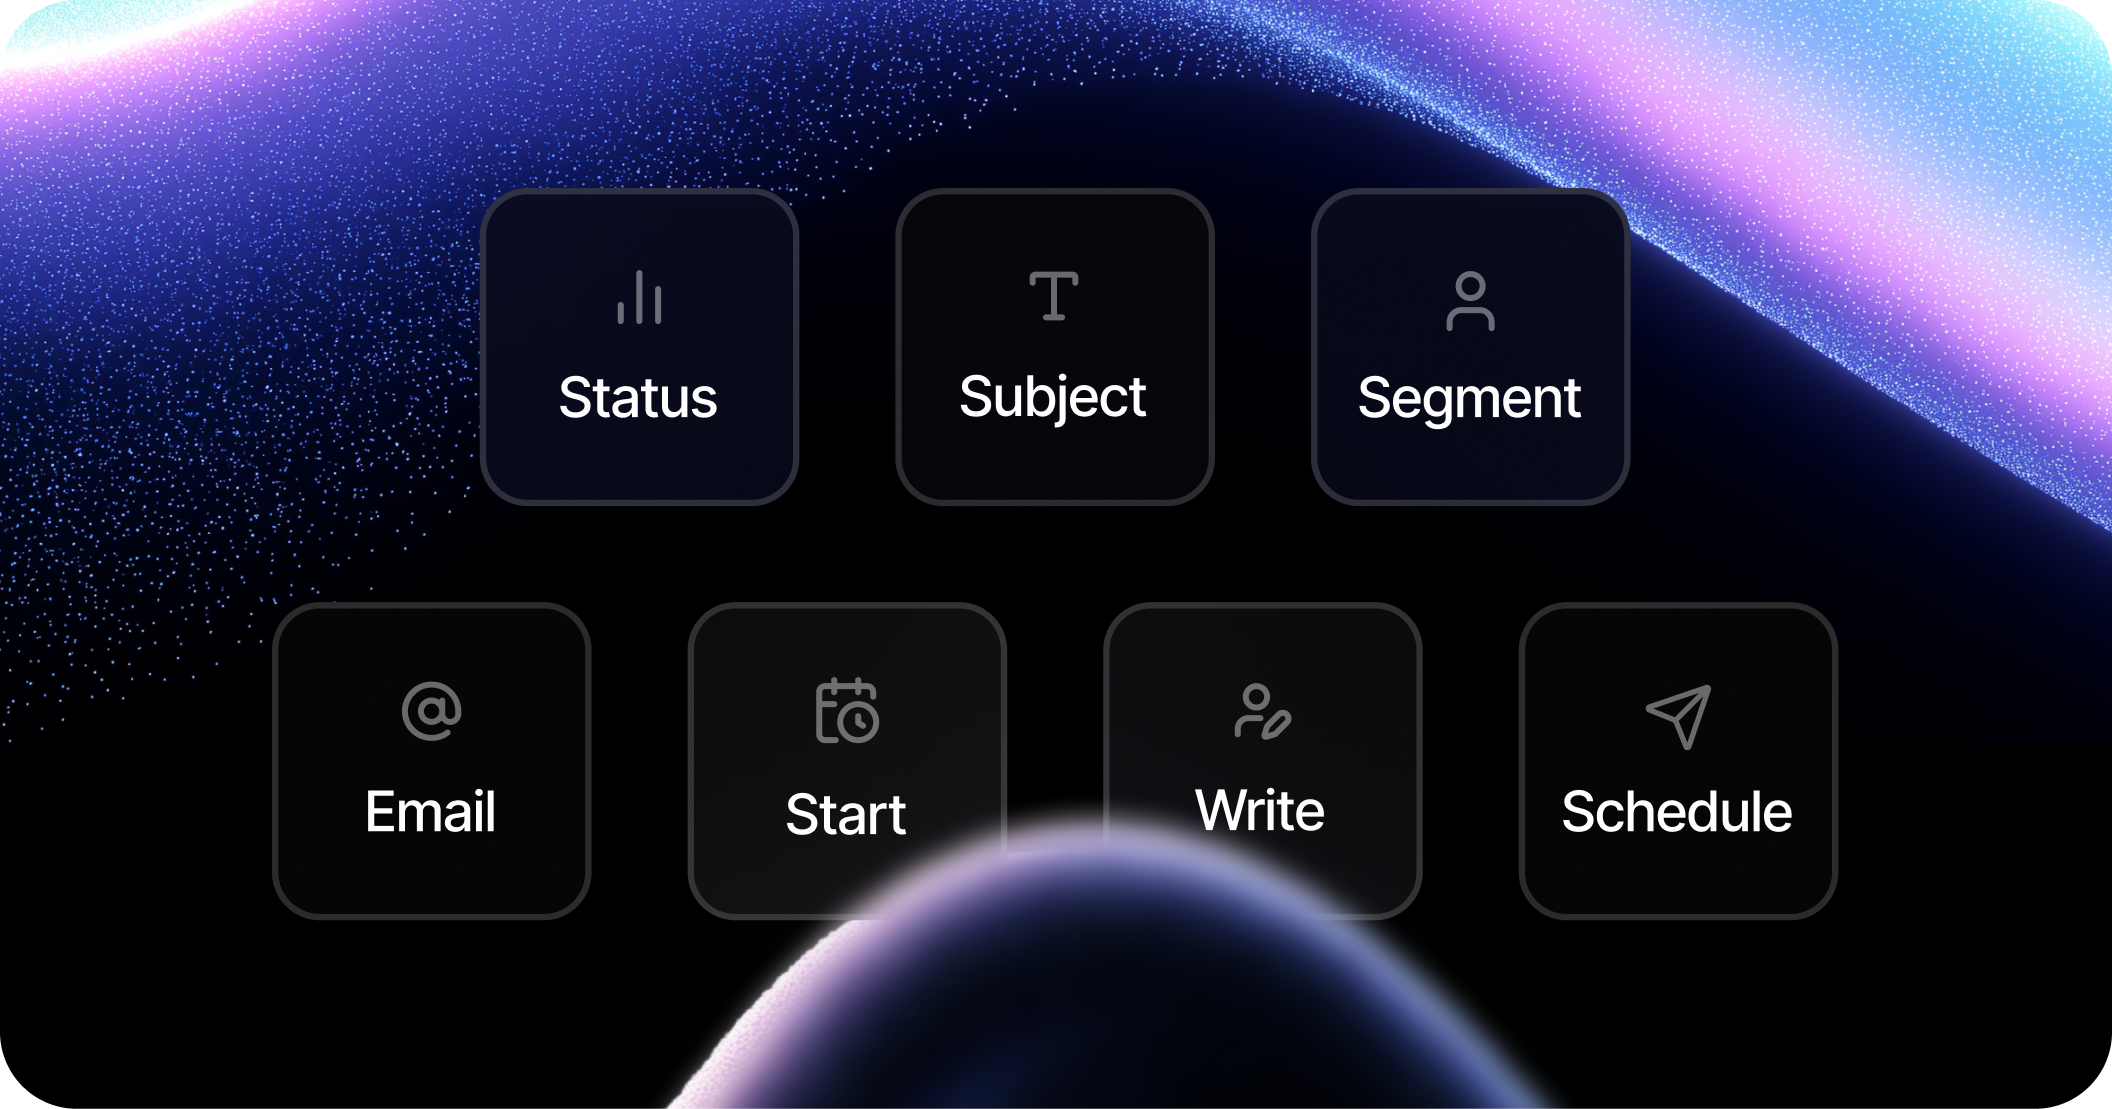
## @ Mentioning Objects
You can @ mention **objects** in Quotient, such as Campaigns, Email Broadcasts, Blogs, Segments, and Email Templates.
Mentioning objects will automatically include all of the data about that object into Quotient's context. You can think of this like sharing a URL with a coworker. Your coworker can click into the URL, give it a quick read, and understand what you're talking about. But without the URL, they might be confused and not understand the context.
Here are some examples of when you might @ mention an object:
- If you're asking Quotient to use a specific email template as part of a flow
- If you're asking Quotient to send an email to a specific segment
- If you want Quotient to use a specific asset as the thumbnail image for a blog
## Managing Threads
Each conversation in Quotient is called a "thread". Within a given thread, Quotient will recall the entire conversation history, but it won't recall conversations from _other_ threads.
When a thread gets too large or covers too many topics, it tends to confuse or overwhelm the AI. Long threads can be overwhelming for humans too. (No one likes looking at a Slack thread with 150 responses, or an email chain that's 80 replies long.)
To get the best performance out of Quotient, it's best to keep threads scoped to a single task or set of related tasks. A good rule of thumb is to create one thread per **deliverable** \- i.e. a single thread for each blog, campaign, email broadcast, etc.
Sometimes it makes sense to group related deliverables into a single thread. For example, you might be working on a blog post as well as an email broadcast announcing the new post to your subscribers. In this case, it might make sense to create both deliverables in the same thread.
On the other hand, if you have a completely new, unrelated request, it's best to start a fresh thread to begin working on it.
## Memories
Although Quotient doesn't naturally remember past interactions the way humans do, it is able to record **[memories](/s/most-recent-business/memory)** which will be stored as context for future interactions. This is a helpful way for Quotient to learn your business's particular preferences and workflows. If you want Quotient to remember something for future interactions, just tell it to "please remember this going forward".
Common examples of memories include…
- Which email templates should be used as a starting point when creating new broadcasts
- Which segments or lists should be used in flows and email broadcasts
- Preferences about campaign management (e.g. "campaigns should always contain one email broadcast per blog post")
**Note:** Memories and Knowledge Documents serve a similar purpose and are mostly interchangeable. Typically, memories reflect workflow preferences, whereas Knowledge Documents contain core information about the brand.
## Under the Hood: Skills
Behind the scenes, Quotient uses **skills** to handle different types of tasks. Each skill gives Quotient specialized knowledge and tools for a particular area of the platform, such as writing blogs, composing emails, or building customer segments.
You don't need to think about which skill is needed for a given task - Quotient automatically loads the right skill(s) based on what you're asking it to do. Just describe what you want to accomplish, and Quotient will take it from there.
-- End of: /working-with-ai
-- Start of: /attio/field-mappings
---
title: Field Mappings
description: How Attio attributes map to Quotient fields and how to customize them
order: 2
---
Field mappings control how data moves between Attio and Quotient. When Attio sends a person record, Quotient needs to know which attribute becomes `firstName`, which becomes `jobTitle`, and where custom properties should land. Mappings make that explicit.
Quotient uses a two-phase approach: built-in logic handles critical fields (email addresses, record IDs, company associations, parsed address and revenue data), then configurable mappings, including defaults plus anything you add, fill in the rest.
Custom fields are commonly used in the CRM for business-specific attributes, for example which product SKUs a company uses, or what pricing plan a business is on. These fields are also highly relevant to marketing, and the Attio integration allows you to sync them bidirectionally to Quotient.
## Default Mappings
When you connect Attio, Quotient creates default mappings automatically. These defaults are **inbound** (Attio → Quotient). You can change direction or add mappings on the **[Attio integration settings](/s/most-recent-business/integrations/attio)** page under the **Person**, **Company**, and **Deal** tabs.
### People (Attio → Quotient)
You can chat with Quotient in plain English, just like you would with a coworker. Tell it what you want, and it will help you get it done. If you've used products like ChatGPT or Claude, the experience will feel familiar.
However, working with AI is different from working with a human in a few key ways. The most important concept to understand is **context.**
## Context and Tools
"Context" refers to the information that is available to Quotient. Unlike humans, Quotient starts each conversation fresh - it doesn't remember what you told it yesterday. It has to be explicitly provided with the information it needs to do its job.
This means you should be explicit about what you want and provide all necessary context in each conversation. Knowing what context Quotient has and doesn't have will help you interact with it more effectively.
When you talk to Quotient, its context will automatically include…
- Information about your brand stored in the Knowledge Store
- The conversation history within that chat thread
- An understanding of the Quotient platform itself
- Specialized knowledge relevant to the task at hand (e.g. when writing a blog, Quotient draws on expertise in SEO-optimized content)
However, Quotient's context does _not_ include...
- Knowledge of current events, like today's front page news or what's currently trending in your industry
- Any information about your brand or business that is not reflected in the Knowledge Store
- Memory of past interactions with you (if you tell Quotient about a new product feature in one conversation, it won't remember that information in future conversations unless you add it to the Knowledge Store)
To get additional information, Quotient can use **tools** to look things up. Tools allow Quotient to interact with the outside world, including the Quotient platform, the open internet, and other integrated systems.
Quotient can use tools to find information to add to its existing context, such as…
- Searching the web and visiting web pages
- Looking up a person or company from your Quotient audience
- Looking up all currently active campaigns in Quotient
In addition to looking up information, tools can also perform actions, such as…
- Creating a new campaign
- Editing a blog
- Deleting an email broadcast
## @ Mentioning Objects
You can @ mention **objects** in Quotient, such as Campaigns, Email Broadcasts, Blogs, Segments, and Email Templates.
Mentioning objects will automatically include all of the data about that object into Quotient's context. You can think of this like sharing a URL with a coworker. Your coworker can click into the URL, give it a quick read, and understand what you're talking about. But without the URL, they might be confused and not understand the context.
Here are some examples of when you might @ mention an object:
- If you're asking Quotient to use a specific email template as part of a flow
- If you're asking Quotient to send an email to a specific segment
- If you want Quotient to use a specific asset as the thumbnail image for a blog
## Managing Threads
Each conversation in Quotient is called a "thread". Within a given thread, Quotient will recall the entire conversation history, but it won't recall conversations from _other_ threads.
When a thread gets too large or covers too many topics, it tends to confuse or overwhelm the AI. Long threads can be overwhelming for humans too. (No one likes looking at a Slack thread with 150 responses, or an email chain that's 80 replies long.)
To get the best performance out of Quotient, it's best to keep threads scoped to a single task or set of related tasks. A good rule of thumb is to create one thread per **deliverable** \- i.e. a single thread for each blog, campaign, email broadcast, etc.
Sometimes it makes sense to group related deliverables into a single thread. For example, you might be working on a blog post as well as an email broadcast announcing the new post to your subscribers. In this case, it might make sense to create both deliverables in the same thread.
On the other hand, if you have a completely new, unrelated request, it's best to start a fresh thread to begin working on it.
## Memories
Although Quotient doesn't naturally remember past interactions the way humans do, it is able to record **[memories](/s/most-recent-business/memory)** which will be stored as context for future interactions. This is a helpful way for Quotient to learn your business's particular preferences and workflows. If you want Quotient to remember something for future interactions, just tell it to "please remember this going forward".
Common examples of memories include…
- Which email templates should be used as a starting point when creating new broadcasts
- Which segments or lists should be used in flows and email broadcasts
- Preferences about campaign management (e.g. "campaigns should always contain one email broadcast per blog post")
**Note:** Memories and Knowledge Documents serve a similar purpose and are mostly interchangeable. Typically, memories reflect workflow preferences, whereas Knowledge Documents contain core information about the brand.
## Under the Hood: Skills
Behind the scenes, Quotient uses **skills** to handle different types of tasks. Each skill gives Quotient specialized knowledge and tools for a particular area of the platform, such as writing blogs, composing emails, or building customer segments.
You don't need to think about which skill is needed for a given task - Quotient automatically loads the right skill(s) based on what you're asking it to do. Just describe what you want to accomplish, and Quotient will take it from there.
-- End of: /working-with-ai
-- Start of: /attio/field-mappings
---
title: Field Mappings
description: How Attio attributes map to Quotient fields and how to customize them
order: 2
---
Field mappings control how data moves between Attio and Quotient. When Attio sends a person record, Quotient needs to know which attribute becomes `firstName`, which becomes `jobTitle`, and where custom properties should land. Mappings make that explicit.
Quotient uses a two-phase approach: built-in logic handles critical fields (email addresses, record IDs, company associations, parsed address and revenue data), then configurable mappings, including defaults plus anything you add, fill in the rest.
Custom fields are commonly used in the CRM for business-specific attributes, for example which product SKUs a company uses, or what pricing plan a business is on. These fields are also highly relevant to marketing, and the Attio integration allows you to sync them bidirectionally to Quotient.
## Default Mappings
When you connect Attio, Quotient creates default mappings automatically. These defaults are **inbound** (Attio → Quotient). You can change direction or add mappings on the **[Attio integration settings](/s/most-recent-business/integrations/attio)** page under the **Person**, **Company**, and **Deal** tabs.
### People (Attio → Quotient)
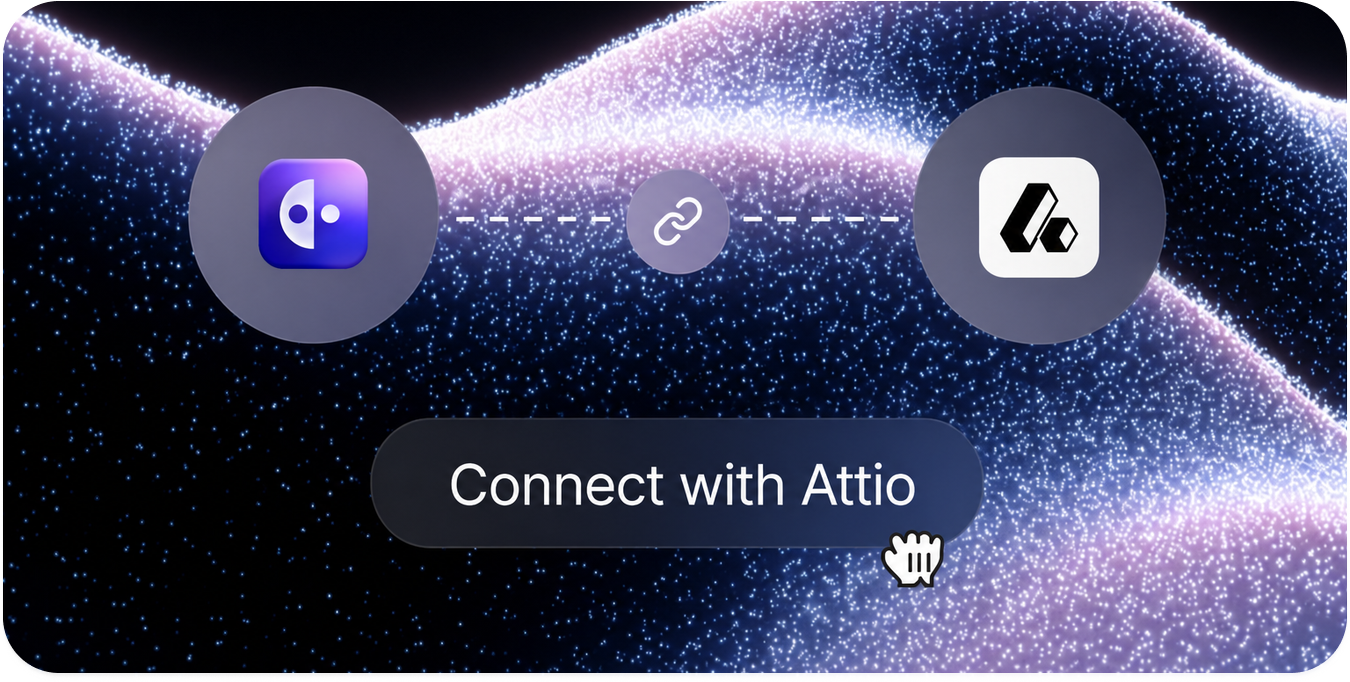 The Attio integration syncs audience data between your CRM (Attio) and Quotient. People, Companies, and Deals sync from Attio into Quotient automatically; People also sync back from Quotient to Attio as new leads come in.
This allows you to:
- Build dynamic segments in Quotient using firmographic data from Attio (like company industry, company size, and deal stage) so you can tailor your marketing to each segment.
- Automatically send new leads collected by Quotient to Attio, or use a Flow with a Conditional step to send them to Attio only once they cross a lead score threshold or meet other criteria.
- Add conditional logic to Flows based on firmographic data from Attio. For example, build automated email sequences that behave differently for companies of different sizes or in different regions.
## Core Concepts
When you connect Attio to Quotient, here is how the pieces fit together:
**Attio workspace connection**
Quotient connects to Attio through OAuth. You authorize Quotient from Attio's login screen, and Quotient stores a secure access token for your workspace. No API keys to copy, and you can disconnect at any time from **[Integrations → Attio](/s/most-recent-business/integrations/attio)**.
**Synced objects**
The integration syncs Attio people, companies, deals, and workspace members. In Quotient, people become audience records you can email and segment on; companies and deals power account-level targeting and reporting; workspace members are imported so record ownership can be mapped correctly.
**Field mappings**
Field mappings control which Attio attributes sync to which Quotient fields. Quotient sets up sensible defaults when you connect, and you can add custom mappings for the attributes that matter to your business. See **[Field Mappings](/docs/attio/field-mappings)** for details.
**Sync**
Your Attio data stays up to date in Quotient automatically, and changes appear instantly.
## Working with Attio Data in Quotient
Most teams connect Attio to solve a simple problem: marketing should not live in a silo. Here is a typical workflow:
1. **Connect Attio** and wait for the initial import to finish. Monitor progress on the **Jobs** tab in integration settings.
2. **Review field mappings** so the Attio attributes you care about (ICP tier, lifecycle stage, ARR band) appear on Quotient people and companies.
3. **Build segments** from synced deal stage, company attributes, or custom properties.
4. **Use Flows** with a **Send to CRM** step when you want Quotient to push updated person fields back to Attio after a form submission or nurture sequence.
Tips for getting the most out of the integration:
- Map your most-used Attio custom attributes early, since segments and email personalization work best when the fields you filter on actually exist in Quotient.
- Ask Quotient to build segments from Attio-backed fields once sync completes; it can see the same properties you mapped.
- Use **Send to CRM** in Flows when a lead fills out a form in Quotient and you want that enrichment written back to the Attio person record.
## Getting Started
1. **[Connect Attio →](/docs/attio/setup)** Authorize your workspace and run the first sync.
2. **[Configure Field Mappings →](/docs/attio/field-mappings)** Customize how Attio attributes map to Quotient fields.
---
**Need help?** Ask Quotient for assistance with your Attio integration, or contact our support team.
-- End of: /attio/index
-- Start of: /attio/setup
---
title: Setup & Configuration
description: Connect your Attio workspace to Quotient and run your first sync
order: 1
---
Connecting Attio to Quotient takes a few minutes. You need an Attio workspace you can authorize apps for, and a Quotient plan that includes CRM integrations (Pro and above).
## Prerequisites
Before you start, make sure you have:
- **An Attio workspace** with permission to install or authorize third-party apps
- **A Quotient business** on a plan with CRM integrations enabled
- **Data in Attio** (people, companies, or deals) if you want to verify the sync immediately after connecting
## Connect Your Attio Workspace
### Step 1: Open Integrations
In Quotient, go to **[Integrations](/s/most-recent-business/integrations)** and find the **Attio** card. If CRM integrations are not included on your current plan, Quotient will prompt you to upgrade before you can connect.
Click **Connect** to start the OAuth flow.
### Step 2: Authorize in Attio
Quotient redirects you to Attio's authorization page. Sign in if prompted, select the workspace you want to connect, and review the permissions Quotient is requesting. Click to grant access and return to Quotient.
Quotient requests read access to Attio records, object configuration, workspace members, and related metadata needed to import and keep your CRM data in sync.
### Step 3: Confirm the connection
After authorization, you land on the **[Attio integration settings](/s/most-recent-business/integrations/attio)** page. You should see:
- **Status: Connected**
- **Last Updated** timestamp for the integration
- Tabs for **Person**, **Company**, and **Deal** field mappings
- **Sync Actions** and **Jobs** tabs for monitoring and manual syncs
Quotient automatically creates default field mappings and starts the initial Attio import as soon as the connection succeeds. You do not need to toggle individual object types on: people, companies, deals, and workspace members are all included in the standard sync.
## What Happens During the First Sync
The initial import runs as a background job. Quotient:
1. Registers webhooks so future Attio changes stream into Quotient
2. Syncs workspace members (for ownership mapping)
3. Syncs companies
4. Syncs people and deals, linking them to the companies already in Quotient
Open the **Jobs** tab on the Attio integration page to watch progress. Large workspaces can take a while depending on record volume; you can keep using Quotient while the import runs.
The Attio integration syncs audience data between your CRM (Attio) and Quotient. People, Companies, and Deals sync from Attio into Quotient automatically; People also sync back from Quotient to Attio as new leads come in.
This allows you to:
- Build dynamic segments in Quotient using firmographic data from Attio (like company industry, company size, and deal stage) so you can tailor your marketing to each segment.
- Automatically send new leads collected by Quotient to Attio, or use a Flow with a Conditional step to send them to Attio only once they cross a lead score threshold or meet other criteria.
- Add conditional logic to Flows based on firmographic data from Attio. For example, build automated email sequences that behave differently for companies of different sizes or in different regions.
## Core Concepts
When you connect Attio to Quotient, here is how the pieces fit together:
**Attio workspace connection**
Quotient connects to Attio through OAuth. You authorize Quotient from Attio's login screen, and Quotient stores a secure access token for your workspace. No API keys to copy, and you can disconnect at any time from **[Integrations → Attio](/s/most-recent-business/integrations/attio)**.
**Synced objects**
The integration syncs Attio people, companies, deals, and workspace members. In Quotient, people become audience records you can email and segment on; companies and deals power account-level targeting and reporting; workspace members are imported so record ownership can be mapped correctly.
**Field mappings**
Field mappings control which Attio attributes sync to which Quotient fields. Quotient sets up sensible defaults when you connect, and you can add custom mappings for the attributes that matter to your business. See **[Field Mappings](/docs/attio/field-mappings)** for details.
**Sync**
Your Attio data stays up to date in Quotient automatically, and changes appear instantly.
## Working with Attio Data in Quotient
Most teams connect Attio to solve a simple problem: marketing should not live in a silo. Here is a typical workflow:
1. **Connect Attio** and wait for the initial import to finish. Monitor progress on the **Jobs** tab in integration settings.
2. **Review field mappings** so the Attio attributes you care about (ICP tier, lifecycle stage, ARR band) appear on Quotient people and companies.
3. **Build segments** from synced deal stage, company attributes, or custom properties.
4. **Use Flows** with a **Send to CRM** step when you want Quotient to push updated person fields back to Attio after a form submission or nurture sequence.
Tips for getting the most out of the integration:
- Map your most-used Attio custom attributes early, since segments and email personalization work best when the fields you filter on actually exist in Quotient.
- Ask Quotient to build segments from Attio-backed fields once sync completes; it can see the same properties you mapped.
- Use **Send to CRM** in Flows when a lead fills out a form in Quotient and you want that enrichment written back to the Attio person record.
## Getting Started
1. **[Connect Attio →](/docs/attio/setup)** Authorize your workspace and run the first sync.
2. **[Configure Field Mappings →](/docs/attio/field-mappings)** Customize how Attio attributes map to Quotient fields.
---
**Need help?** Ask Quotient for assistance with your Attio integration, or contact our support team.
-- End of: /attio/index
-- Start of: /attio/setup
---
title: Setup & Configuration
description: Connect your Attio workspace to Quotient and run your first sync
order: 1
---
Connecting Attio to Quotient takes a few minutes. You need an Attio workspace you can authorize apps for, and a Quotient plan that includes CRM integrations (Pro and above).
## Prerequisites
Before you start, make sure you have:
- **An Attio workspace** with permission to install or authorize third-party apps
- **A Quotient business** on a plan with CRM integrations enabled
- **Data in Attio** (people, companies, or deals) if you want to verify the sync immediately after connecting
## Connect Your Attio Workspace
### Step 1: Open Integrations
In Quotient, go to **[Integrations](/s/most-recent-business/integrations)** and find the **Attio** card. If CRM integrations are not included on your current plan, Quotient will prompt you to upgrade before you can connect.
Click **Connect** to start the OAuth flow.
### Step 2: Authorize in Attio
Quotient redirects you to Attio's authorization page. Sign in if prompted, select the workspace you want to connect, and review the permissions Quotient is requesting. Click to grant access and return to Quotient.
Quotient requests read access to Attio records, object configuration, workspace members, and related metadata needed to import and keep your CRM data in sync.
### Step 3: Confirm the connection
After authorization, you land on the **[Attio integration settings](/s/most-recent-business/integrations/attio)** page. You should see:
- **Status: Connected**
- **Last Updated** timestamp for the integration
- Tabs for **Person**, **Company**, and **Deal** field mappings
- **Sync Actions** and **Jobs** tabs for monitoring and manual syncs
Quotient automatically creates default field mappings and starts the initial Attio import as soon as the connection succeeds. You do not need to toggle individual object types on: people, companies, deals, and workspace members are all included in the standard sync.
## What Happens During the First Sync
The initial import runs as a background job. Quotient:
1. Registers webhooks so future Attio changes stream into Quotient
2. Syncs workspace members (for ownership mapping)
3. Syncs companies
4. Syncs people and deals, linking them to the companies already in Quotient
Open the **Jobs** tab on the Attio integration page to watch progress. Large workspaces can take a while depending on record volume; you can keep using Quotient while the import runs.
 Quotient's Audience section helps you understand and engage with your customers effectively. The platform enables you to:
- Track customer interactions and behaviors across channels
- Build detailed customer segments based on engagement patterns
- Personalize marketing campaigns using customer data
- Measure and analyze customer engagement over time
## Key Features
### Import Audience
Upload a CSV to quickly add or update contacts in bulk. [Start an
import](/s/most-recent-business/people/import-people/upload-csv), and review the
[import guide](/docs/audience/import-audience) for required fields and validation.
### People
View detailed information about individual customers, including their purchase history, email engagement, and preferences. [Explore your people](/s/most-recent-business/people) or learn more in our [people guide](/docs/audience/people).
### Segments
Create dynamic groups of customers based on shared characteristics or behaviors. [View your segments](/s/most-recent-business/segments) to target your marketing campaigns and analyze customer patterns.
### Working with Quotient
Ask Quotient to help you understand your customers better and suggest targeted marketing strategies based on your audience data.
Quotient's Audience section helps you understand and engage with your customers effectively. The platform enables you to:
- Track customer interactions and behaviors across channels
- Build detailed customer segments based on engagement patterns
- Personalize marketing campaigns using customer data
- Measure and analyze customer engagement over time
## Key Features
### Import Audience
Upload a CSV to quickly add or update contacts in bulk. [Start an
import](/s/most-recent-business/people/import-people/upload-csv), and review the
[import guide](/docs/audience/import-audience) for required fields and validation.
### People
View detailed information about individual customers, including their purchase history, email engagement, and preferences. [Explore your people](/s/most-recent-business/people) or learn more in our [people guide](/docs/audience/people).
### Segments
Create dynamic groups of customers based on shared characteristics or behaviors. [View your segments](/s/most-recent-business/segments) to target your marketing campaigns and analyze customer patterns.
### Working with Quotient
Ask Quotient to help you understand your customers better and suggest targeted marketing strategies based on your audience data.
 Email is one of the most important tools in your marketing toolkit. Email marketing remains one of the most effective ways to nurture leads, build relationships with customers, and drive sales for your business.
Quotient lets you craft, send, and measure emails — and you can ask Quotient to handle any part of the process for you.
## Core Concepts
**Broadcasts**
[Broadcasts](/s/most-recent-business/email-broadcasts) are a one-time blast email to a portion of your audience. A broadcast is made up of...
- **Content:** HTML content that recipients will see in their inbox. You can edit the content of the email directly in the email editor, or you can ask Quotient to make updates on your behalf.
- **Metadata**: Additional data about the email including the subject line, preview text, and from address. Setting metadata correctly helps improve the performance and deliverability of emails.
- **Send Time:** The time at which the email will begin sending to recipients. We say "begin sending" because not all of the emails will be sent immediately at the send time. To improve deliverability, we send the emails in batches over the course of several minutes.
Email broadcasts follow a three-stage lifecycle: **Draft** → **Scheduled** → **Launched**. You can either schedule a broadcast for a specific time in the future or launch it immediately. Once the broadcast is launched and emails start sending, it moves to the "Launched" status. Once launched, broadcasts can no longer be modified - this is different from blogs, which can be re-published after going live. Once an email has been sent, you can't change it.
**Audience**
“Audience” refers to the people you've designated to receive an email broadcast. The audience can be made up of both **lists** and **segments**. You can learn more about the difference in the article on Building Your Audience.
You can include multiple lists and/or segments in the audience for your broadcast. If a person appears in multiple, Quotient will deduplicate and ensure that they only receive the email once.
**Analytics**
If you're using Quotient to send email, we will automatically track the performance of your broadcasts, including:
1. **Delivery Rate:** Of the emails sent, how many were successfully delivered.
2. **Open Rate:** Of the emails delivered, how many were opened by the recipient.
3. **Click Rate:** Of the emails opened, how many people clicked on a link leading to your website.
**Templates**
[Templates](/s/most-recent-business/email-template) are reusable blueprints of email content. It's important to understand that templates are not directly sent out - they must either be cloned into a broadcast or used as part of a flow. There are two different ways you can use templates:
1. **Starting Point for Broadcasts:** It's common to clone templates as a starting point for email broadcasts. This ensures that all email broadcasts maintain a consistent structure and look. For example, you might have a template for your weekly newsletter, and each week you would clone it and replace the content for that week.
2. **In Automated Flows:** Templates can also be used inside of **flows**. In Quotient, flows are automated processes that can send email to customers based on pre-defined schedules or triggers. A common example would be sending new users an automated welcome series after they sign up for your product. To learn more about flows, check out the article on Automating Workflows.
**Components**
[Components](/s/most-recent-business/email-components) are reusable blocks of email content that can be used in both broadcasts and templates and stay automatically up-to-date. The most common examples of components are **headers and footers**.
Typically you want your headers and footers to stay consistent across all your emails, and if you change them, you want them to update automatically in all the templates/broadcasts where they're used.
**Email Domains**
[Email domains](/s/most-recent-business/email-settings) are the domains that your emails are sent from (e.g., `updates@yourcompany.com`). Using a custom email domain is crucial for deliverability and brand consistency. It helps ensure your emails reach the inbox rather than being marked as spam.
Quotient helps you set up and verify custom email domains with proper DNS configuration. You can learn more about setting up custom DNS in our [Custom DNS guide](/docs/email/dns).
## Creating Emails with Quotient
Ask Quotient to help you create any of the above — broadcasts, templates, components, and finding the right audience for each email.
Quotient has access to your Knowledge Store, so the content it creates will be consistent with your brand's voice and messaging strategy.
Here are some tips for getting the most out of Quotient when working with email:
- When setting up your Quotient account, ask Quotient to create a standard header, footer, and "base template", and ask it to remember to always use those as a starting point. This helps keep your emails consistent and on-brand, and ensures that Quotient doesn't have to reinvent the wheel with each new broadcast.
- Formatting emails is notoriously difficult due to the esoteric requirements of legacy email clients. We recommend asking Quotient to take the first stab at creating the content. From there you can use the editor to tweak copy and styles. This is often easier than creating the formatting yourself.
- You can upload screenshots of emails from other brands to the chat panel and ask Quotient to copy them or use them as inspiration.
- Emails should always have CTAs that lead to pages on your website where readers can learn more and hopefully enter your conversion funnel. To set CTAs up properly, Quotient needs to understand your website structure. Ask Quotient to crawl your website and create a Knowledge Doc describing it, which it can then use to construct links.
## Inbound vs. Outbound Email
It's important to note that Quotient is used for **inbound email marketing**, not **outbound email marketing.** Inbound marketing targets people who have _already_ shown interest in your product - like signing up for a demo or newsletter - whereas outbound marketing, also known as "cold email", proactively reaches out to people regardless of their expressed interest.
There are a few key differences between inbound and outbound email marketing:
Email is one of the most important tools in your marketing toolkit. Email marketing remains one of the most effective ways to nurture leads, build relationships with customers, and drive sales for your business.
Quotient lets you craft, send, and measure emails — and you can ask Quotient to handle any part of the process for you.
## Core Concepts
**Broadcasts**
[Broadcasts](/s/most-recent-business/email-broadcasts) are a one-time blast email to a portion of your audience. A broadcast is made up of...
- **Content:** HTML content that recipients will see in their inbox. You can edit the content of the email directly in the email editor, or you can ask Quotient to make updates on your behalf.
- **Metadata**: Additional data about the email including the subject line, preview text, and from address. Setting metadata correctly helps improve the performance and deliverability of emails.
- **Send Time:** The time at which the email will begin sending to recipients. We say "begin sending" because not all of the emails will be sent immediately at the send time. To improve deliverability, we send the emails in batches over the course of several minutes.
Email broadcasts follow a three-stage lifecycle: **Draft** → **Scheduled** → **Launched**. You can either schedule a broadcast for a specific time in the future or launch it immediately. Once the broadcast is launched and emails start sending, it moves to the "Launched" status. Once launched, broadcasts can no longer be modified - this is different from blogs, which can be re-published after going live. Once an email has been sent, you can't change it.
**Audience**
“Audience” refers to the people you've designated to receive an email broadcast. The audience can be made up of both **lists** and **segments**. You can learn more about the difference in the article on Building Your Audience.
You can include multiple lists and/or segments in the audience for your broadcast. If a person appears in multiple, Quotient will deduplicate and ensure that they only receive the email once.
**Analytics**
If you're using Quotient to send email, we will automatically track the performance of your broadcasts, including:
1. **Delivery Rate:** Of the emails sent, how many were successfully delivered.
2. **Open Rate:** Of the emails delivered, how many were opened by the recipient.
3. **Click Rate:** Of the emails opened, how many people clicked on a link leading to your website.
**Templates**
[Templates](/s/most-recent-business/email-template) are reusable blueprints of email content. It's important to understand that templates are not directly sent out - they must either be cloned into a broadcast or used as part of a flow. There are two different ways you can use templates:
1. **Starting Point for Broadcasts:** It's common to clone templates as a starting point for email broadcasts. This ensures that all email broadcasts maintain a consistent structure and look. For example, you might have a template for your weekly newsletter, and each week you would clone it and replace the content for that week.
2. **In Automated Flows:** Templates can also be used inside of **flows**. In Quotient, flows are automated processes that can send email to customers based on pre-defined schedules or triggers. A common example would be sending new users an automated welcome series after they sign up for your product. To learn more about flows, check out the article on Automating Workflows.
**Components**
[Components](/s/most-recent-business/email-components) are reusable blocks of email content that can be used in both broadcasts and templates and stay automatically up-to-date. The most common examples of components are **headers and footers**.
Typically you want your headers and footers to stay consistent across all your emails, and if you change them, you want them to update automatically in all the templates/broadcasts where they're used.
**Email Domains**
[Email domains](/s/most-recent-business/email-settings) are the domains that your emails are sent from (e.g., `updates@yourcompany.com`). Using a custom email domain is crucial for deliverability and brand consistency. It helps ensure your emails reach the inbox rather than being marked as spam.
Quotient helps you set up and verify custom email domains with proper DNS configuration. You can learn more about setting up custom DNS in our [Custom DNS guide](/docs/email/dns).
## Creating Emails with Quotient
Ask Quotient to help you create any of the above — broadcasts, templates, components, and finding the right audience for each email.
Quotient has access to your Knowledge Store, so the content it creates will be consistent with your brand's voice and messaging strategy.
Here are some tips for getting the most out of Quotient when working with email:
- When setting up your Quotient account, ask Quotient to create a standard header, footer, and "base template", and ask it to remember to always use those as a starting point. This helps keep your emails consistent and on-brand, and ensures that Quotient doesn't have to reinvent the wheel with each new broadcast.
- Formatting emails is notoriously difficult due to the esoteric requirements of legacy email clients. We recommend asking Quotient to take the first stab at creating the content. From there you can use the editor to tweak copy and styles. This is often easier than creating the formatting yourself.
- You can upload screenshots of emails from other brands to the chat panel and ask Quotient to copy them or use them as inspiration.
- Emails should always have CTAs that lead to pages on your website where readers can learn more and hopefully enter your conversion funnel. To set CTAs up properly, Quotient needs to understand your website structure. Ask Quotient to crawl your website and create a Knowledge Doc describing it, which it can then use to construct links.
## Inbound vs. Outbound Email
It's important to note that Quotient is used for **inbound email marketing**, not **outbound email marketing.** Inbound marketing targets people who have _already_ shown interest in your product - like signing up for a demo or newsletter - whereas outbound marketing, also known as "cold email", proactively reaches out to people regardless of their expressed interest.
There are a few key differences between inbound and outbound email marketing:
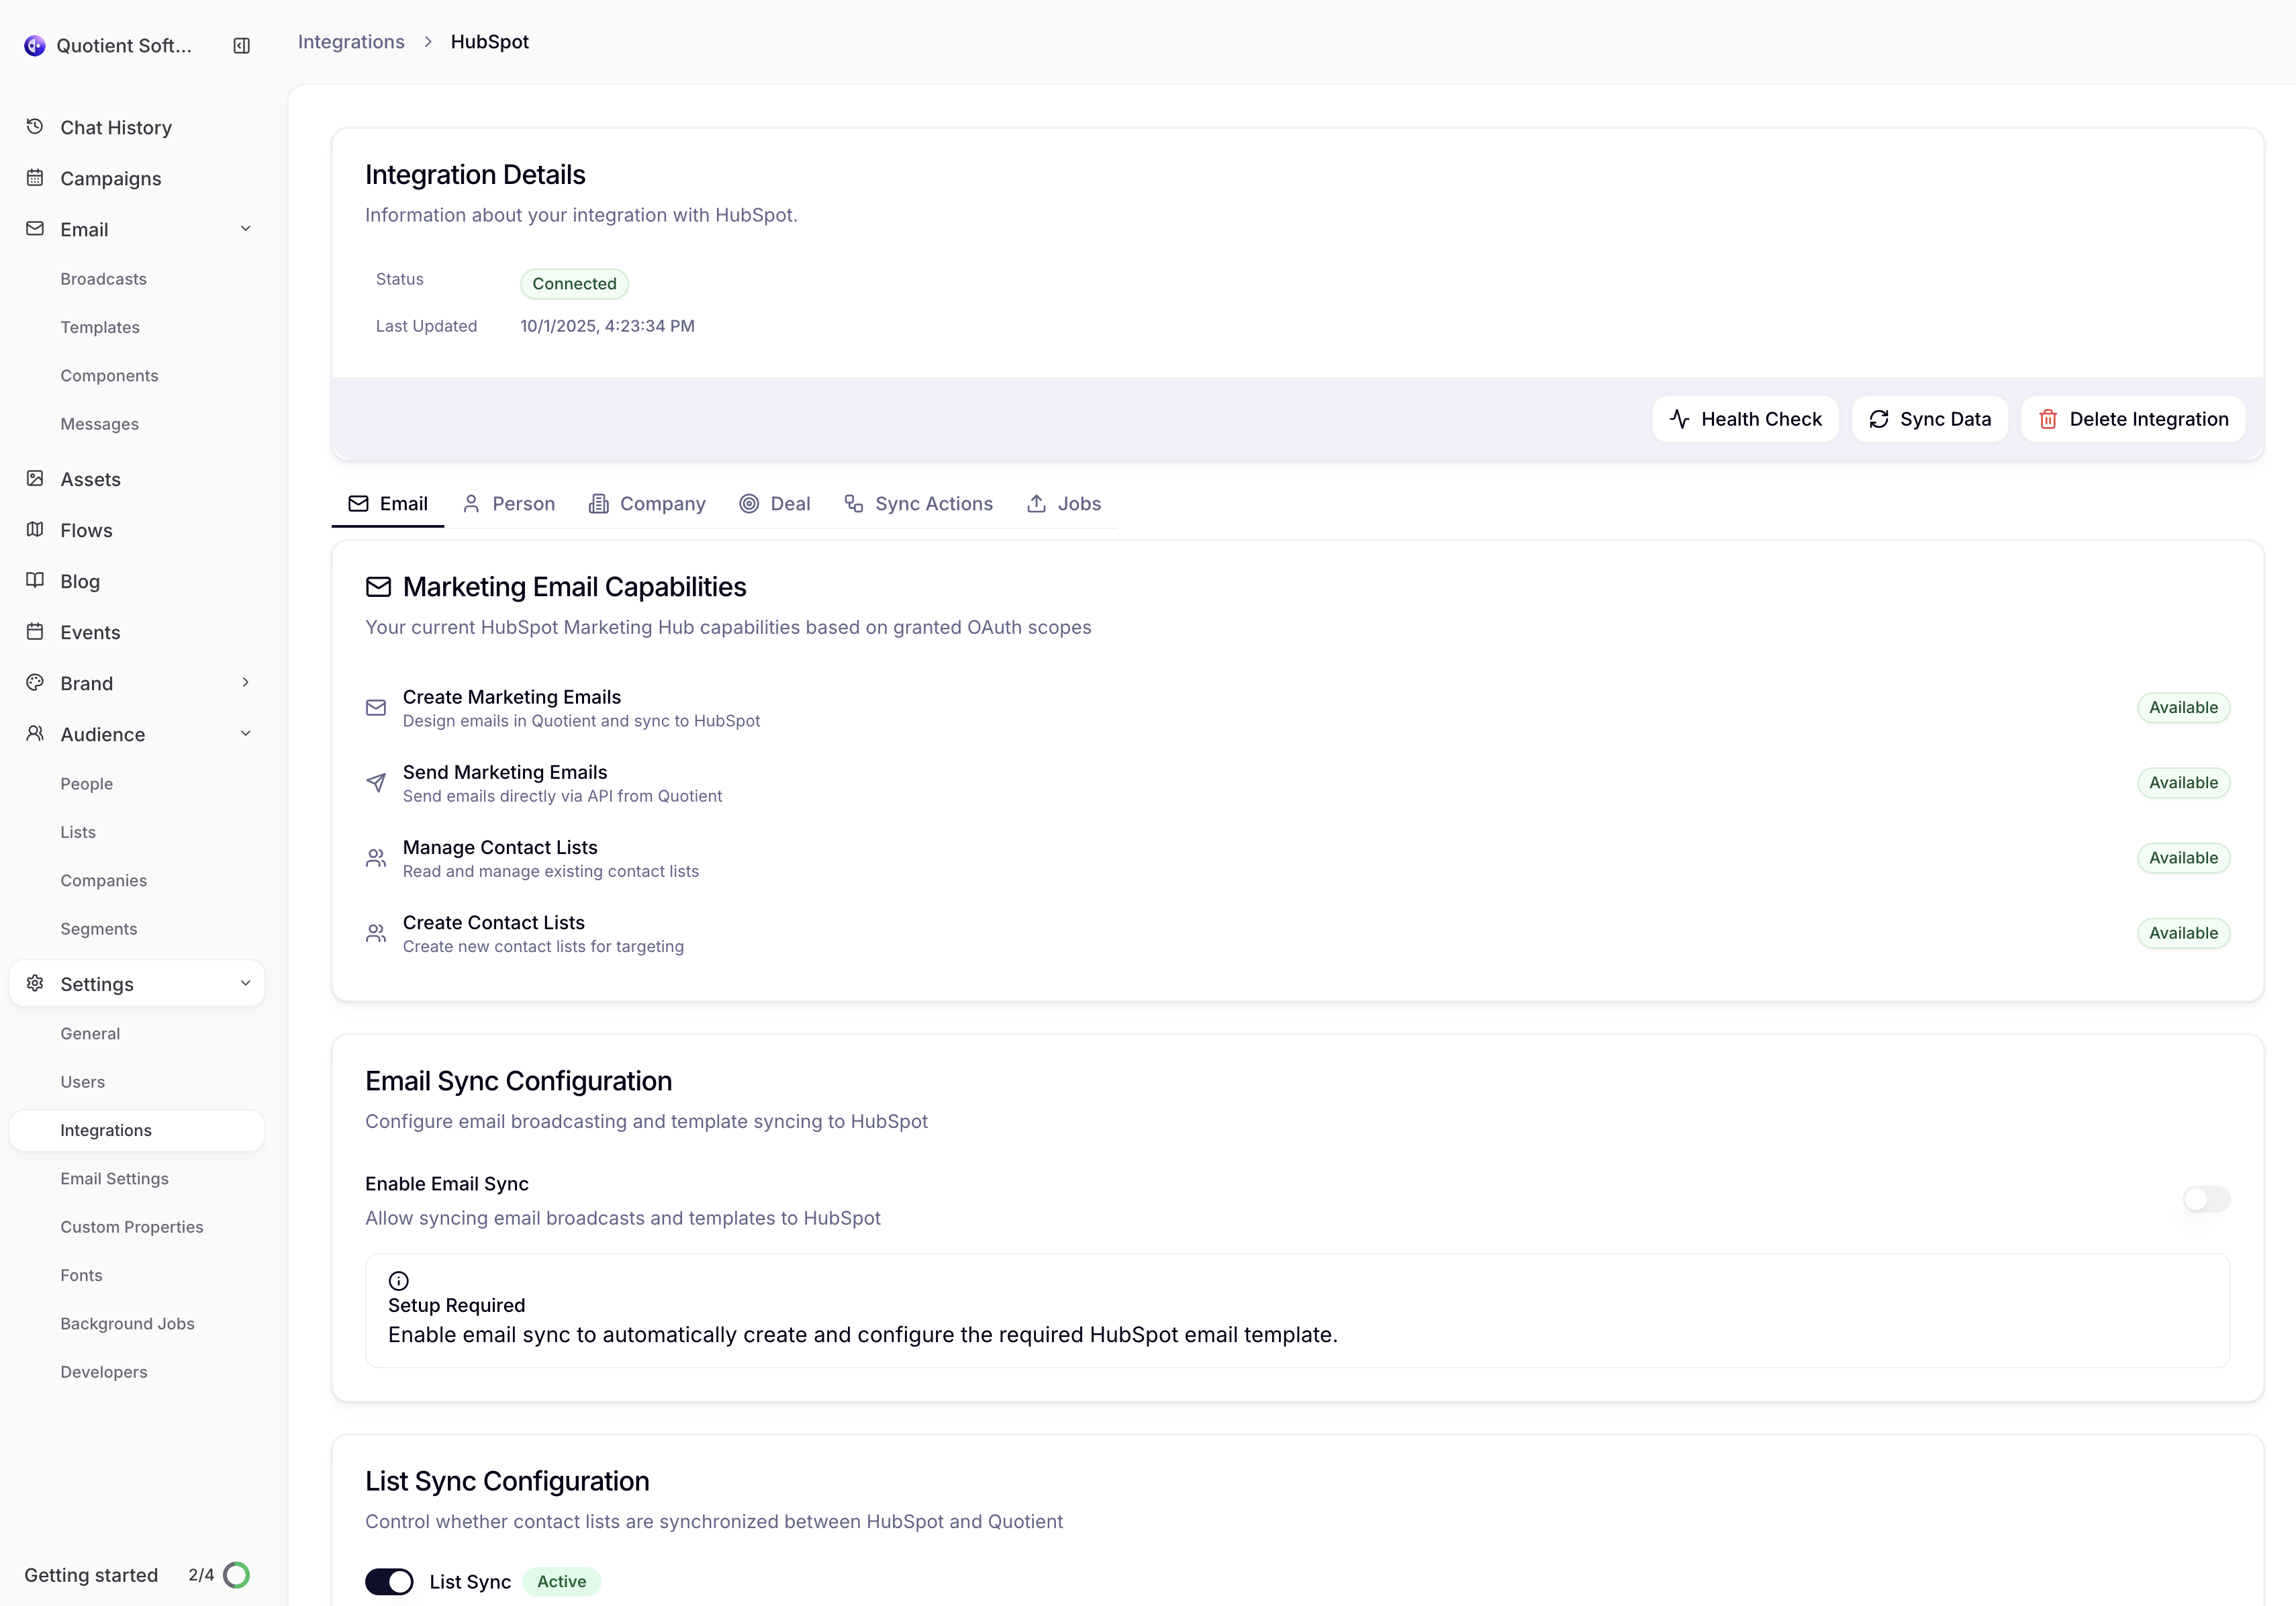
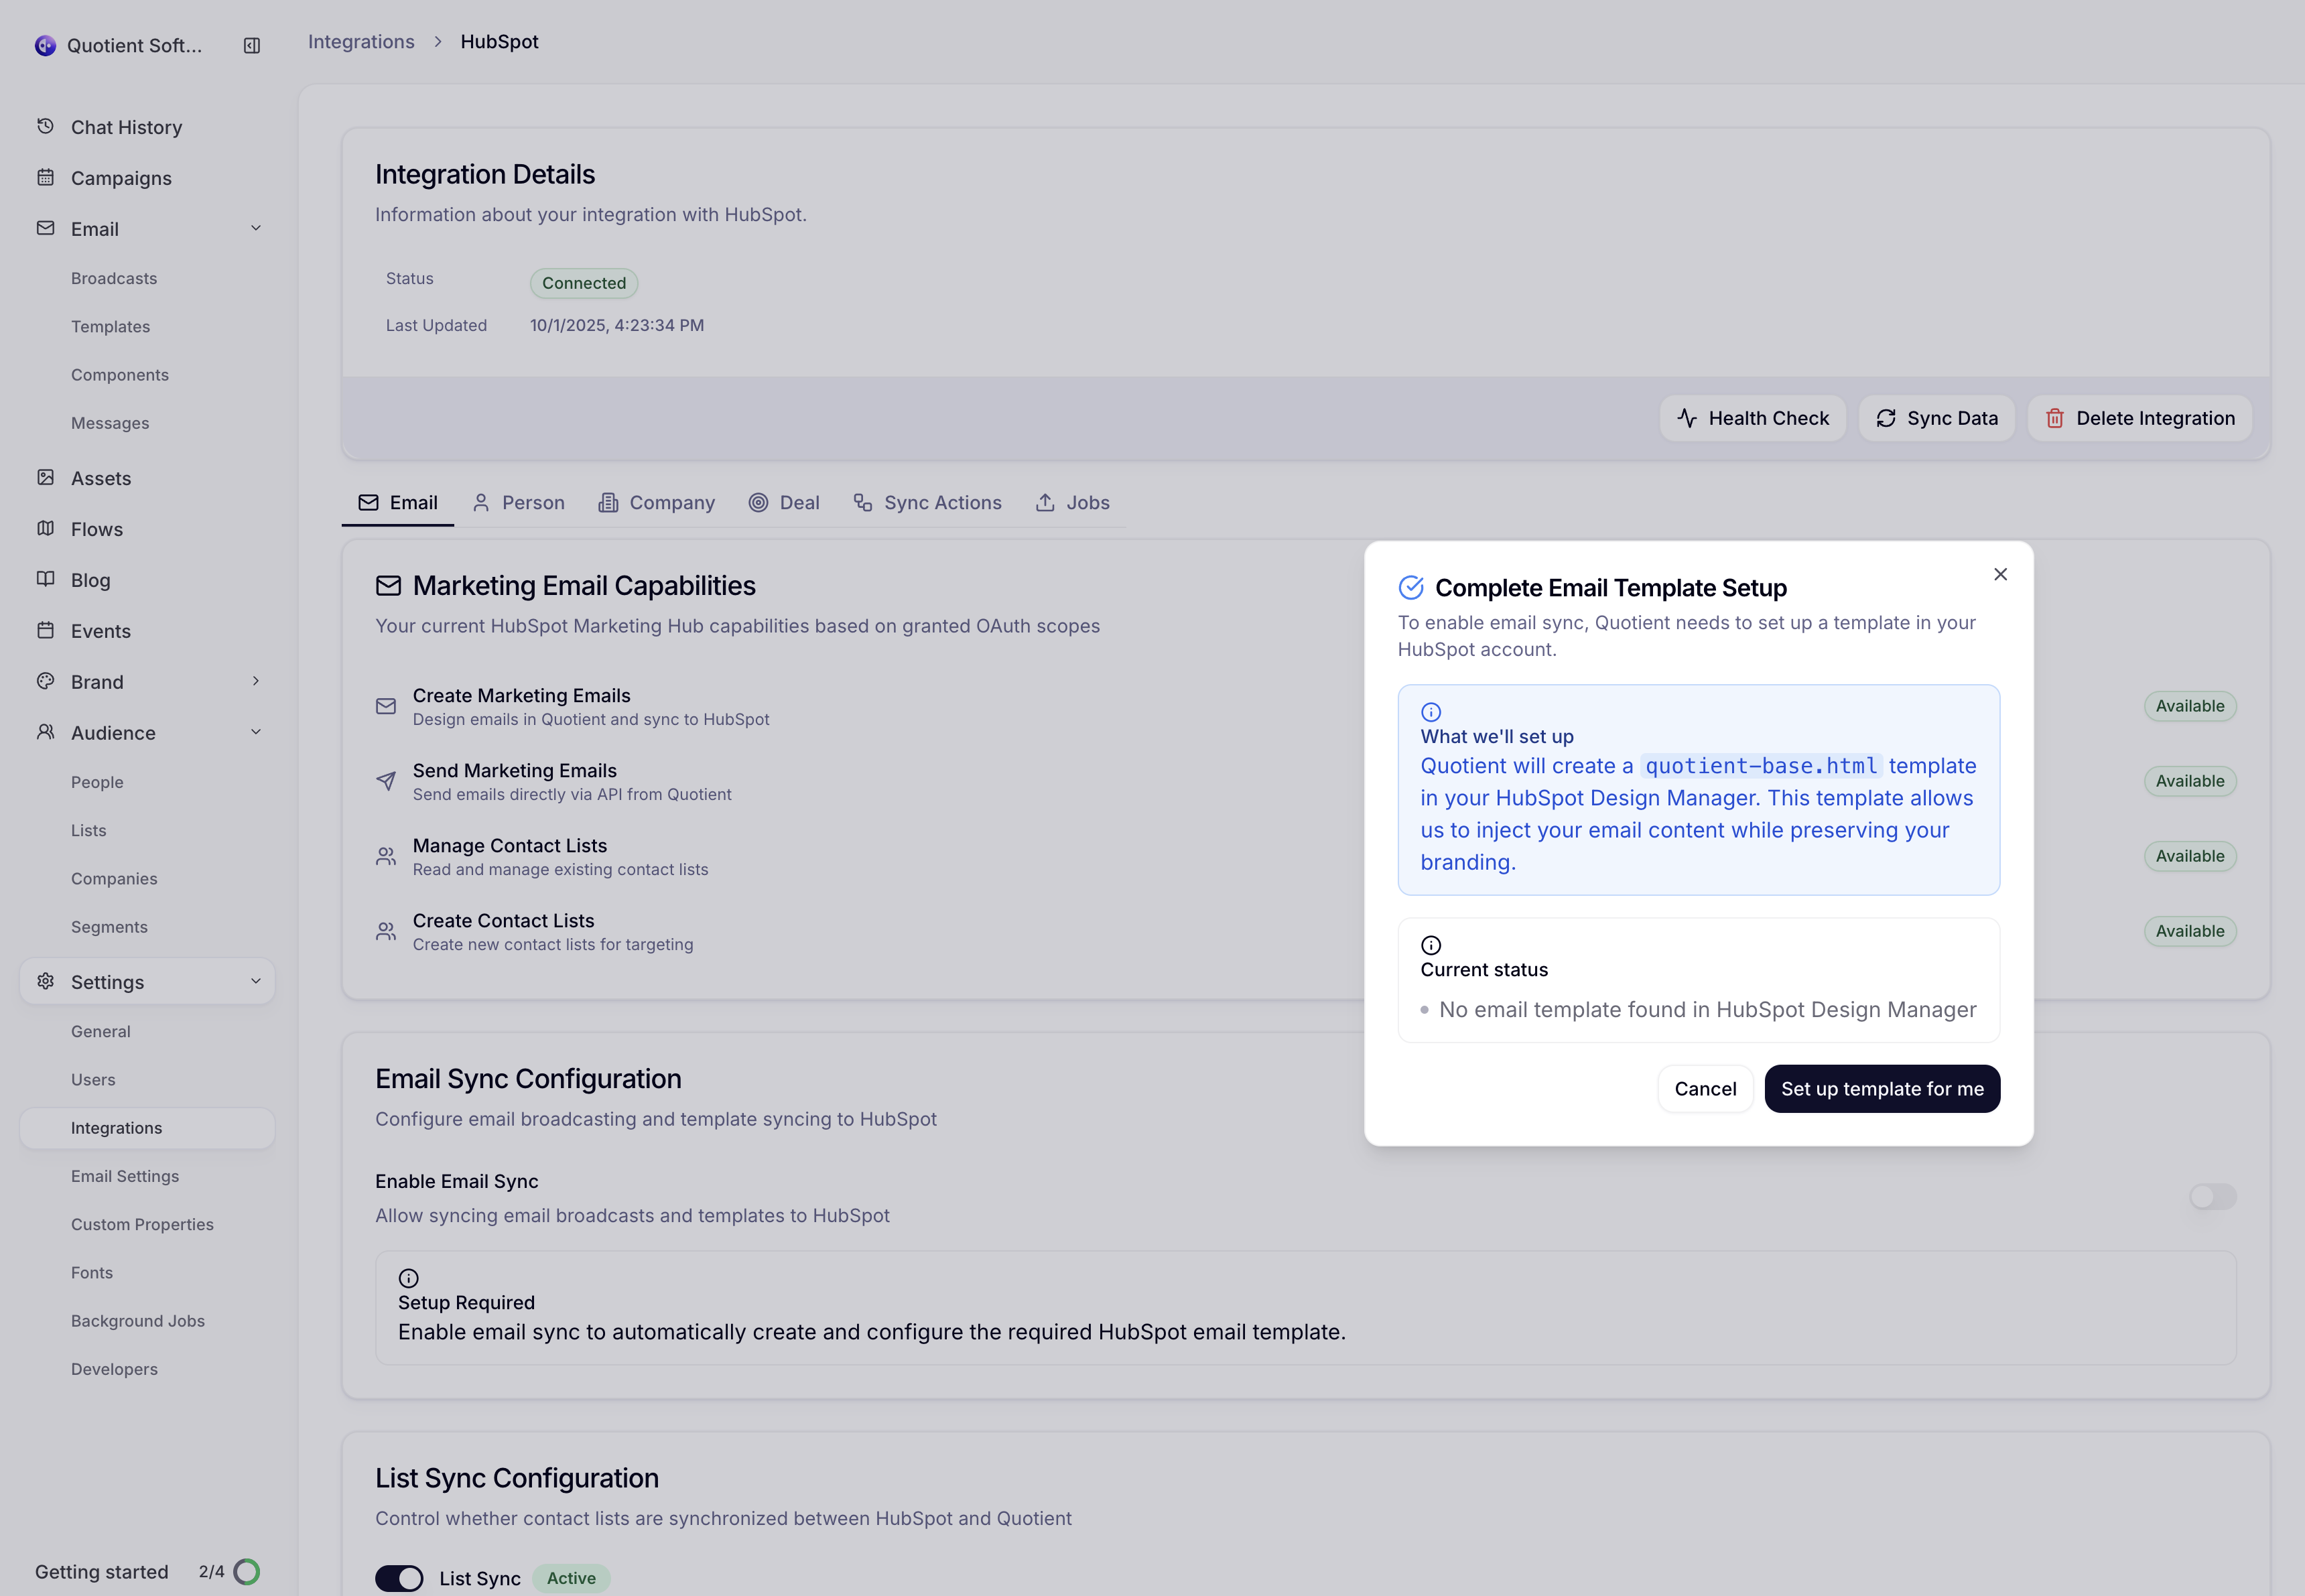
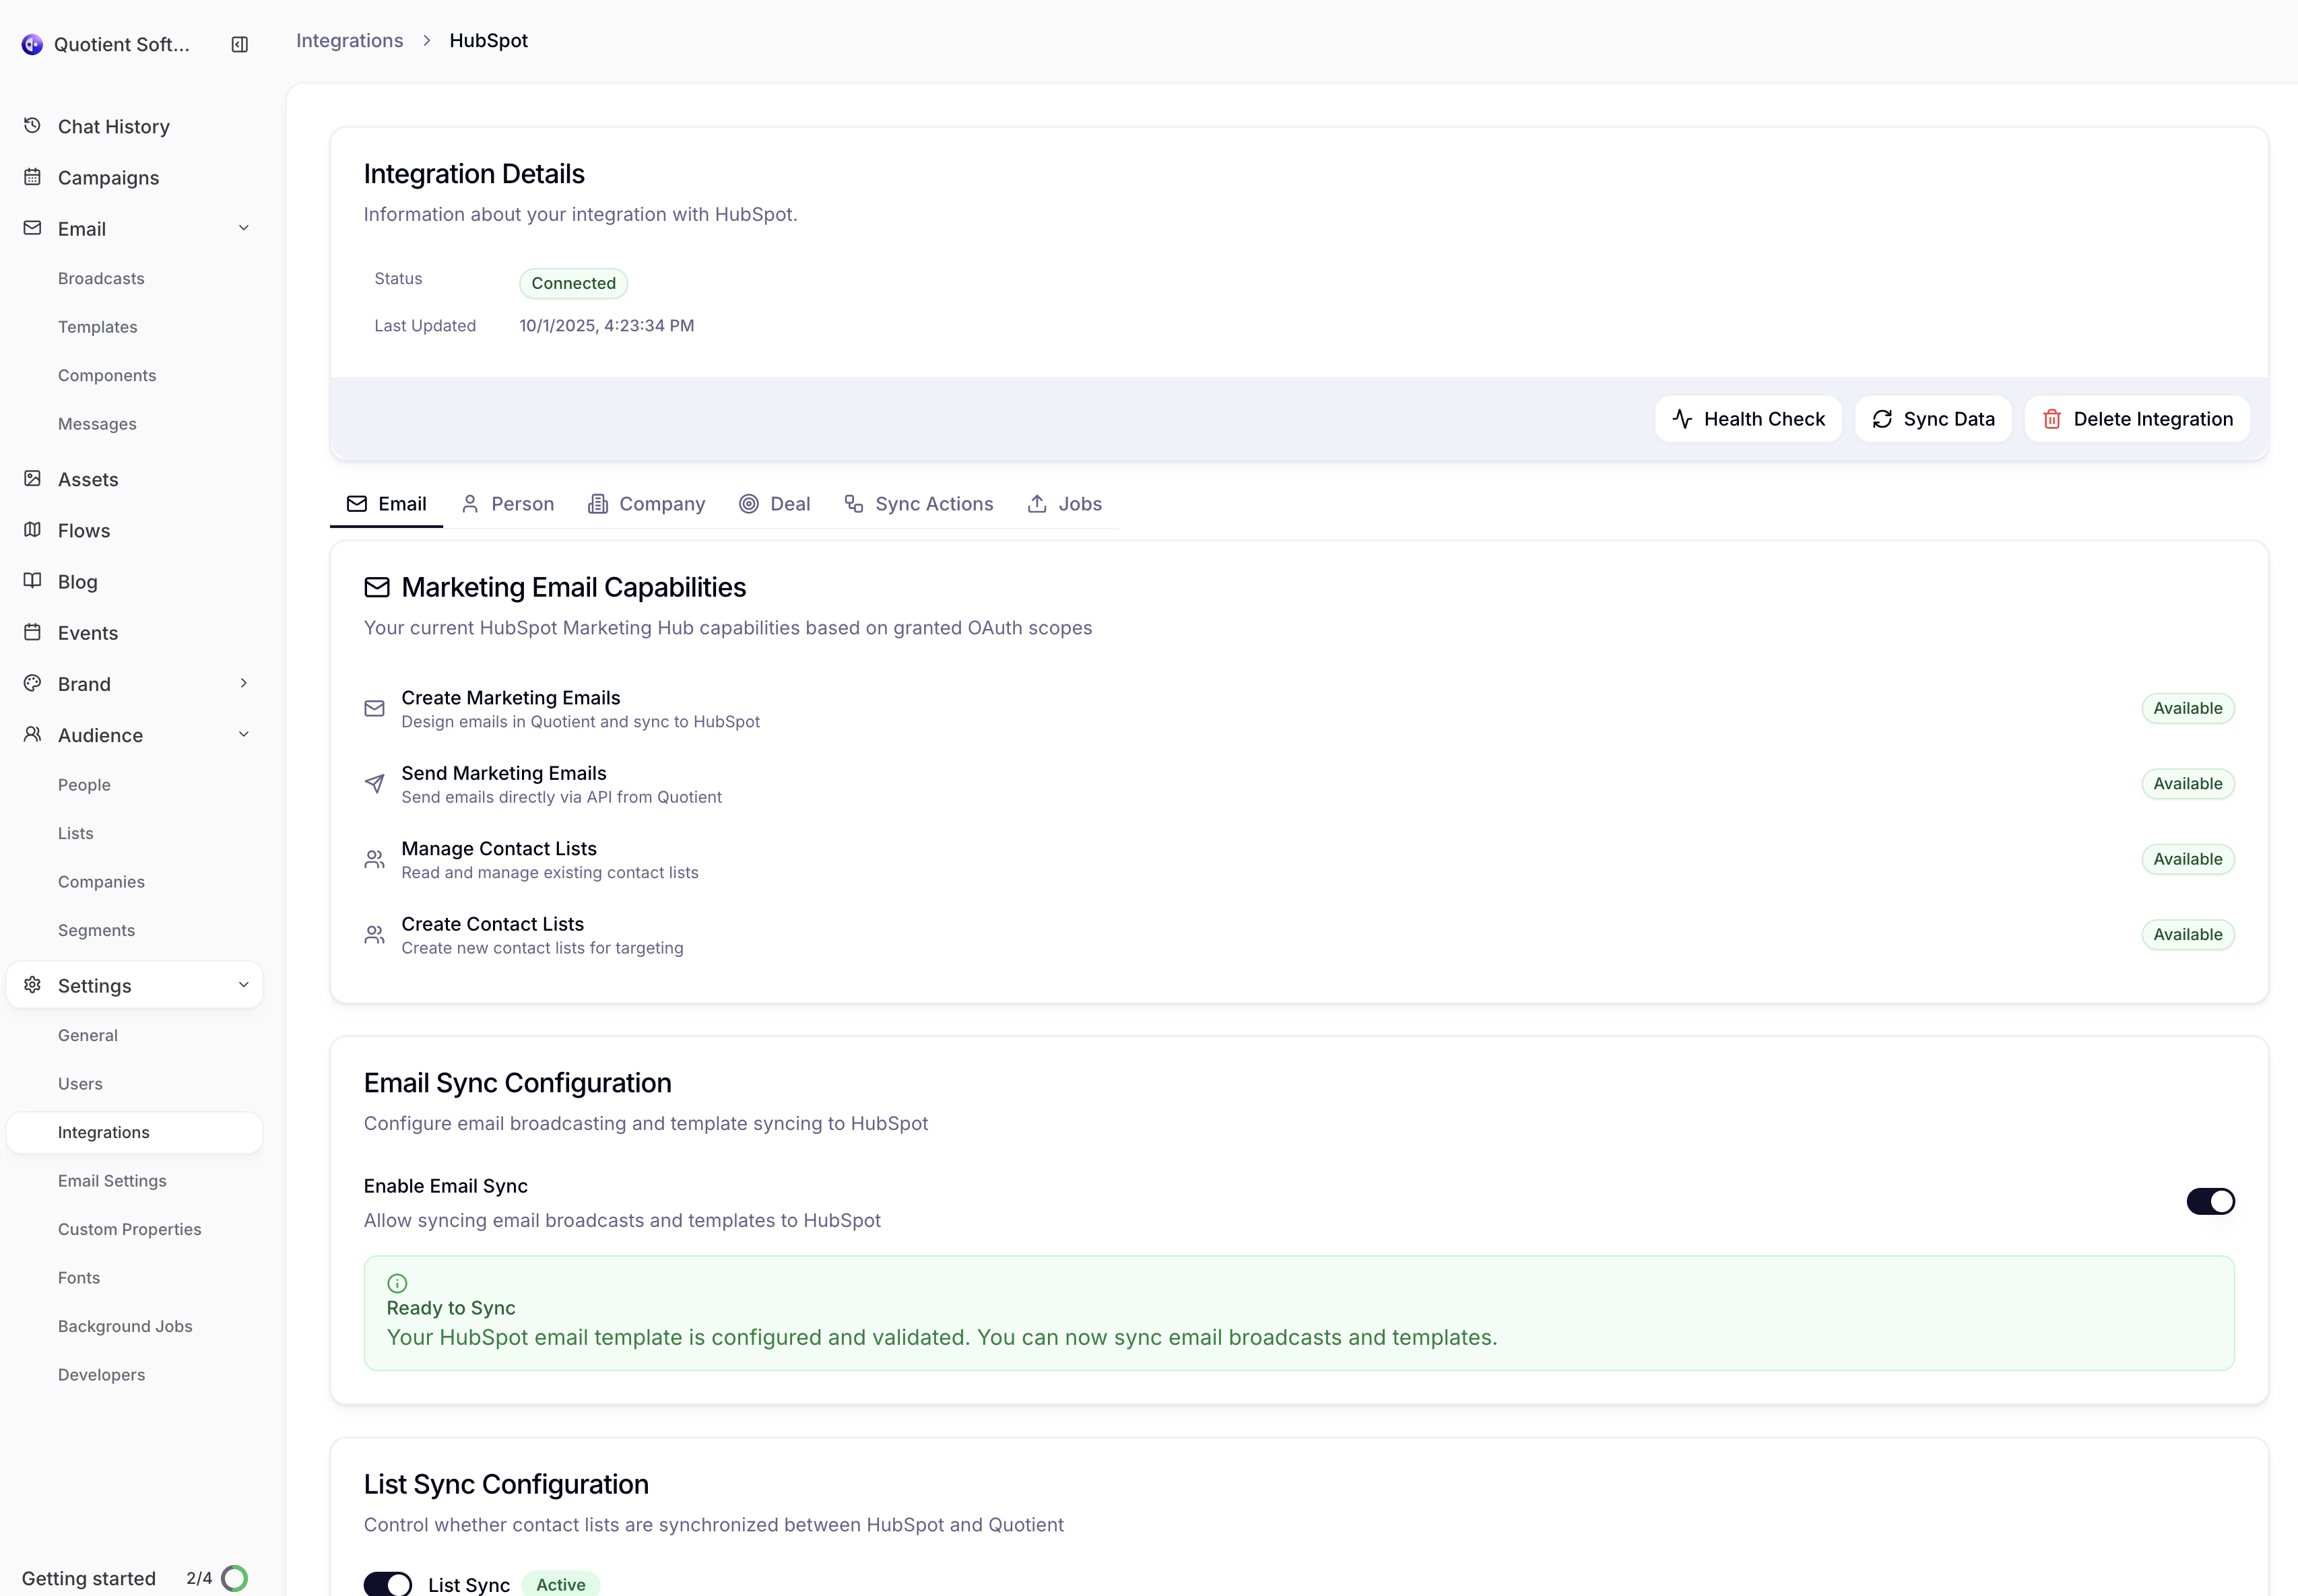
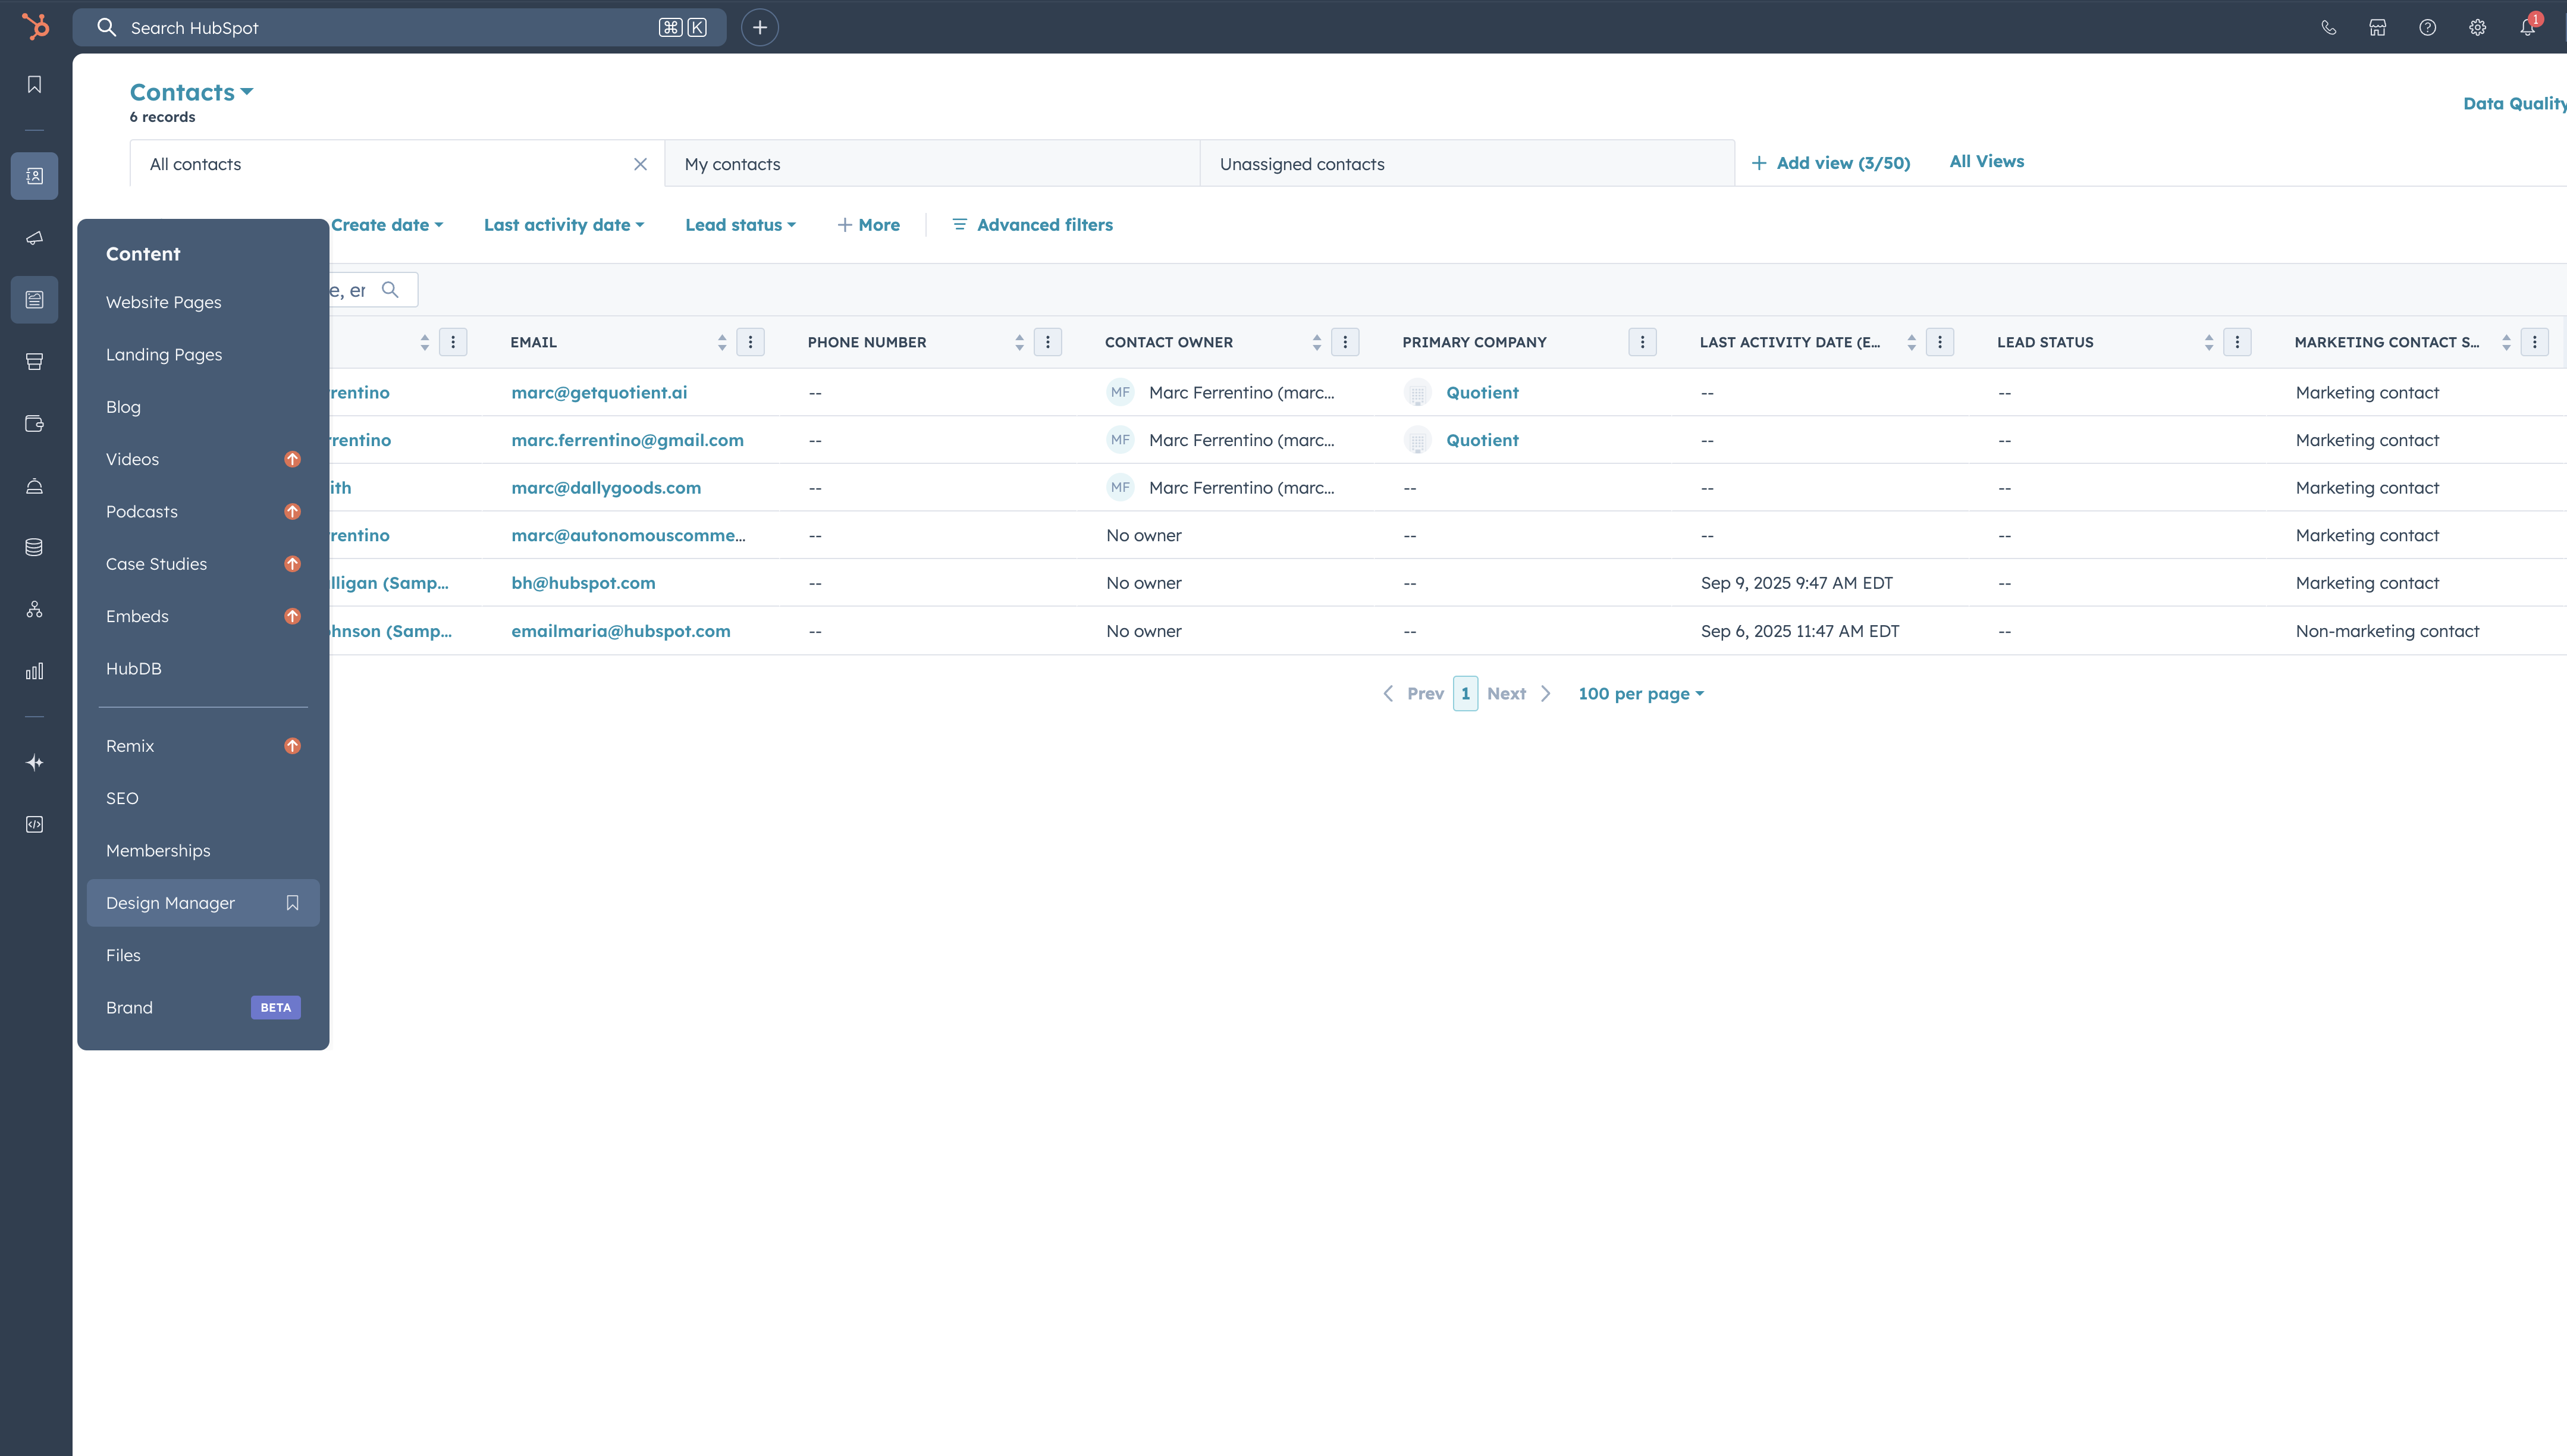
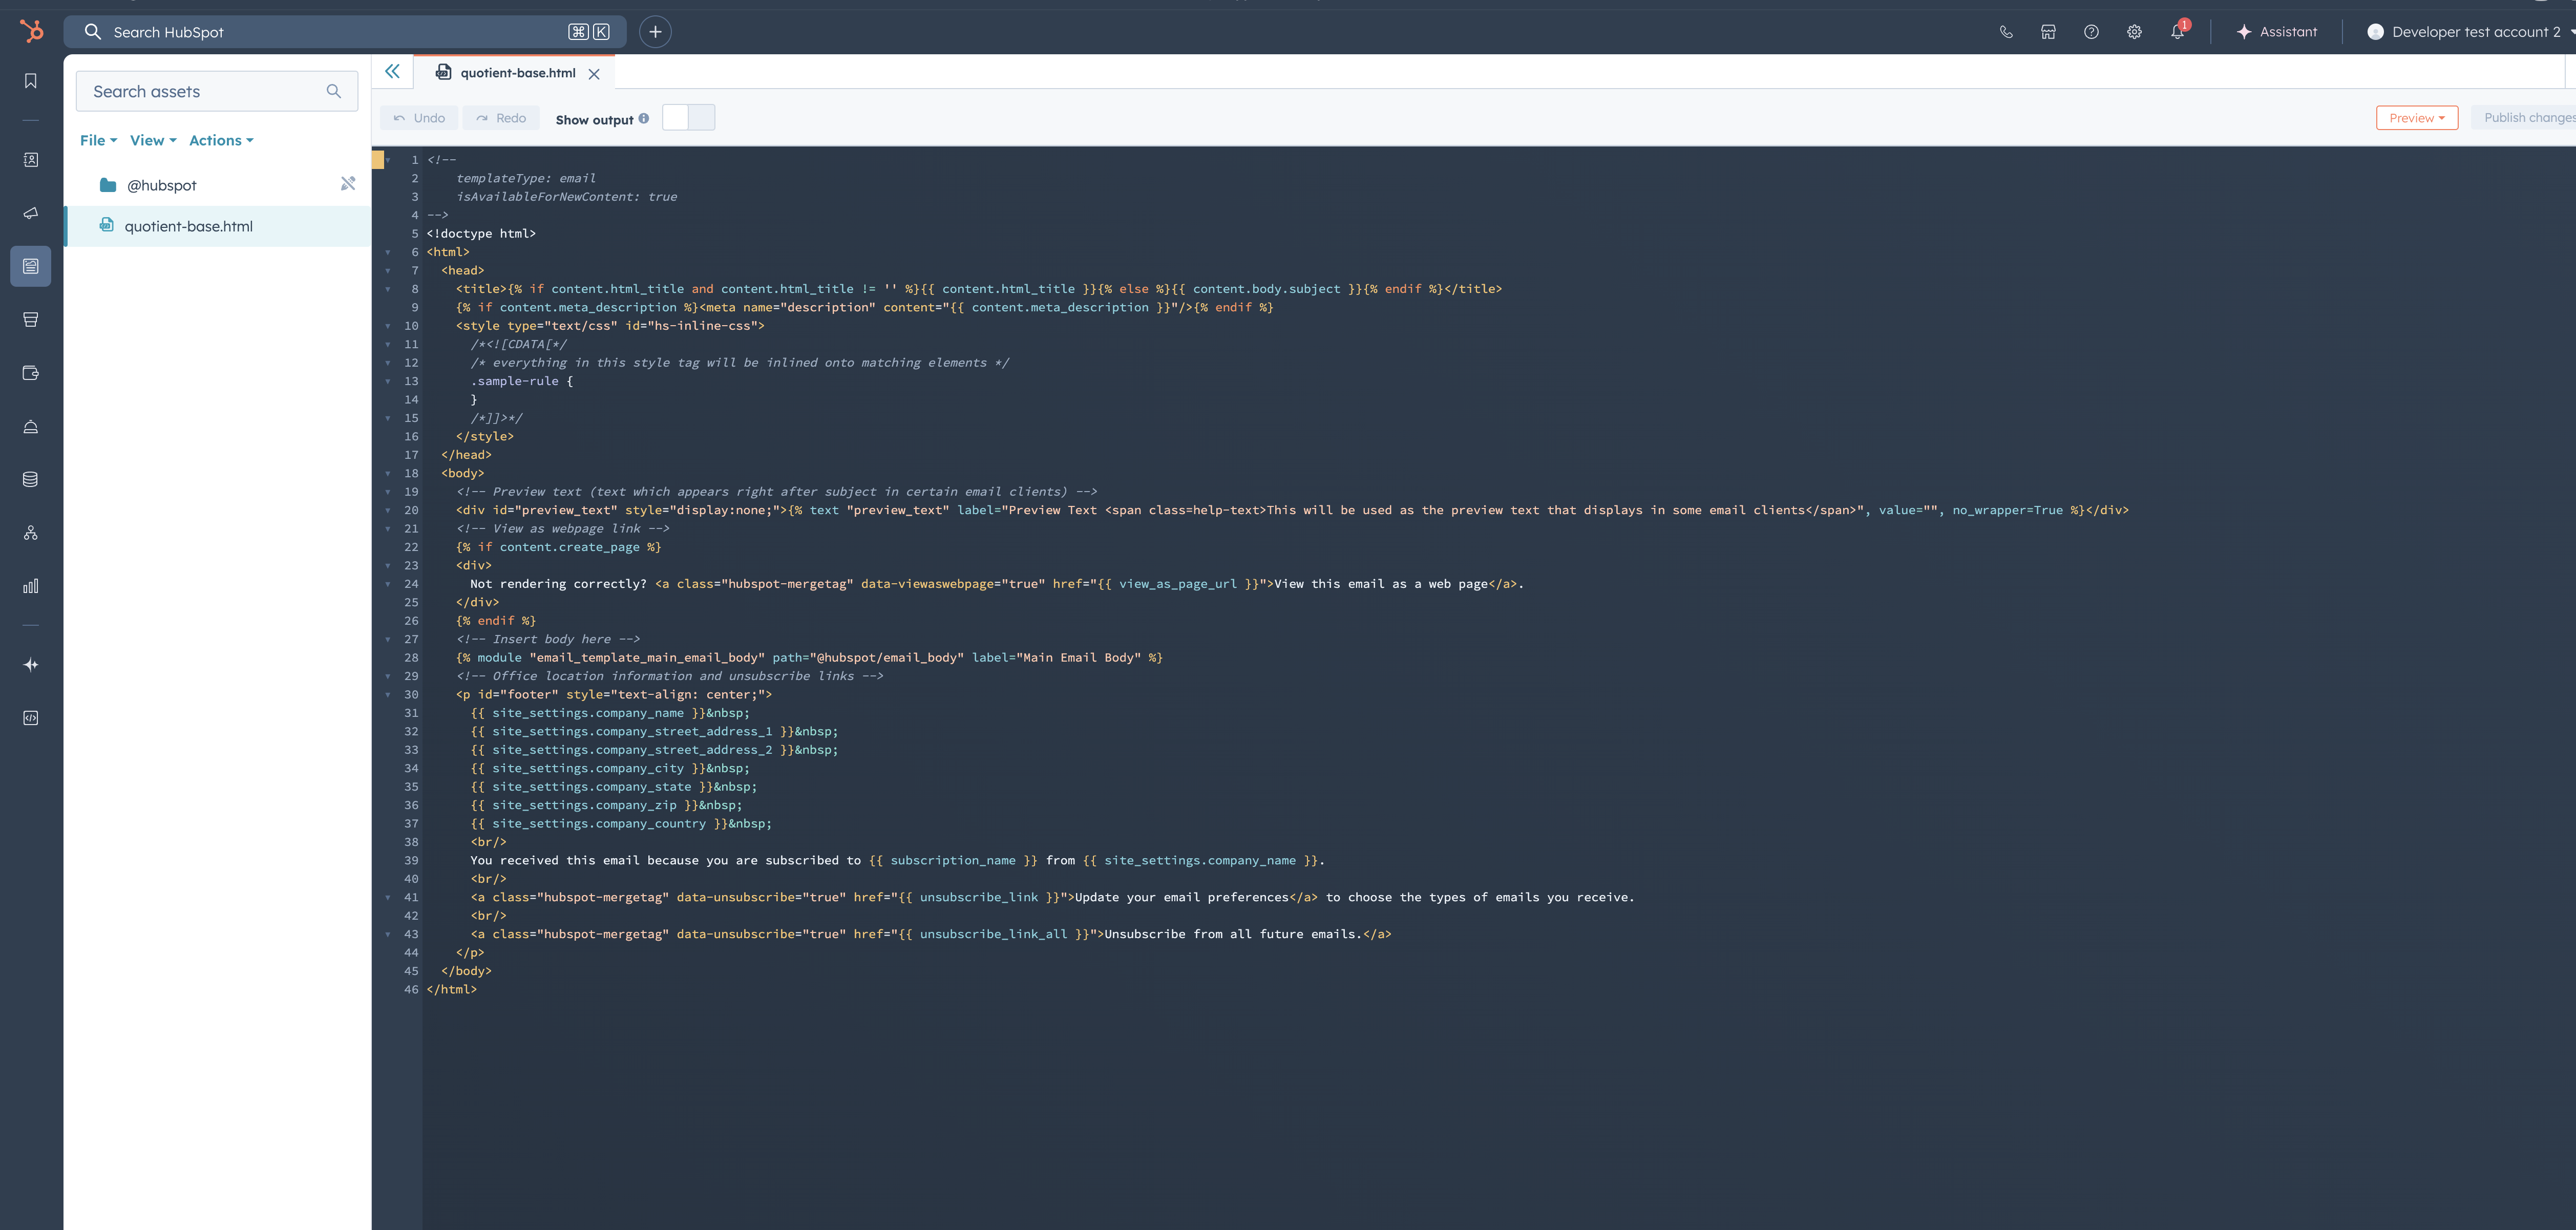
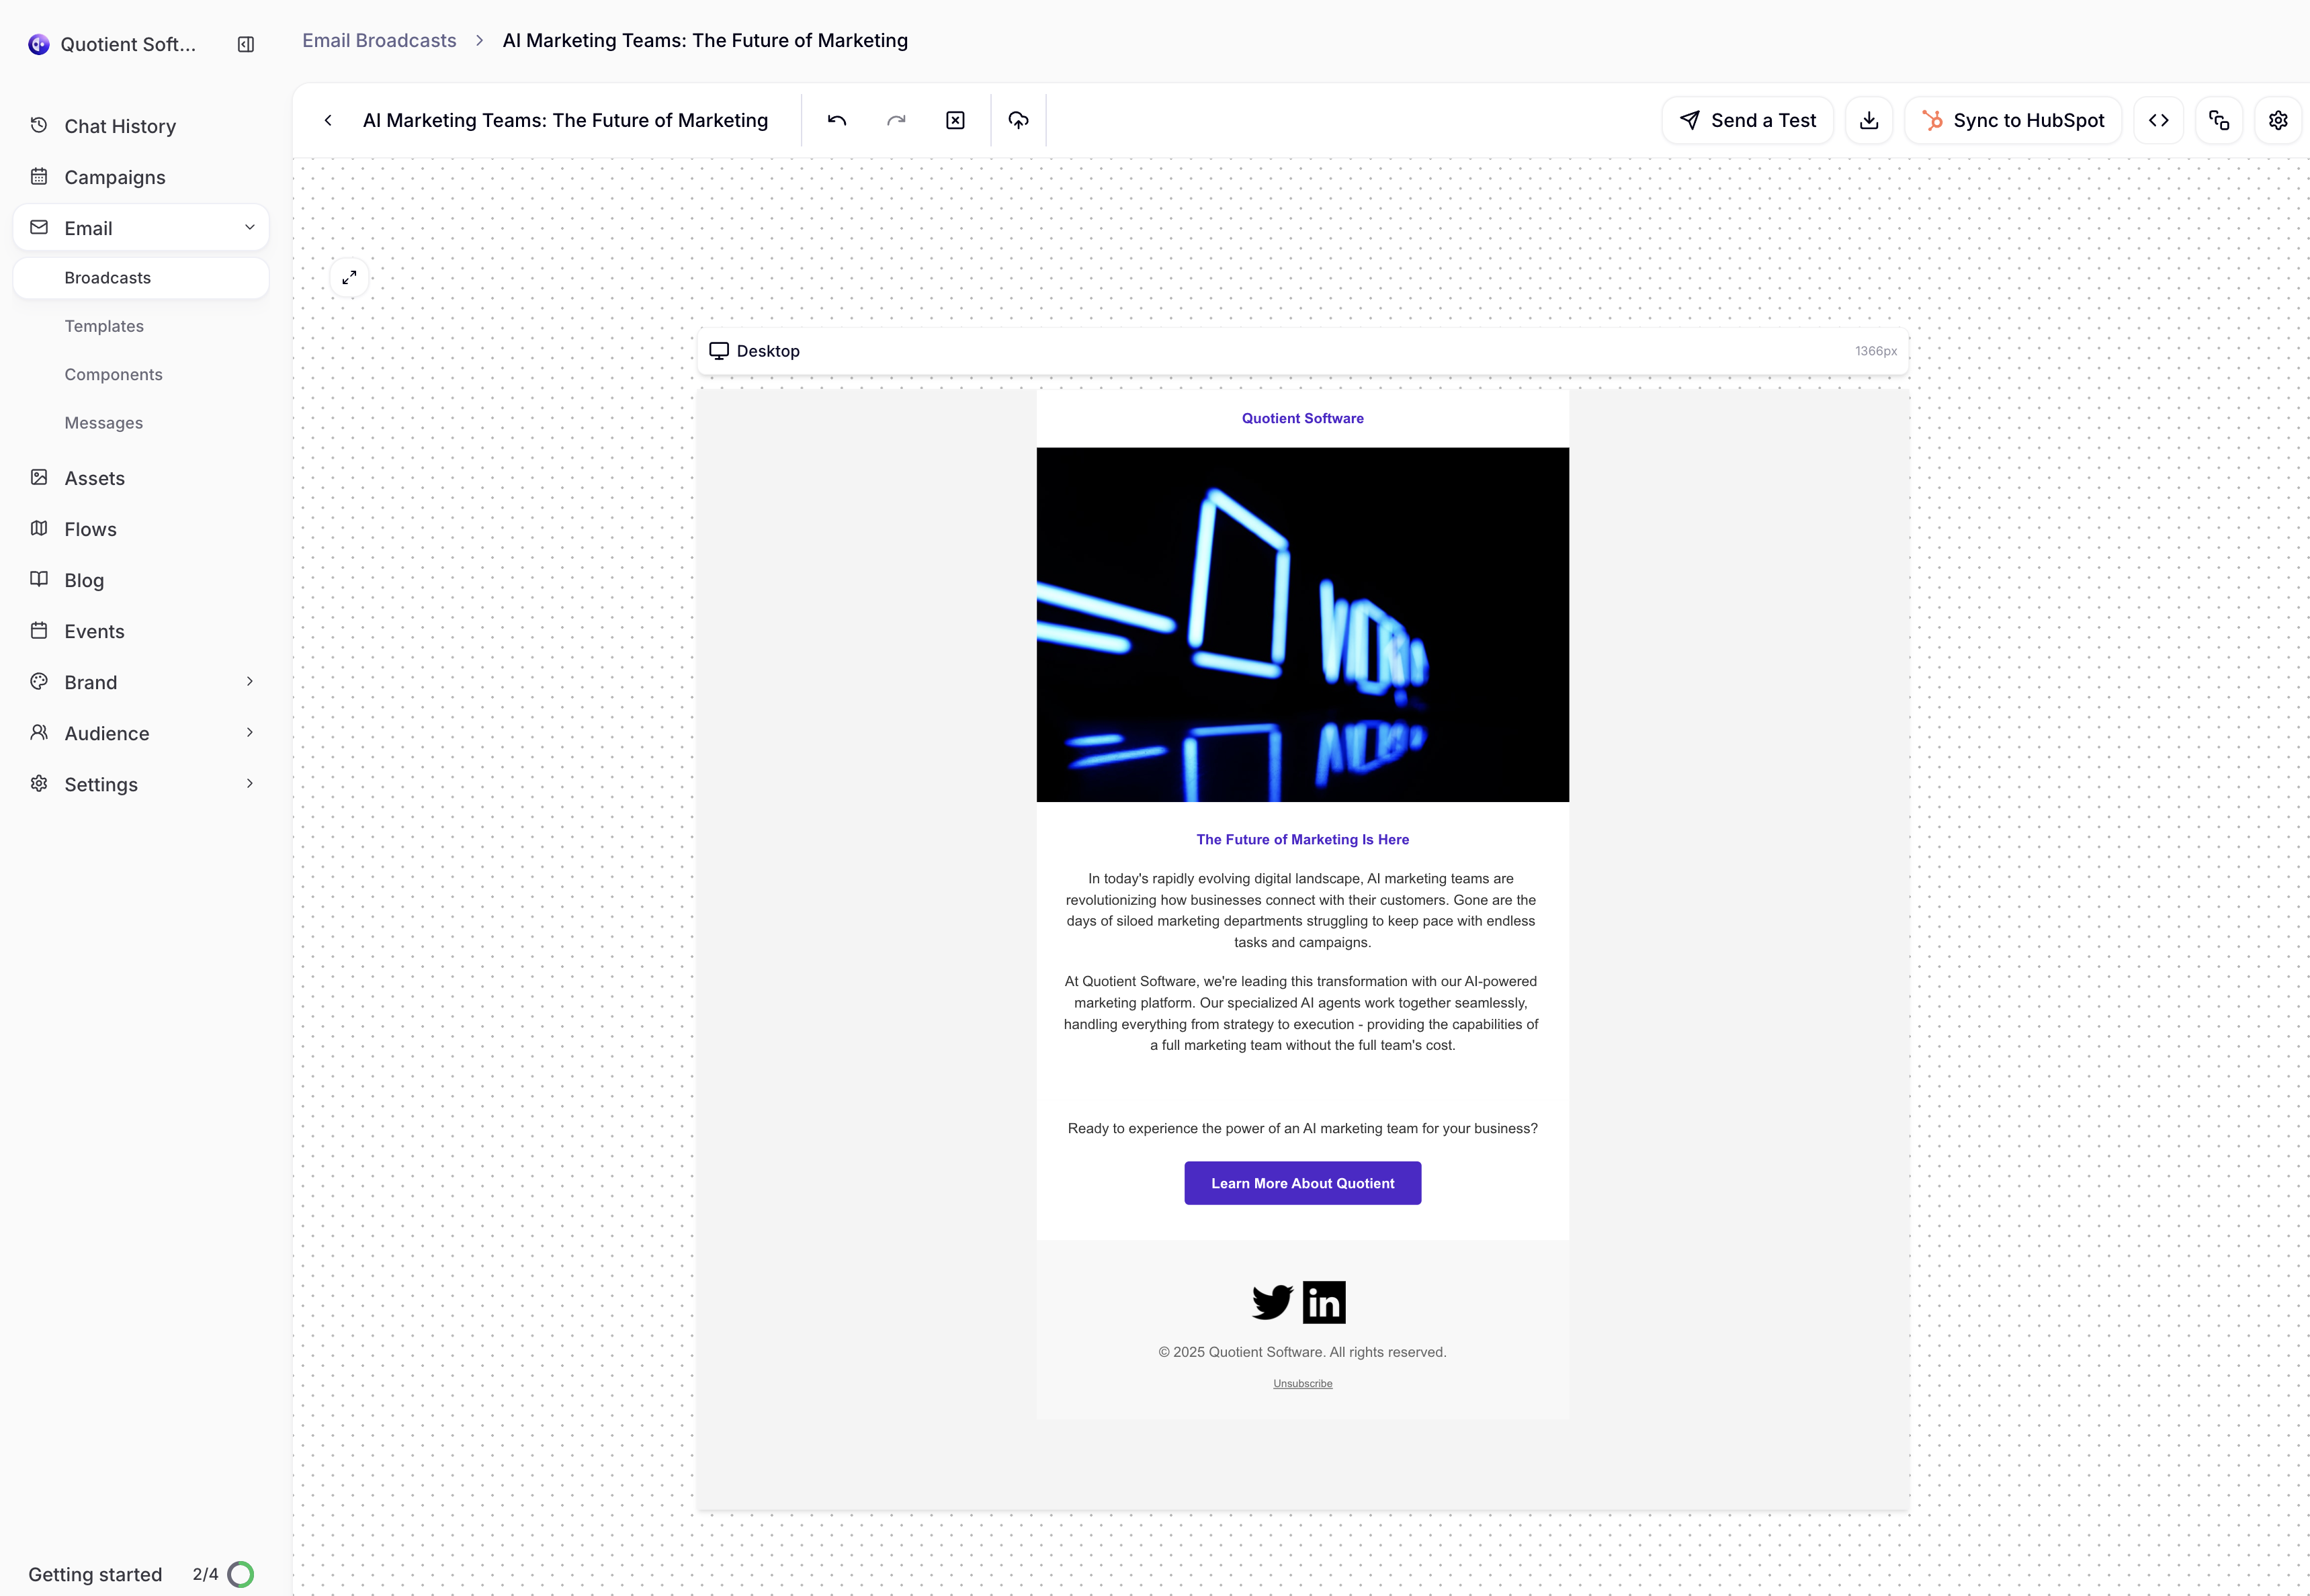

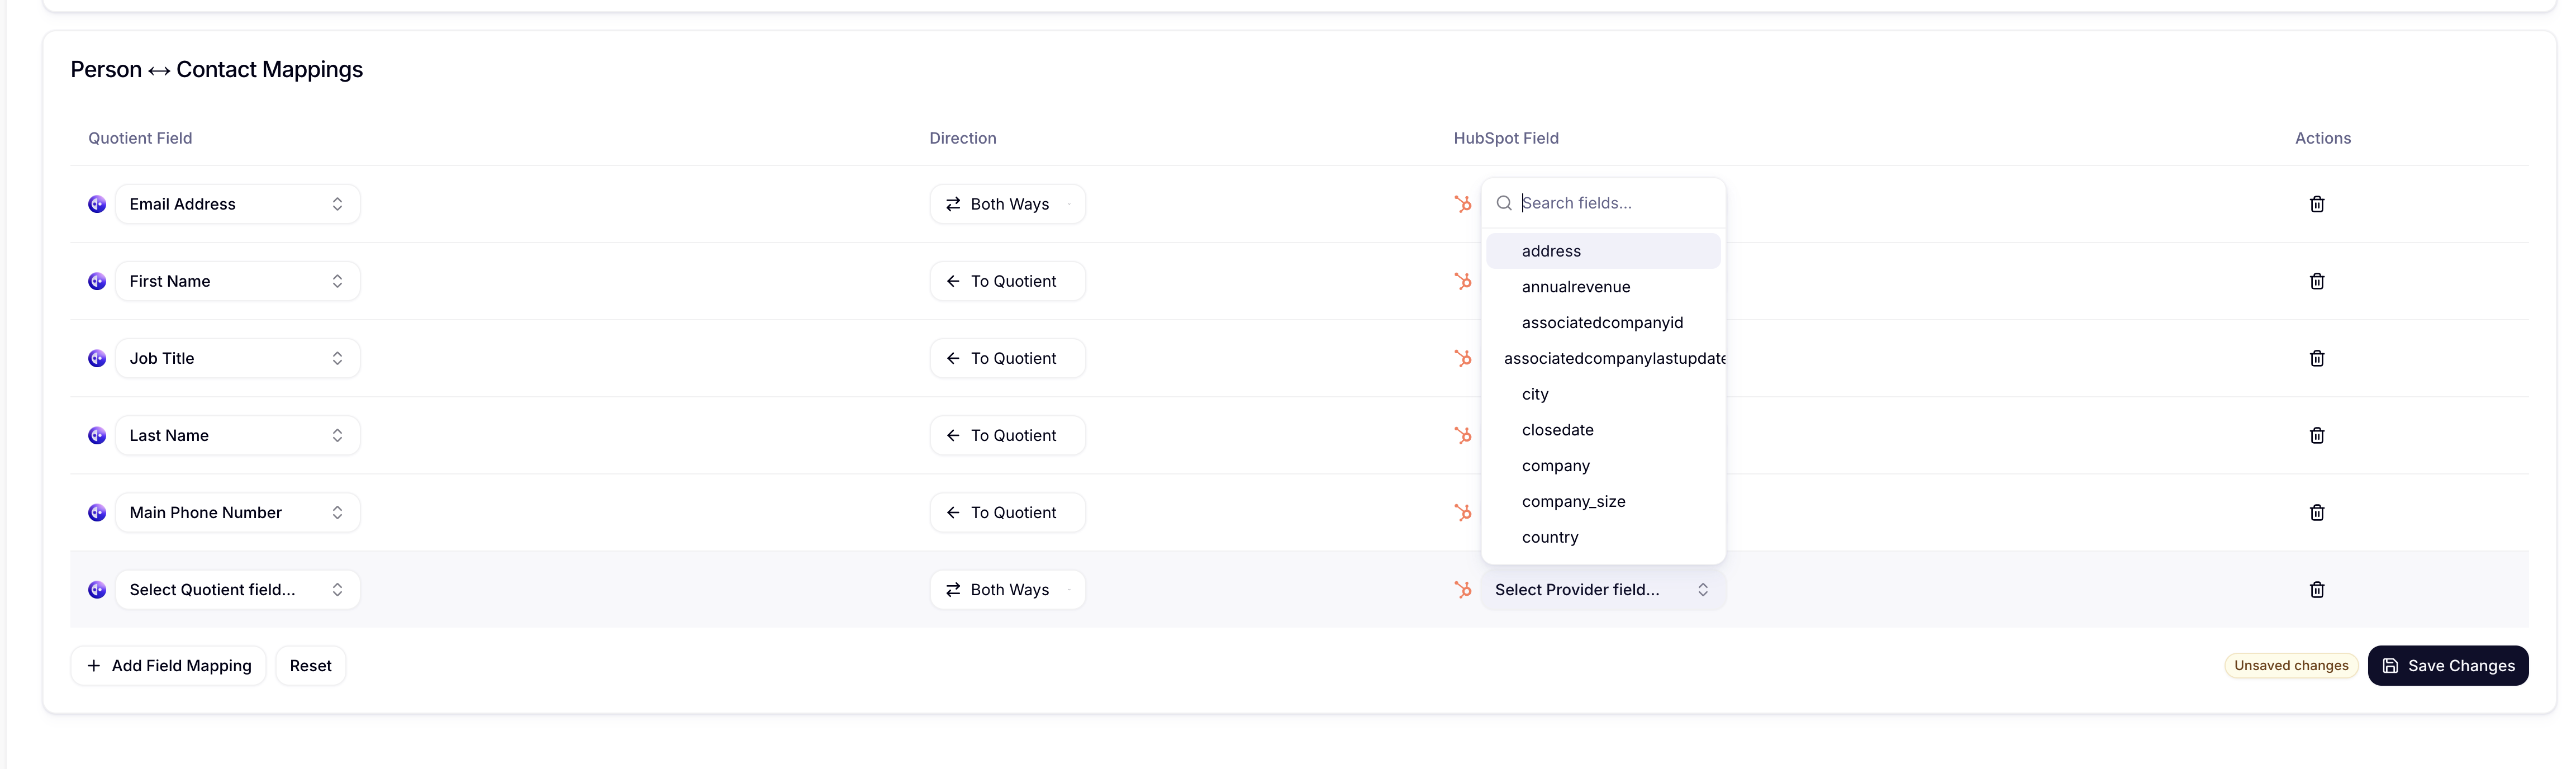
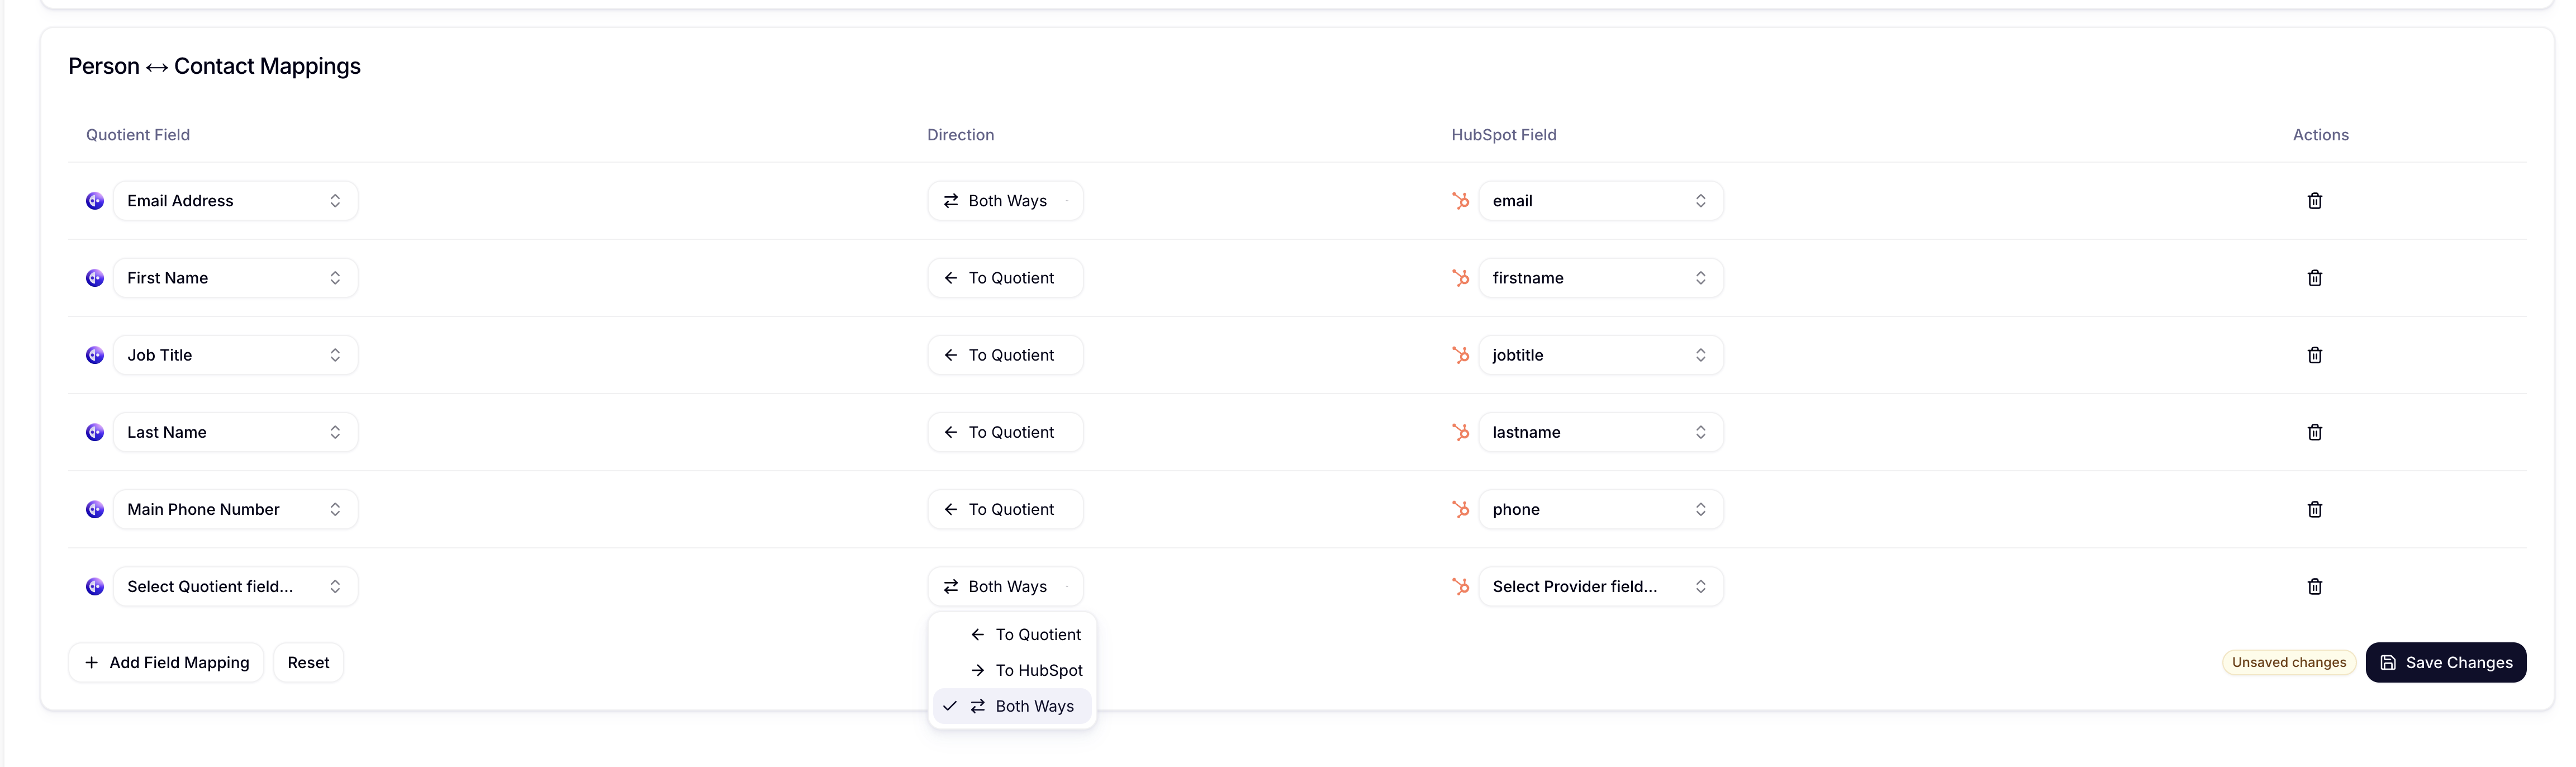
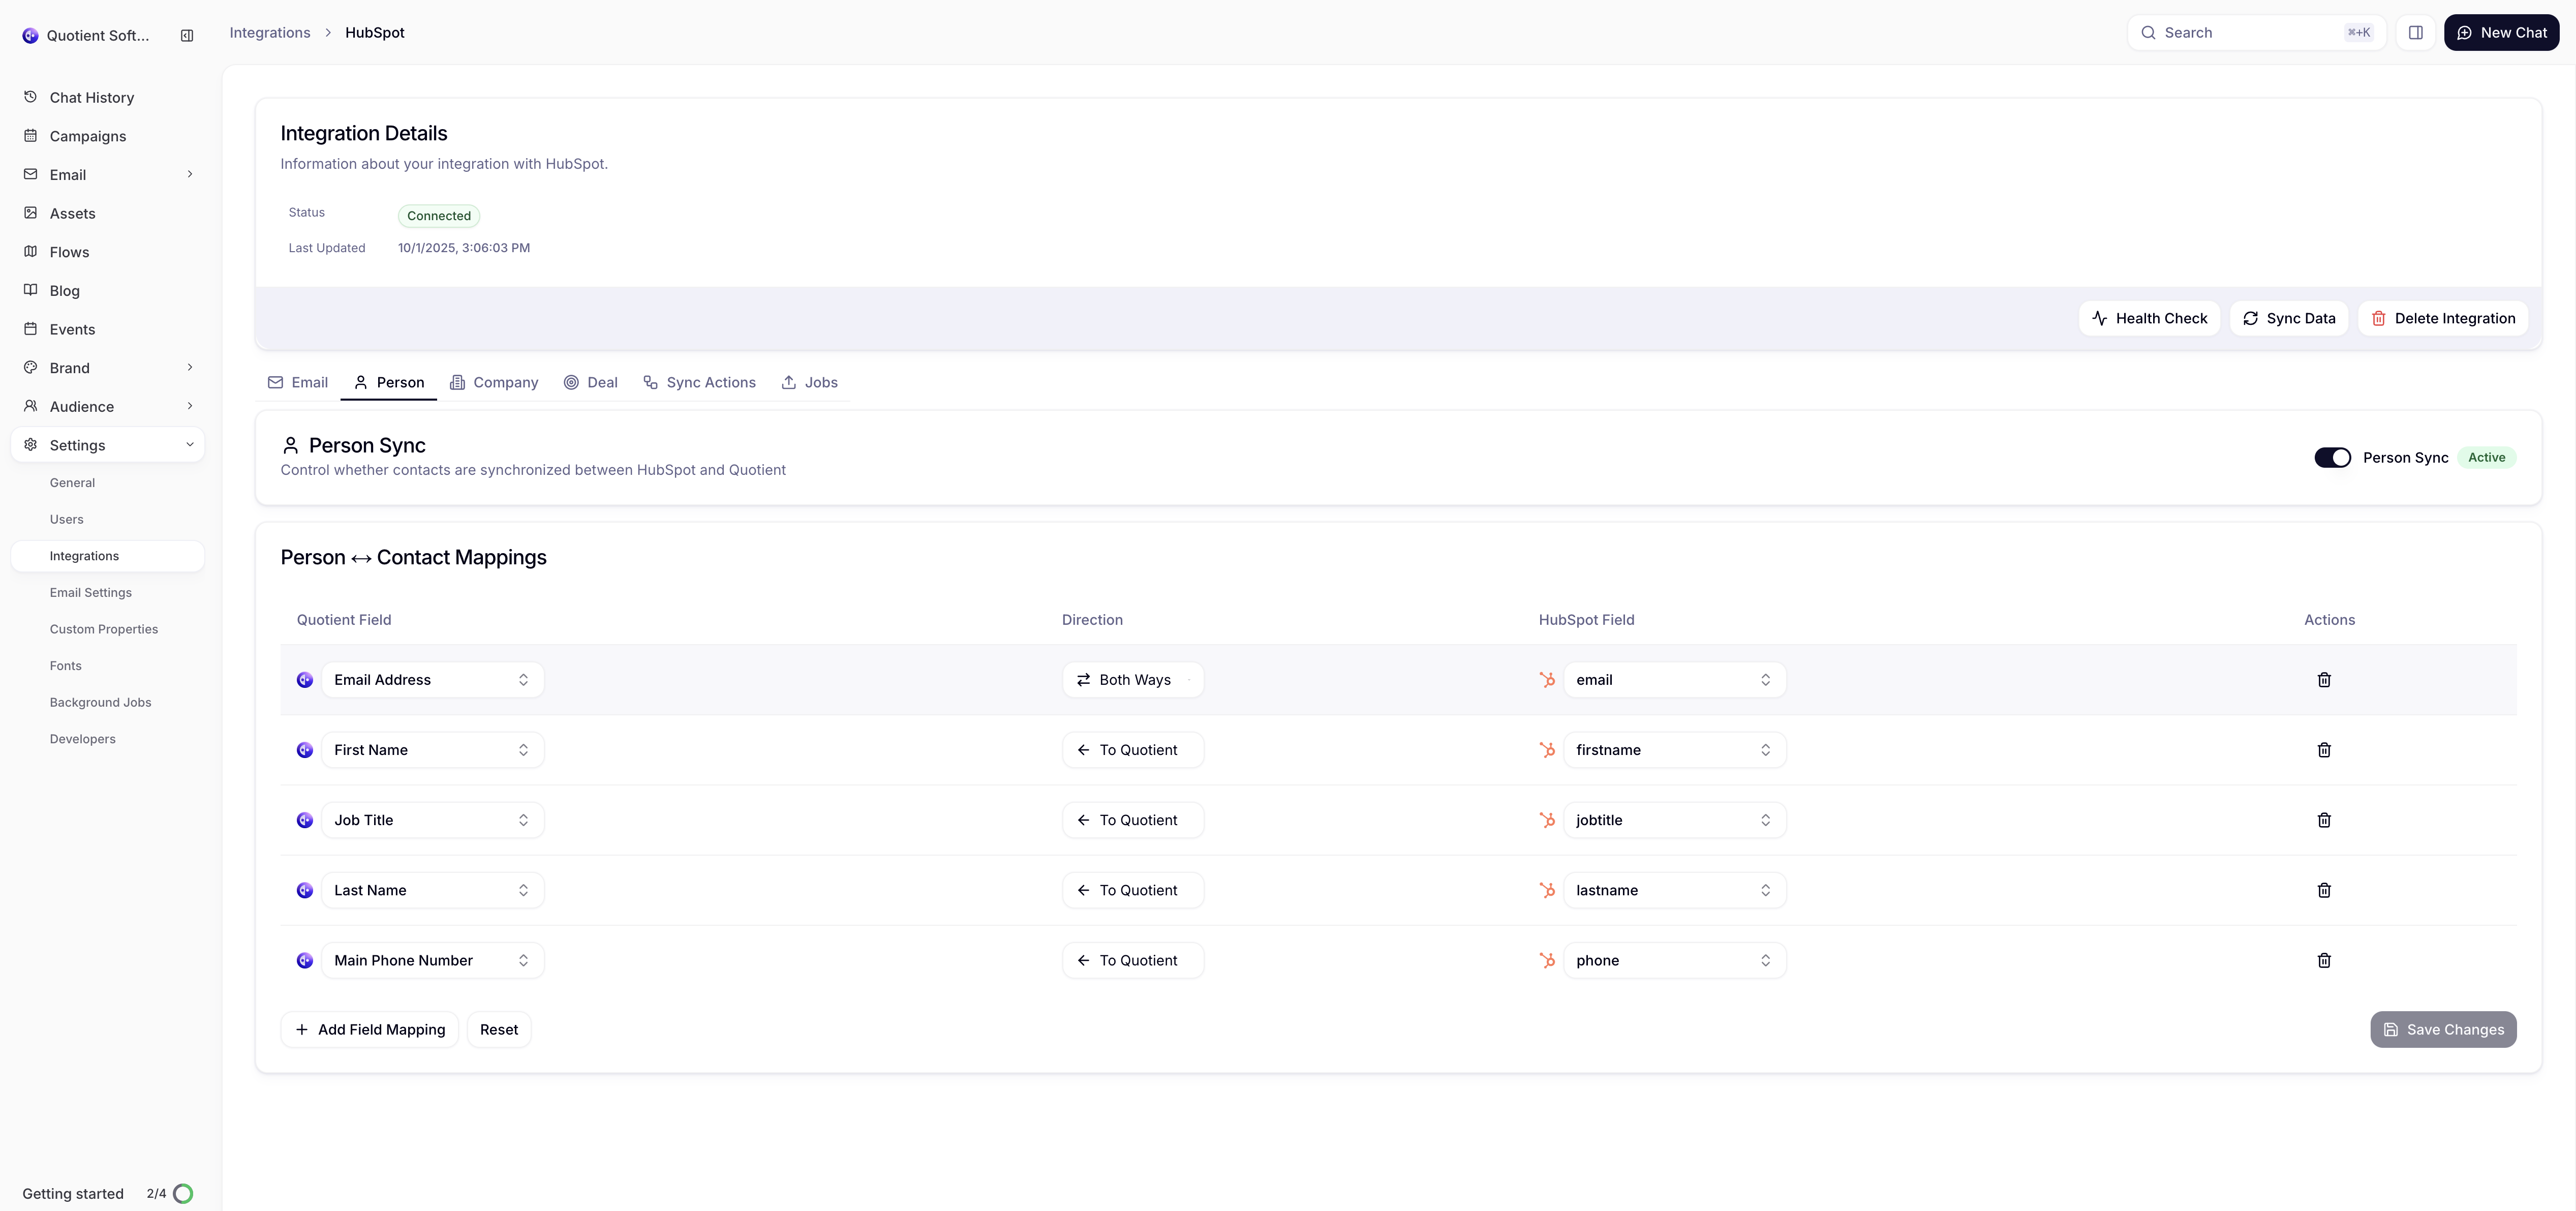

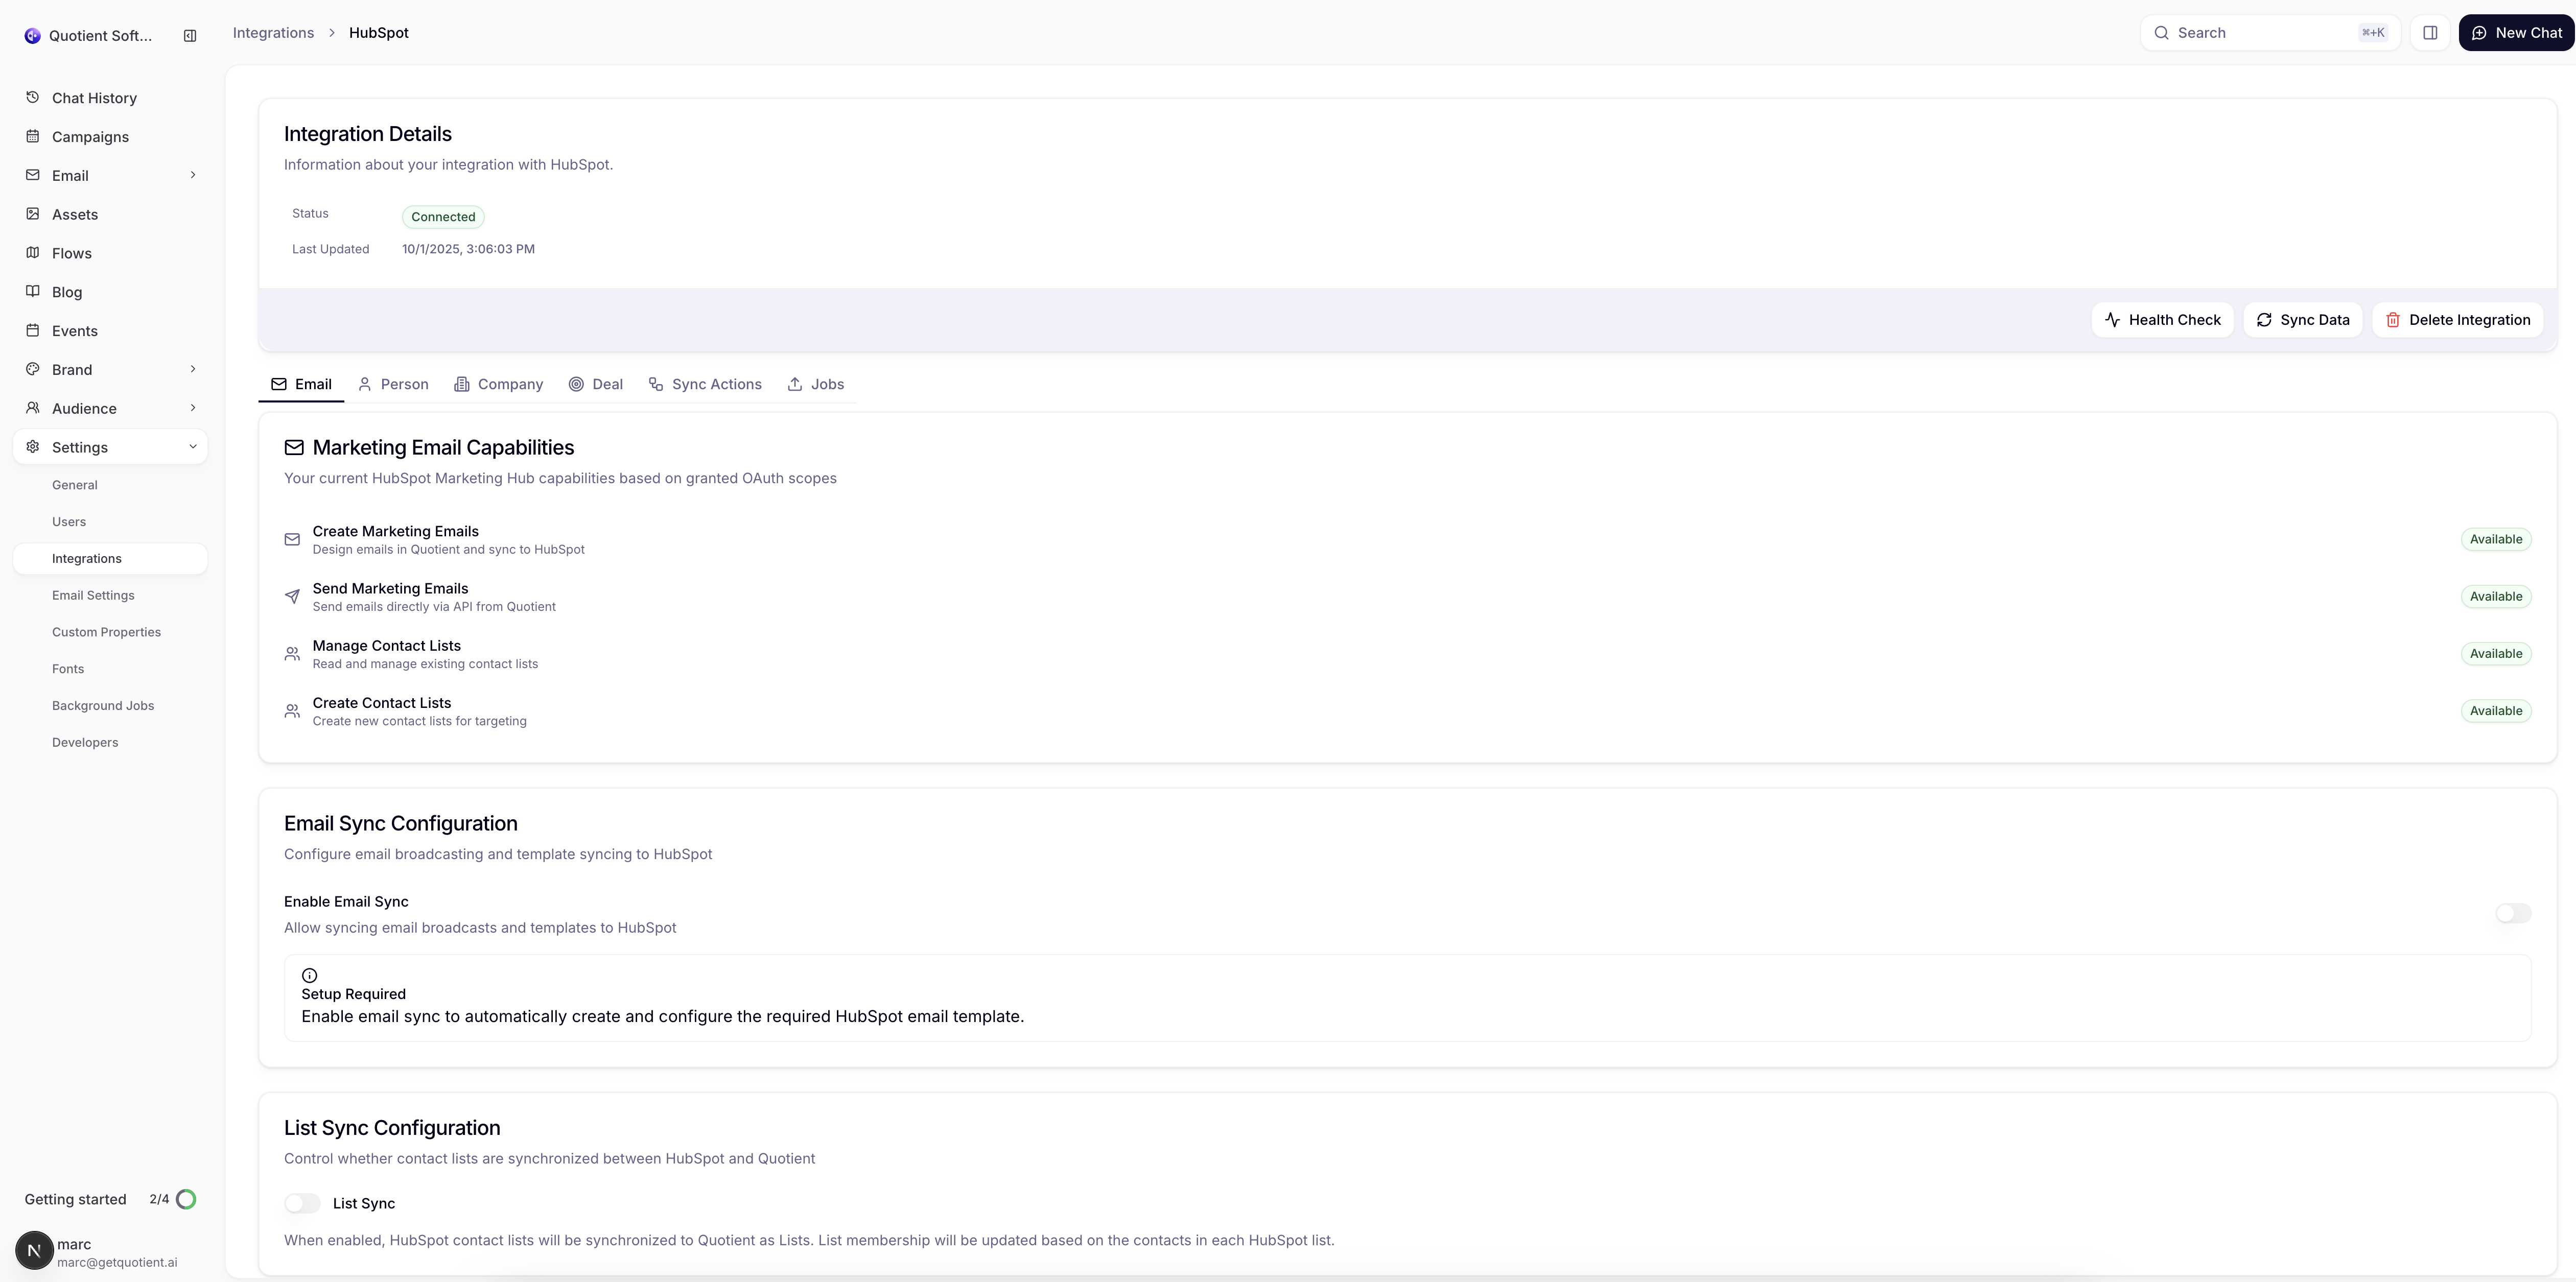
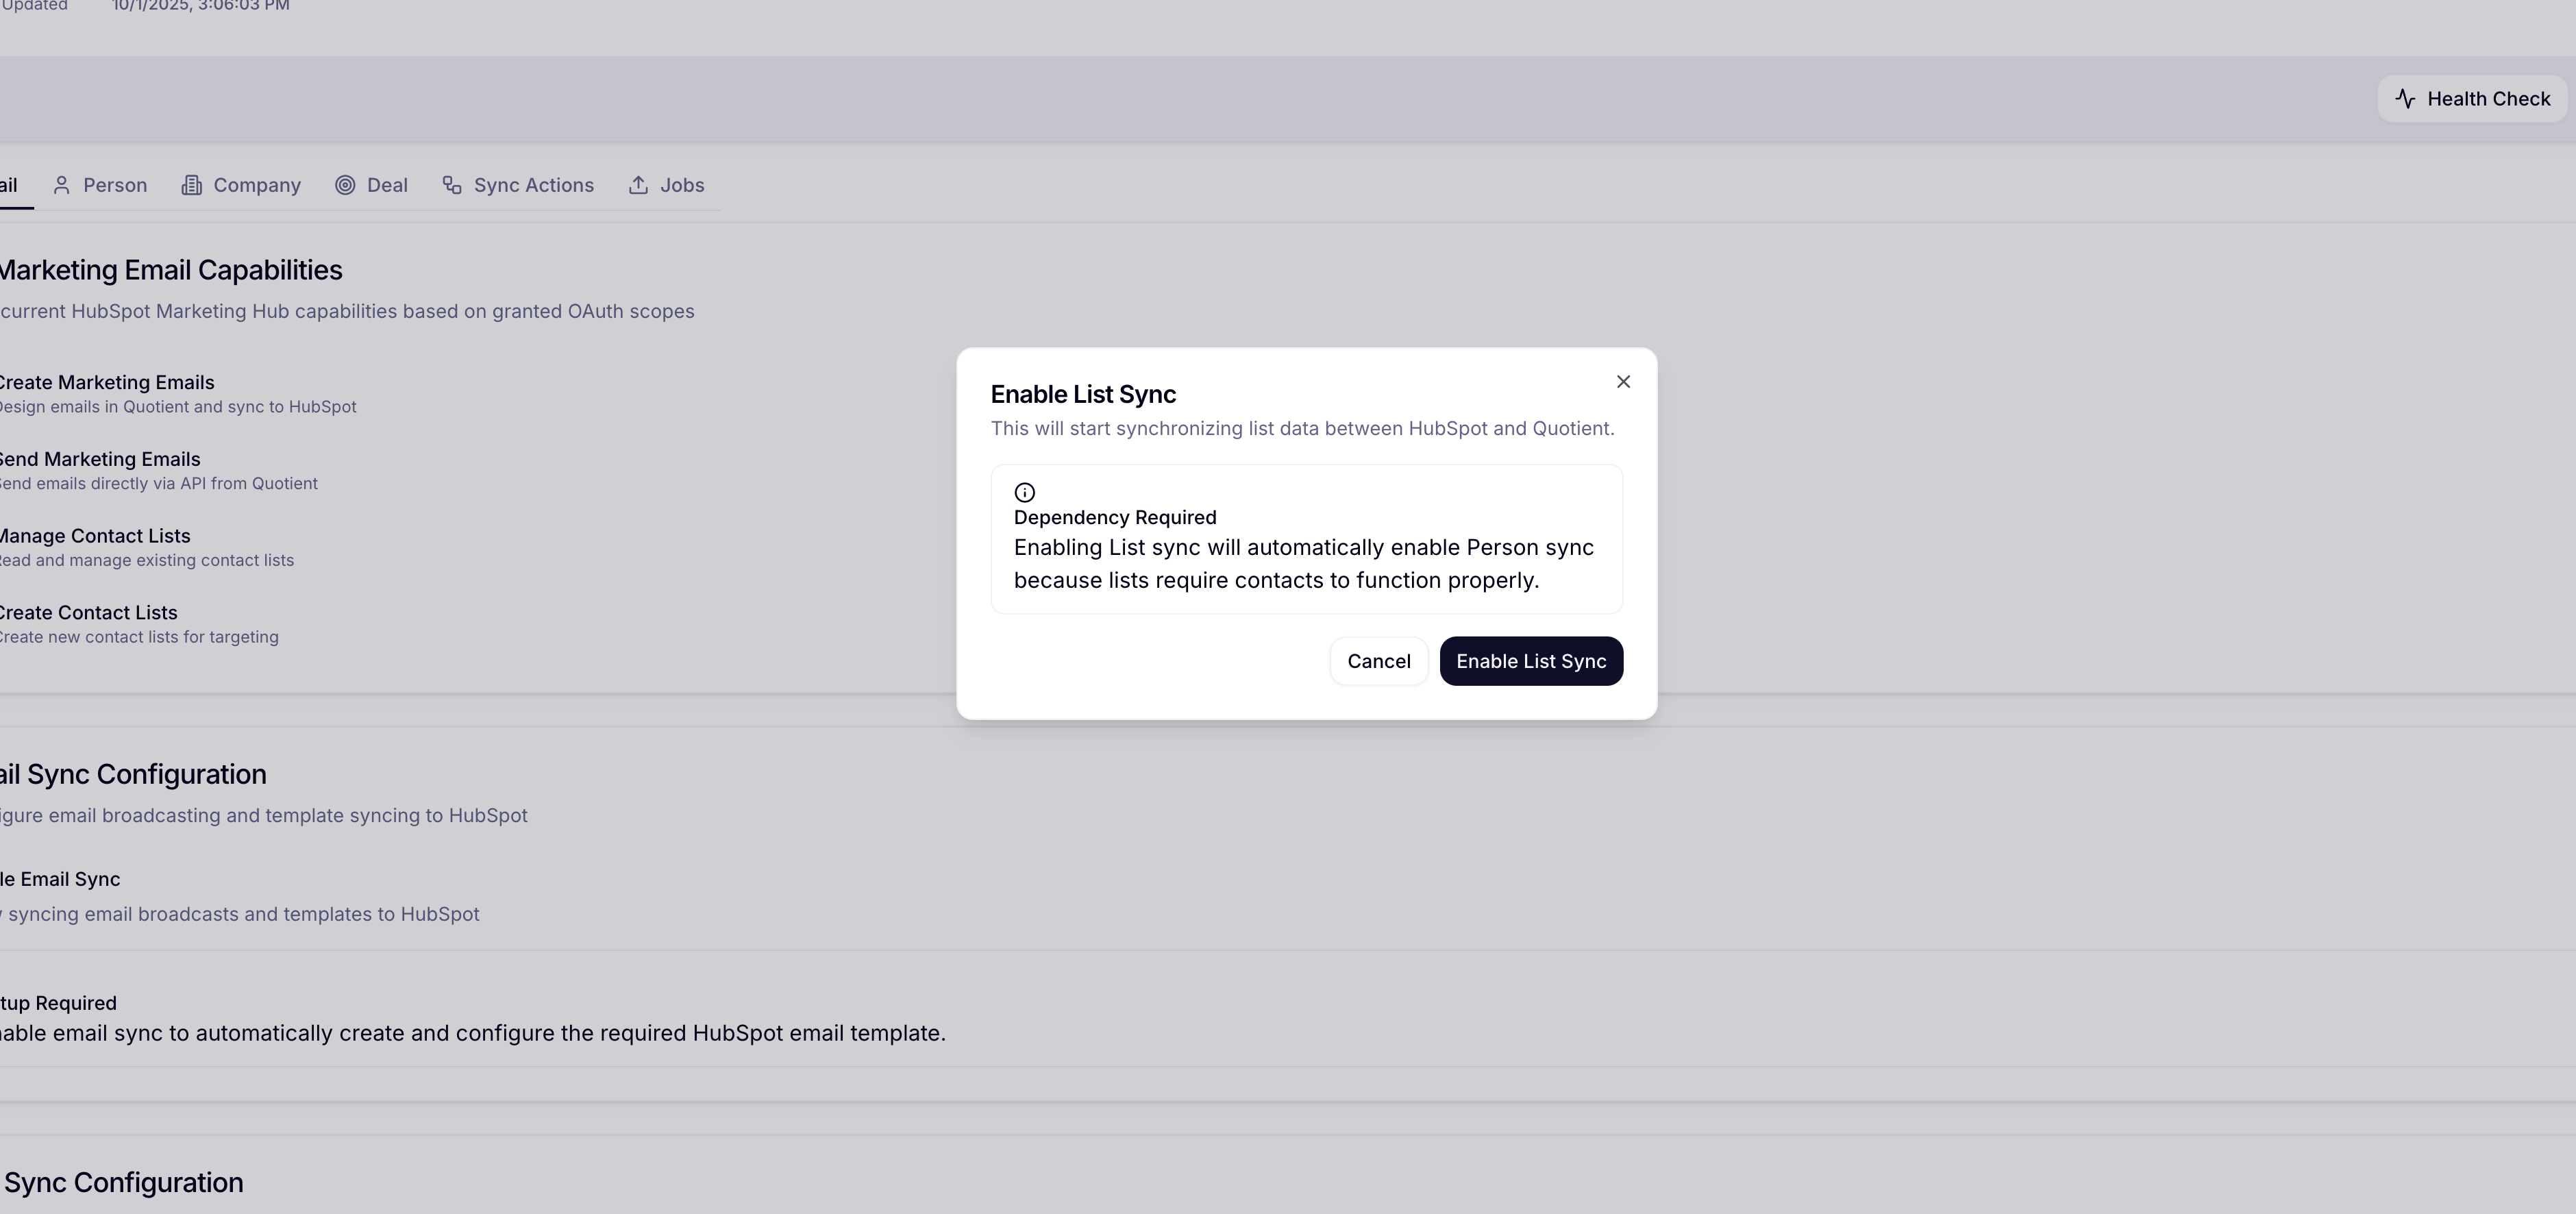

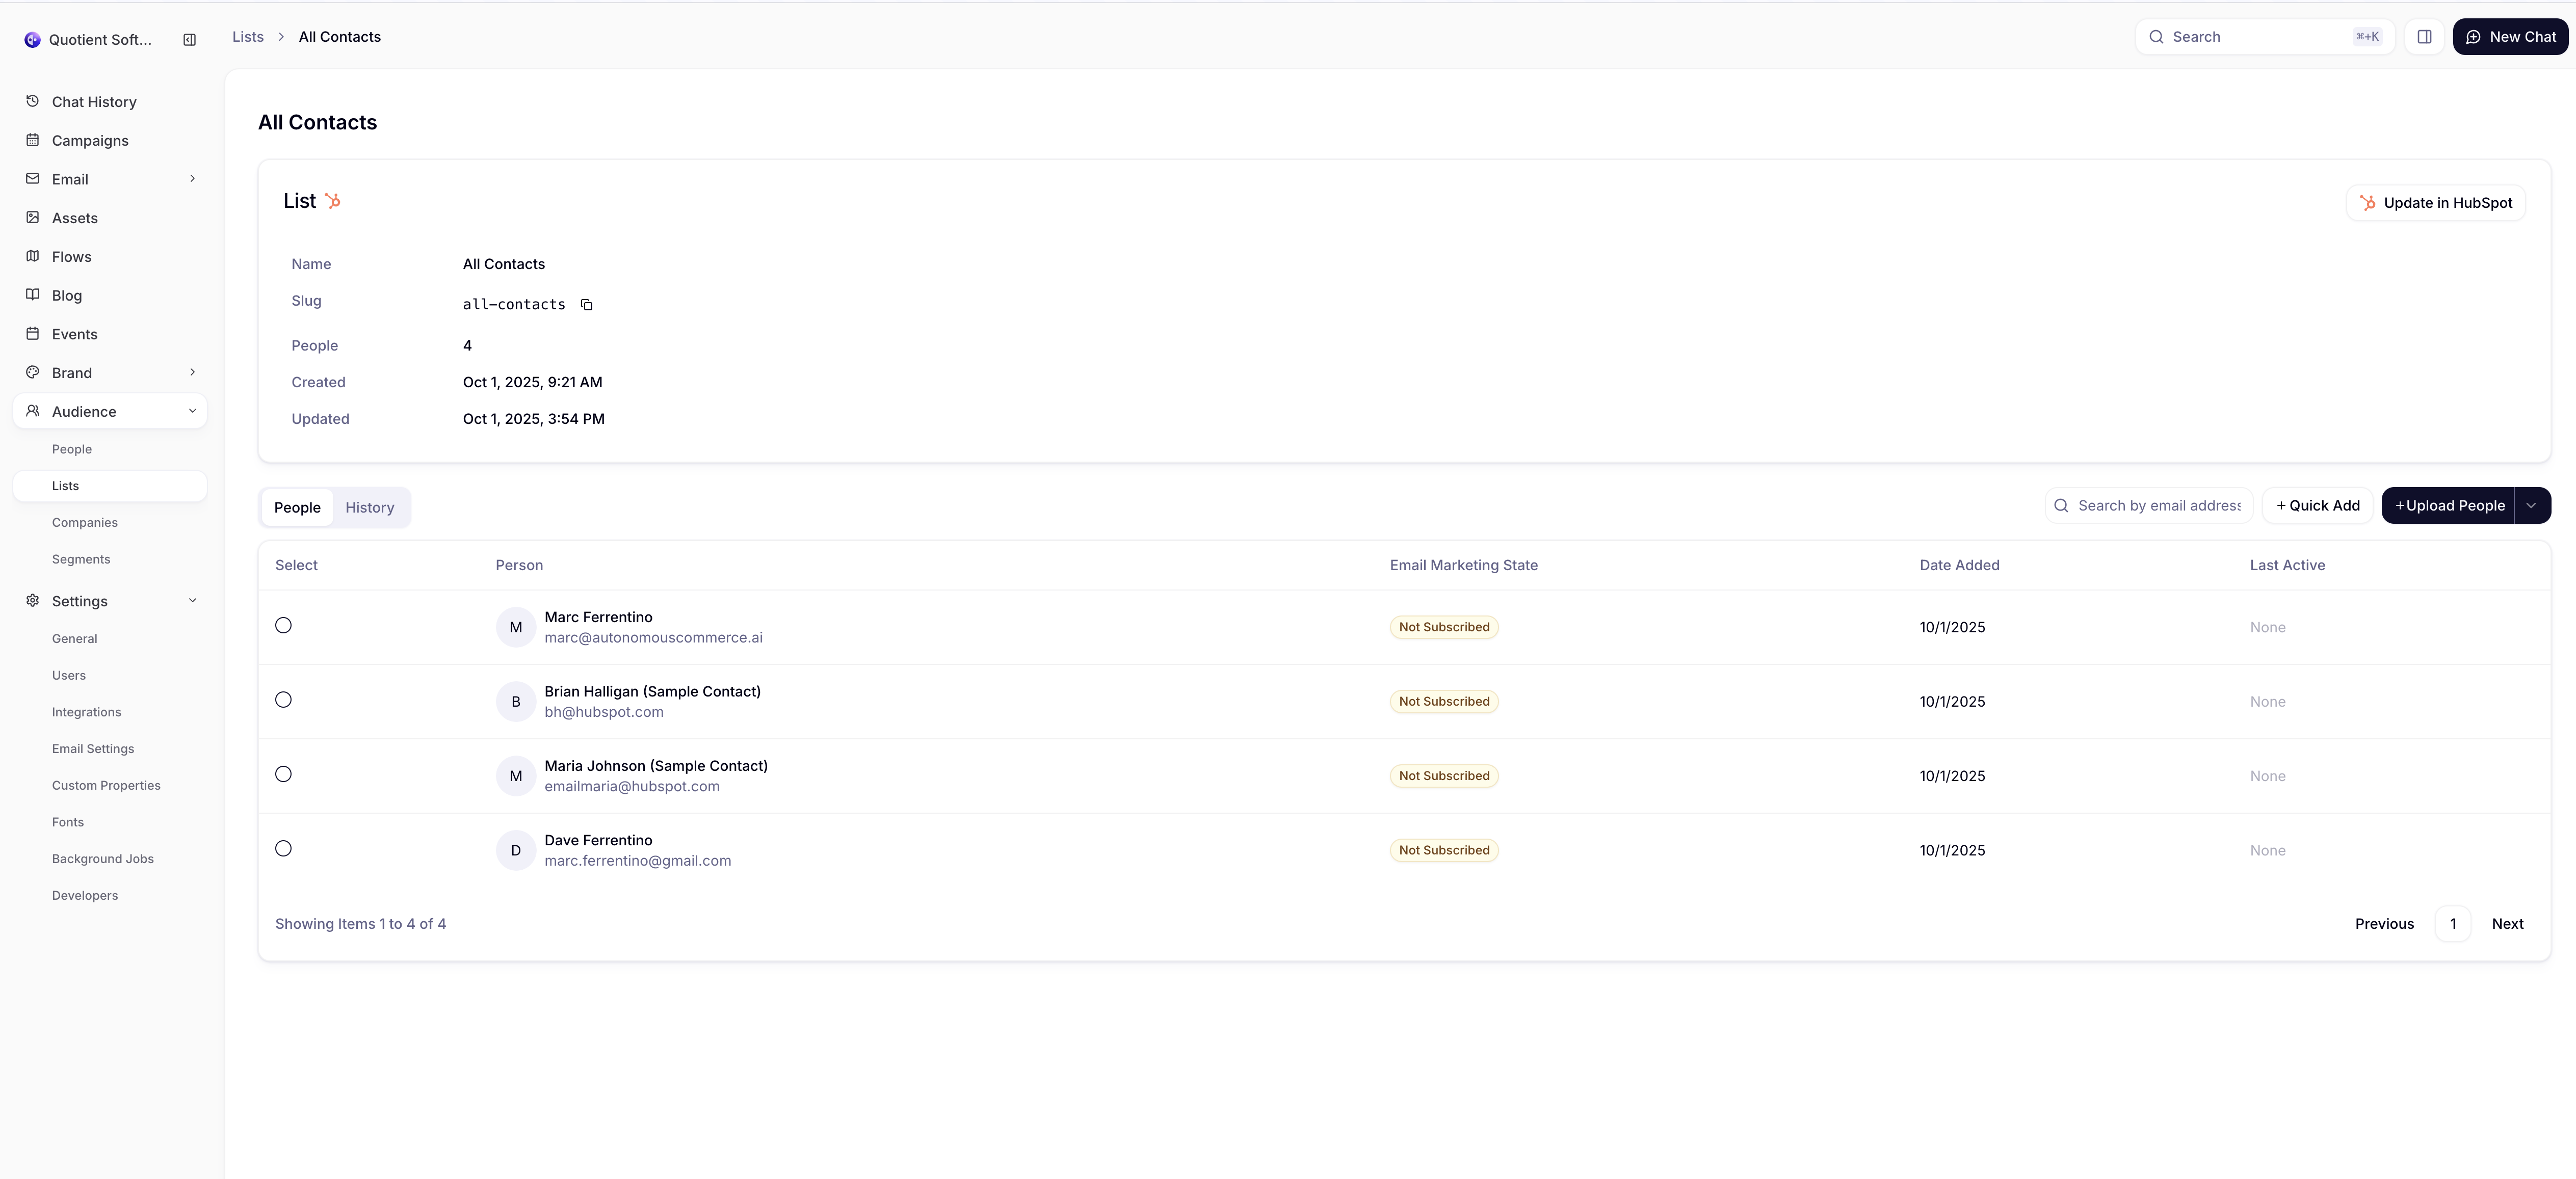
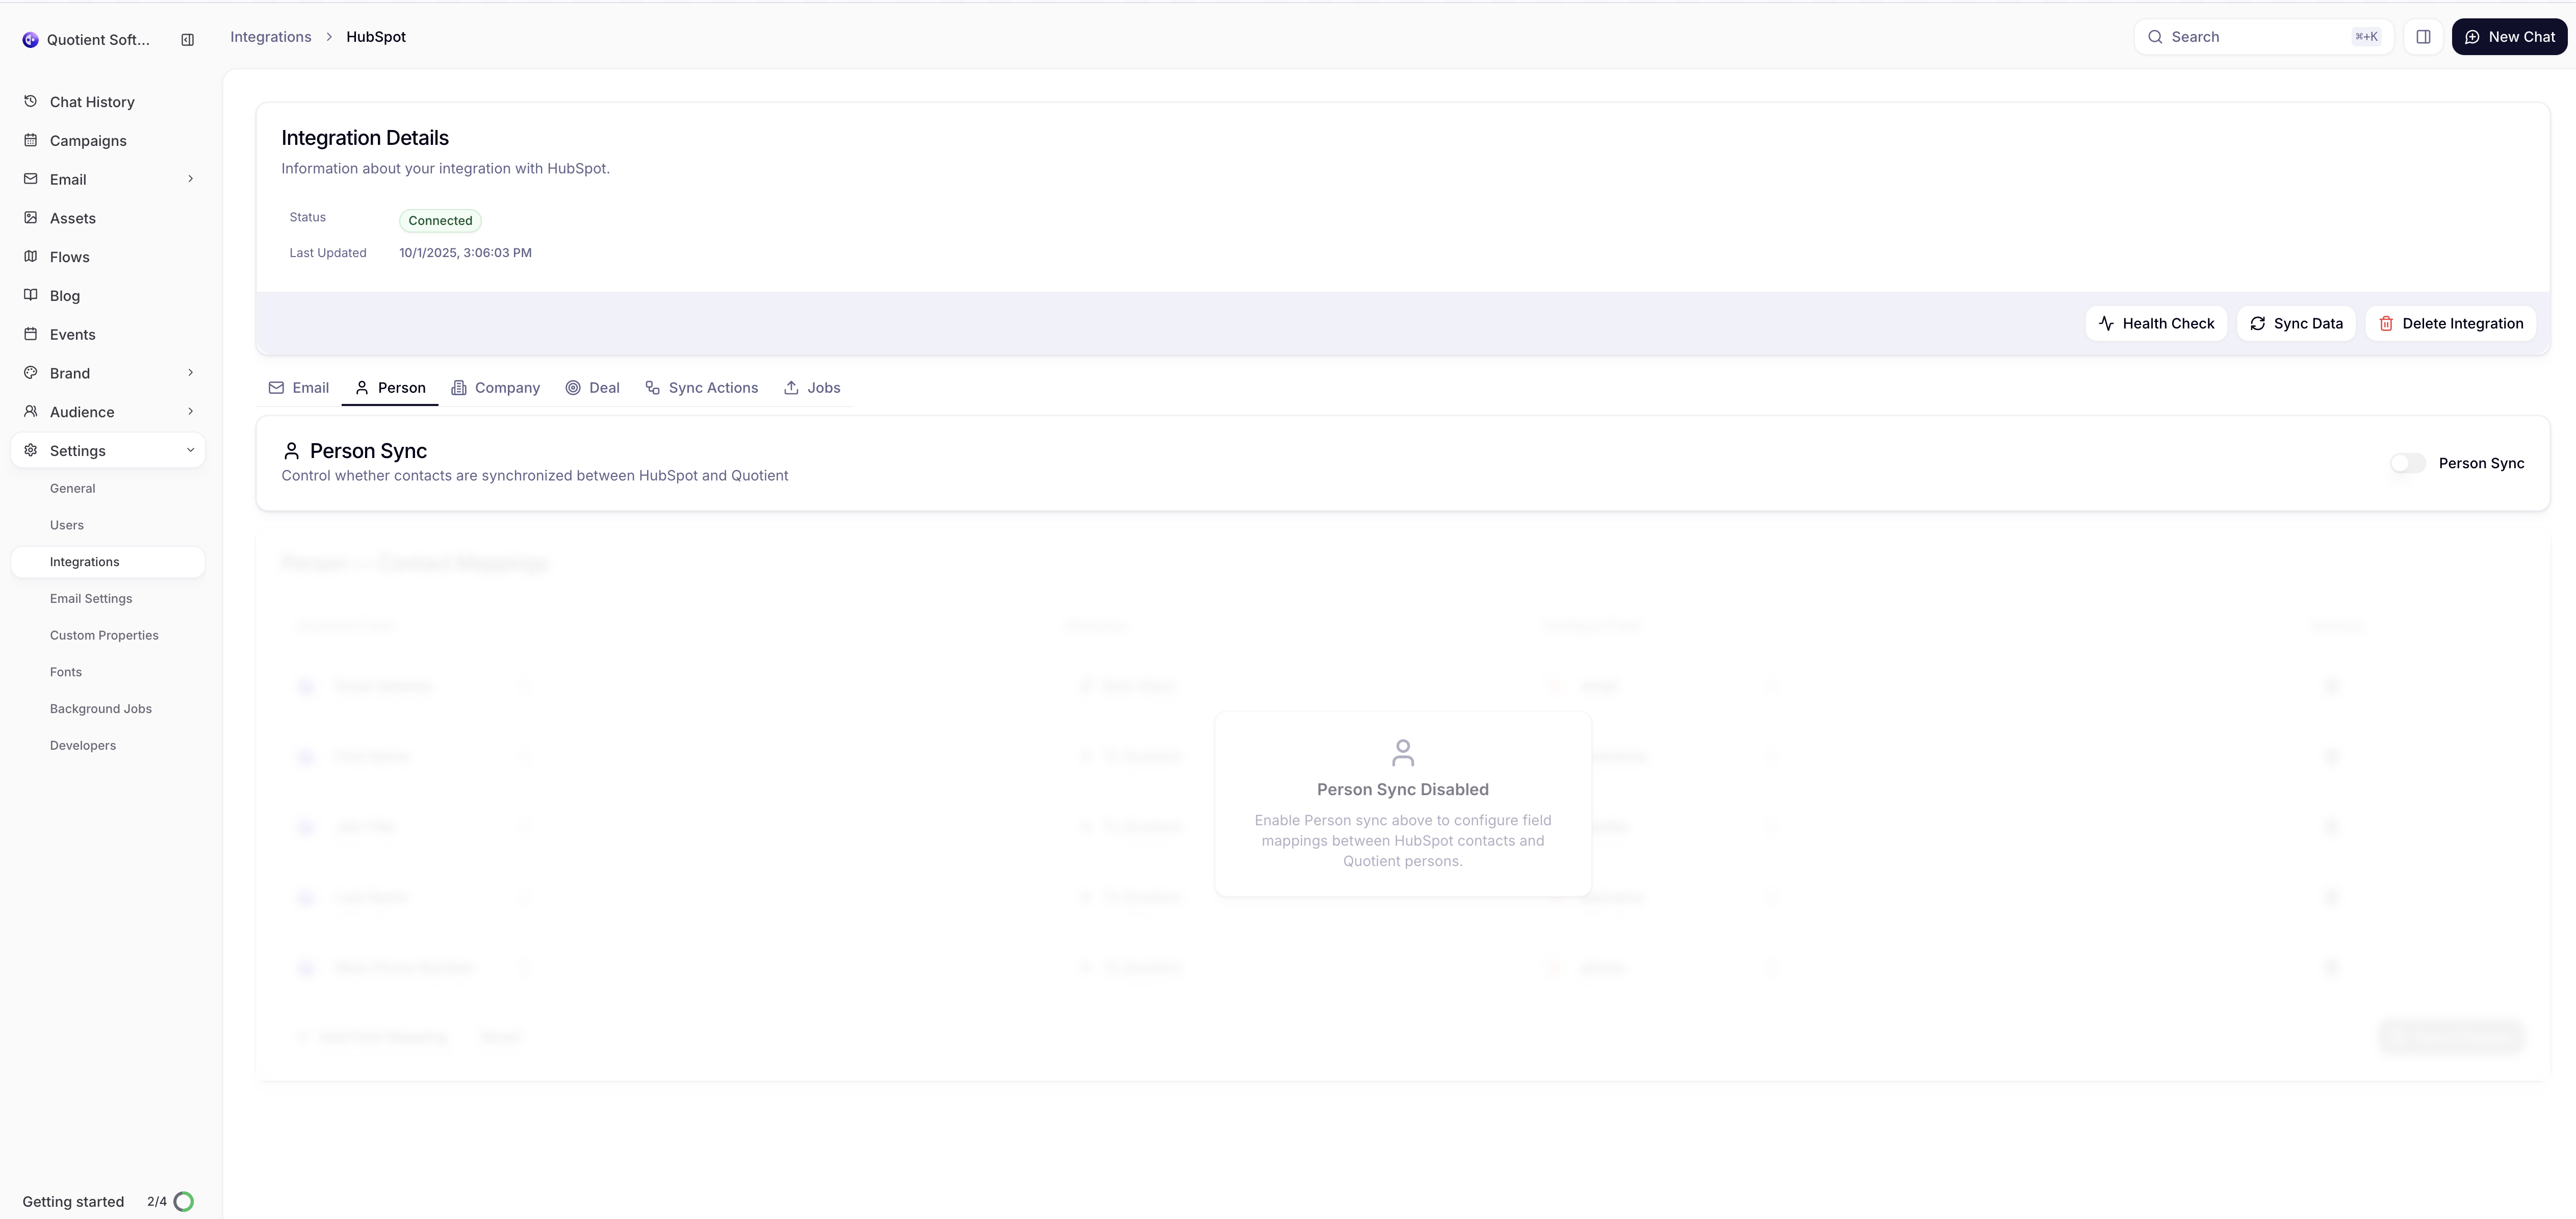
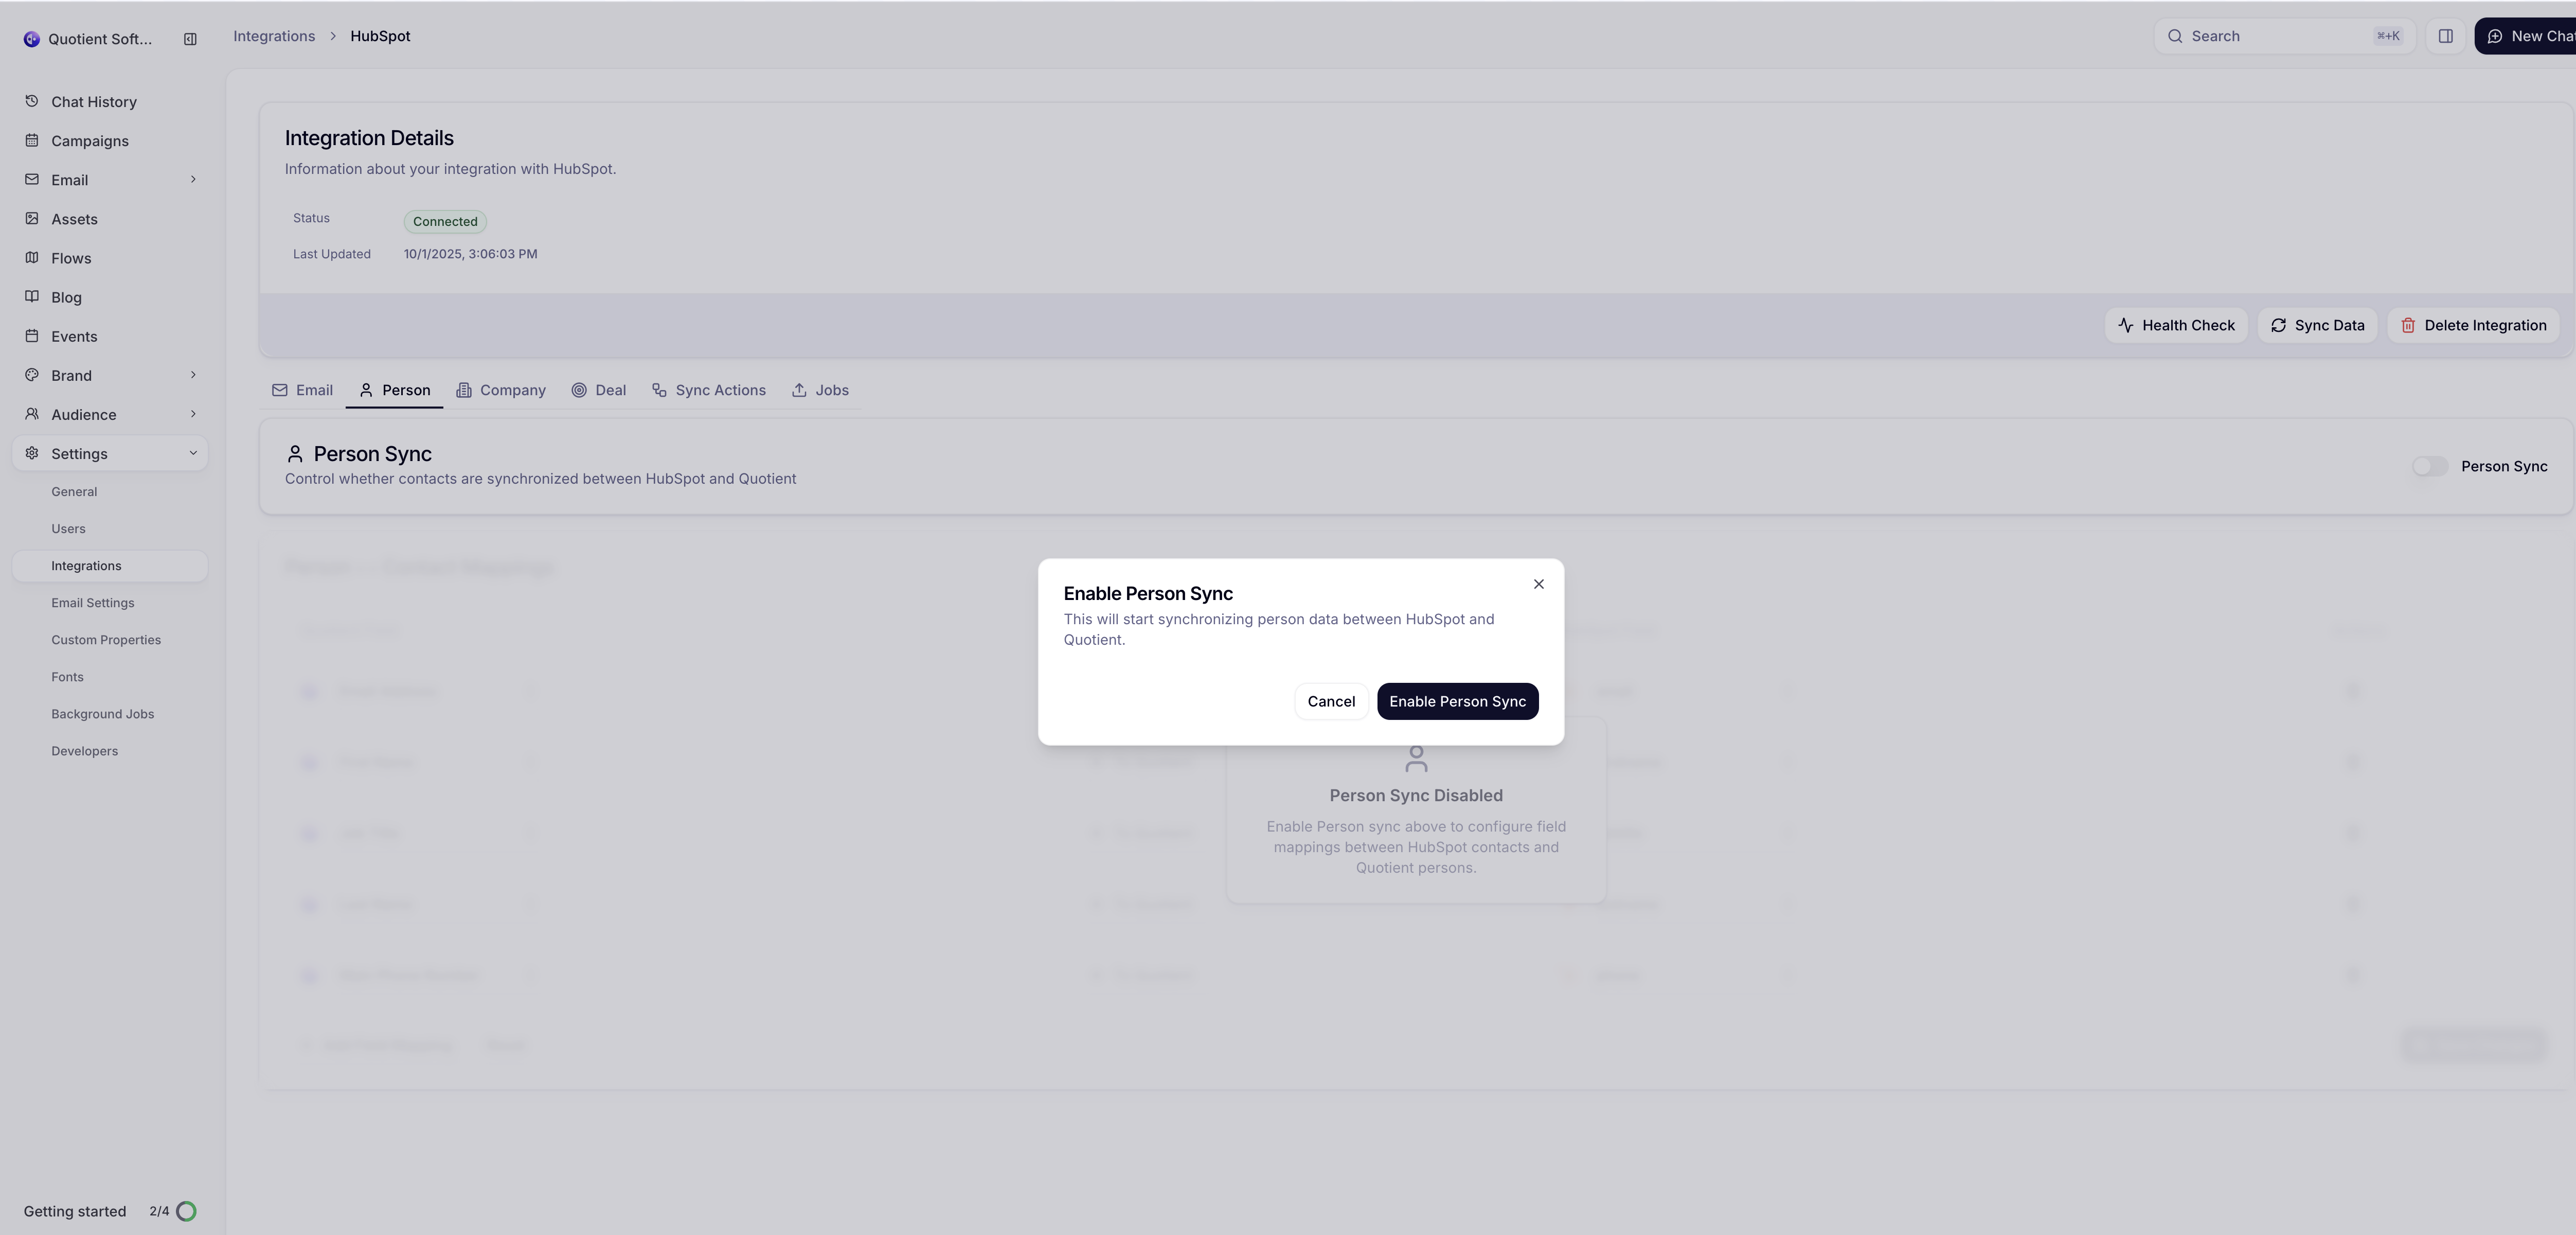
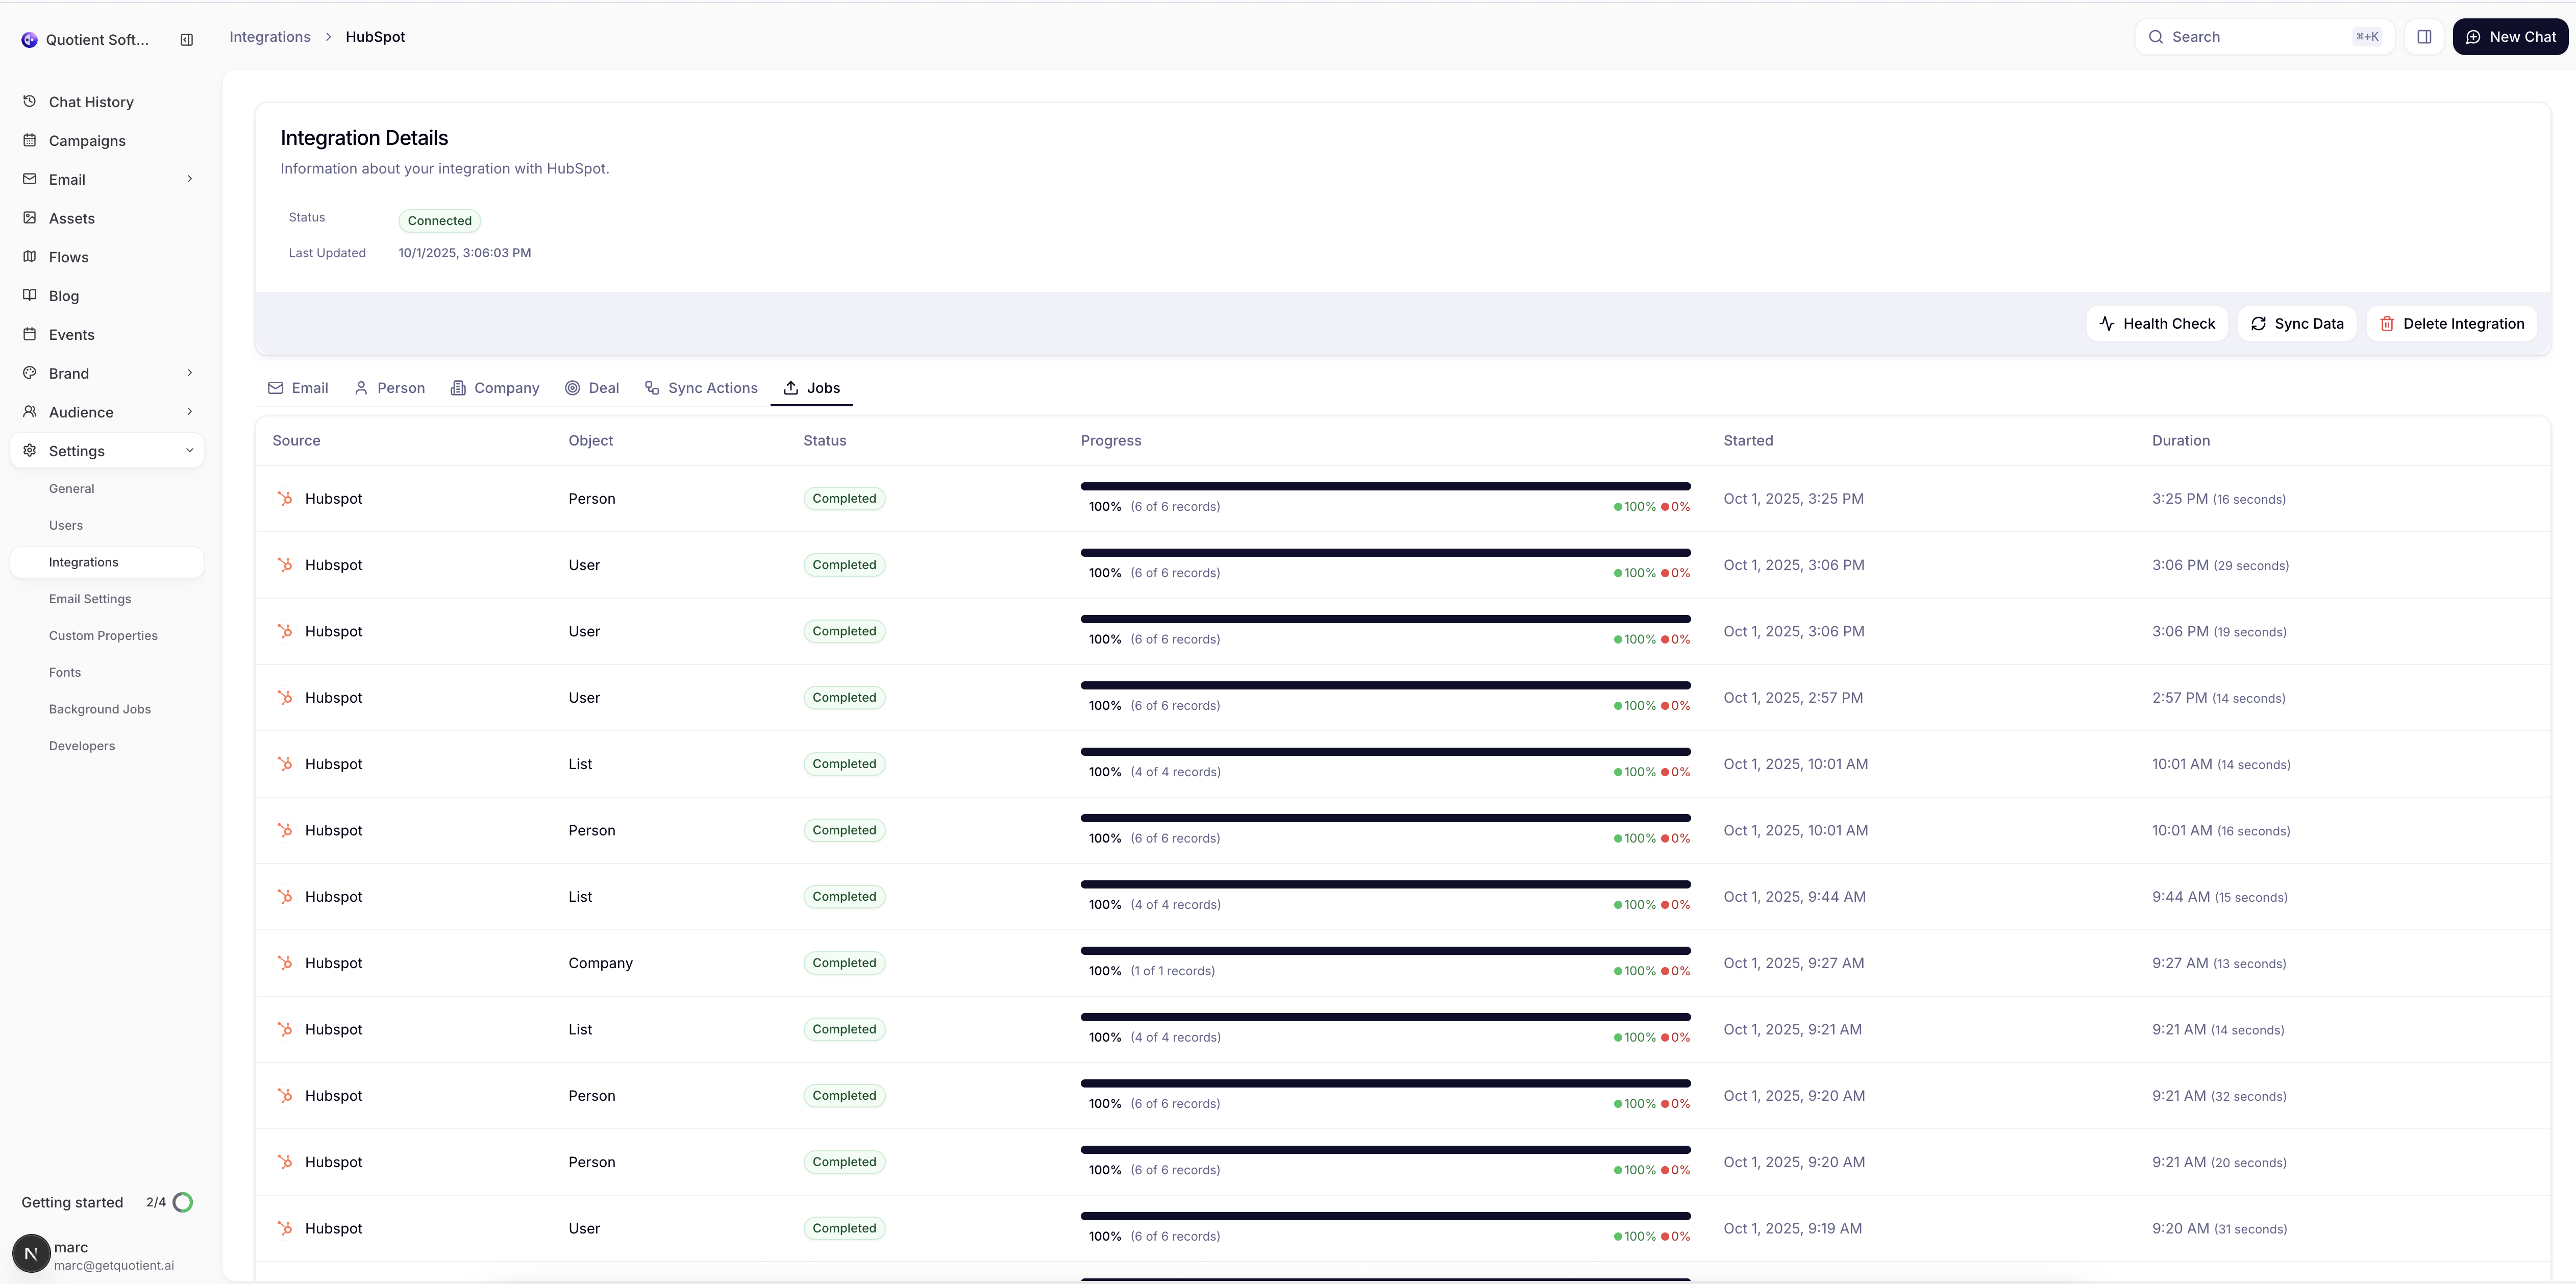
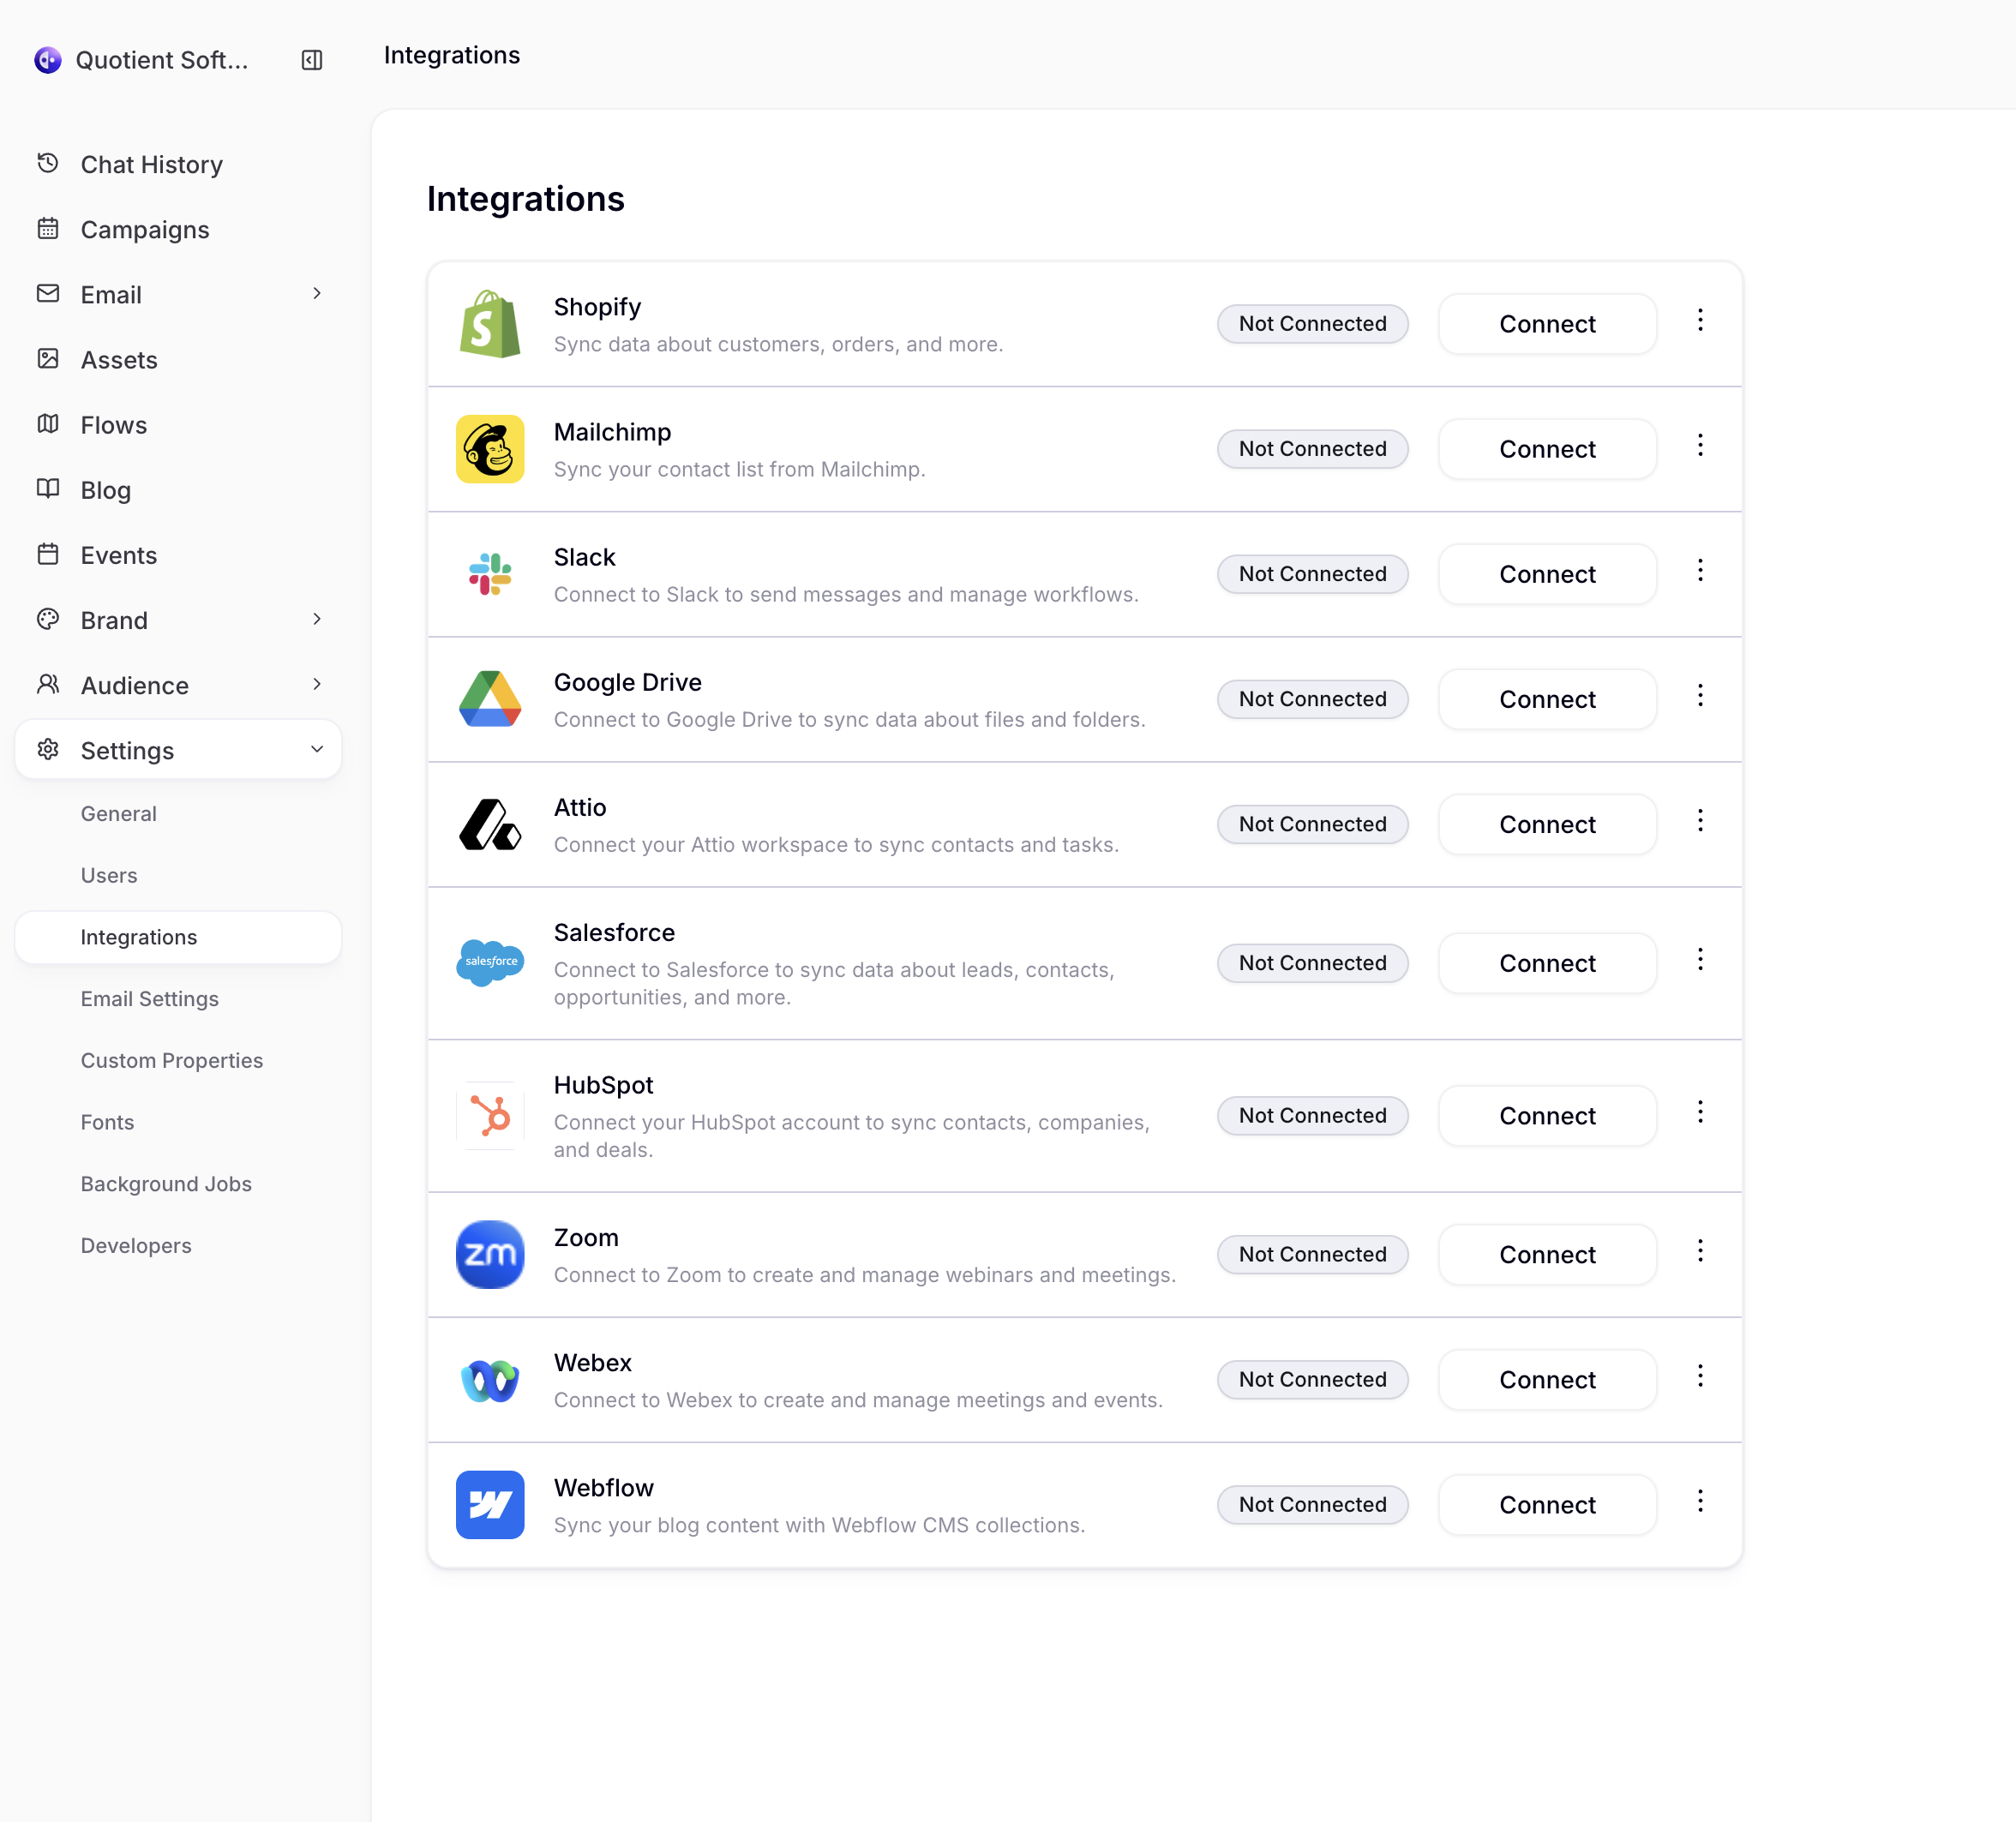
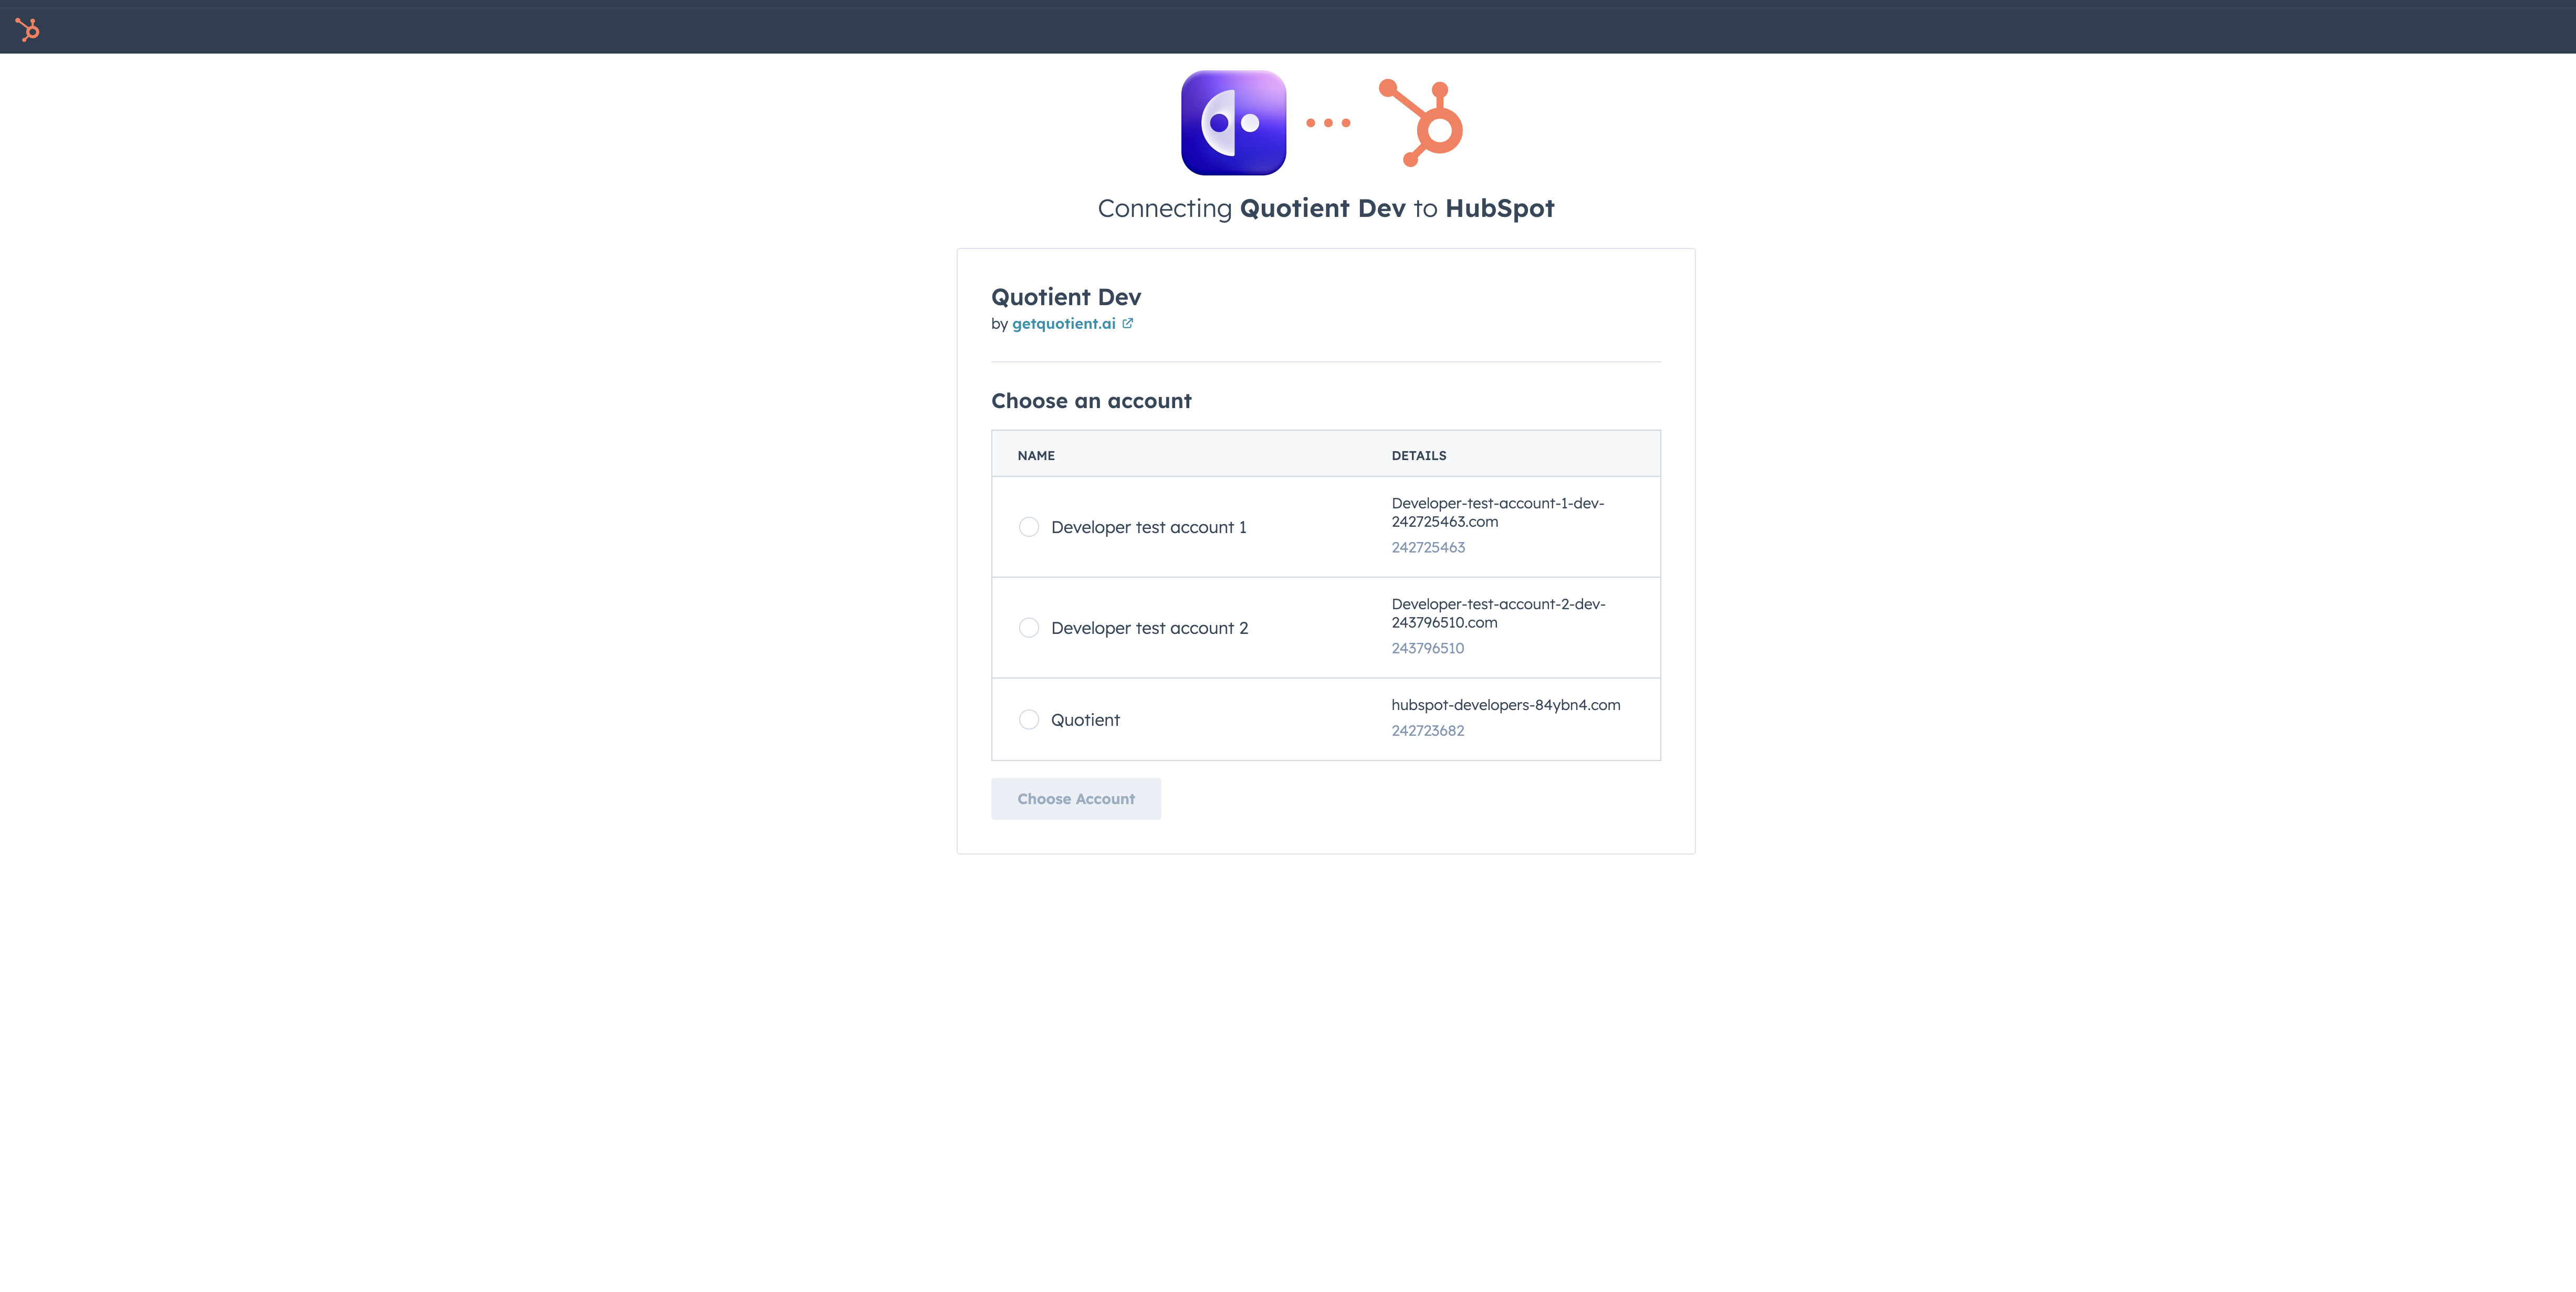
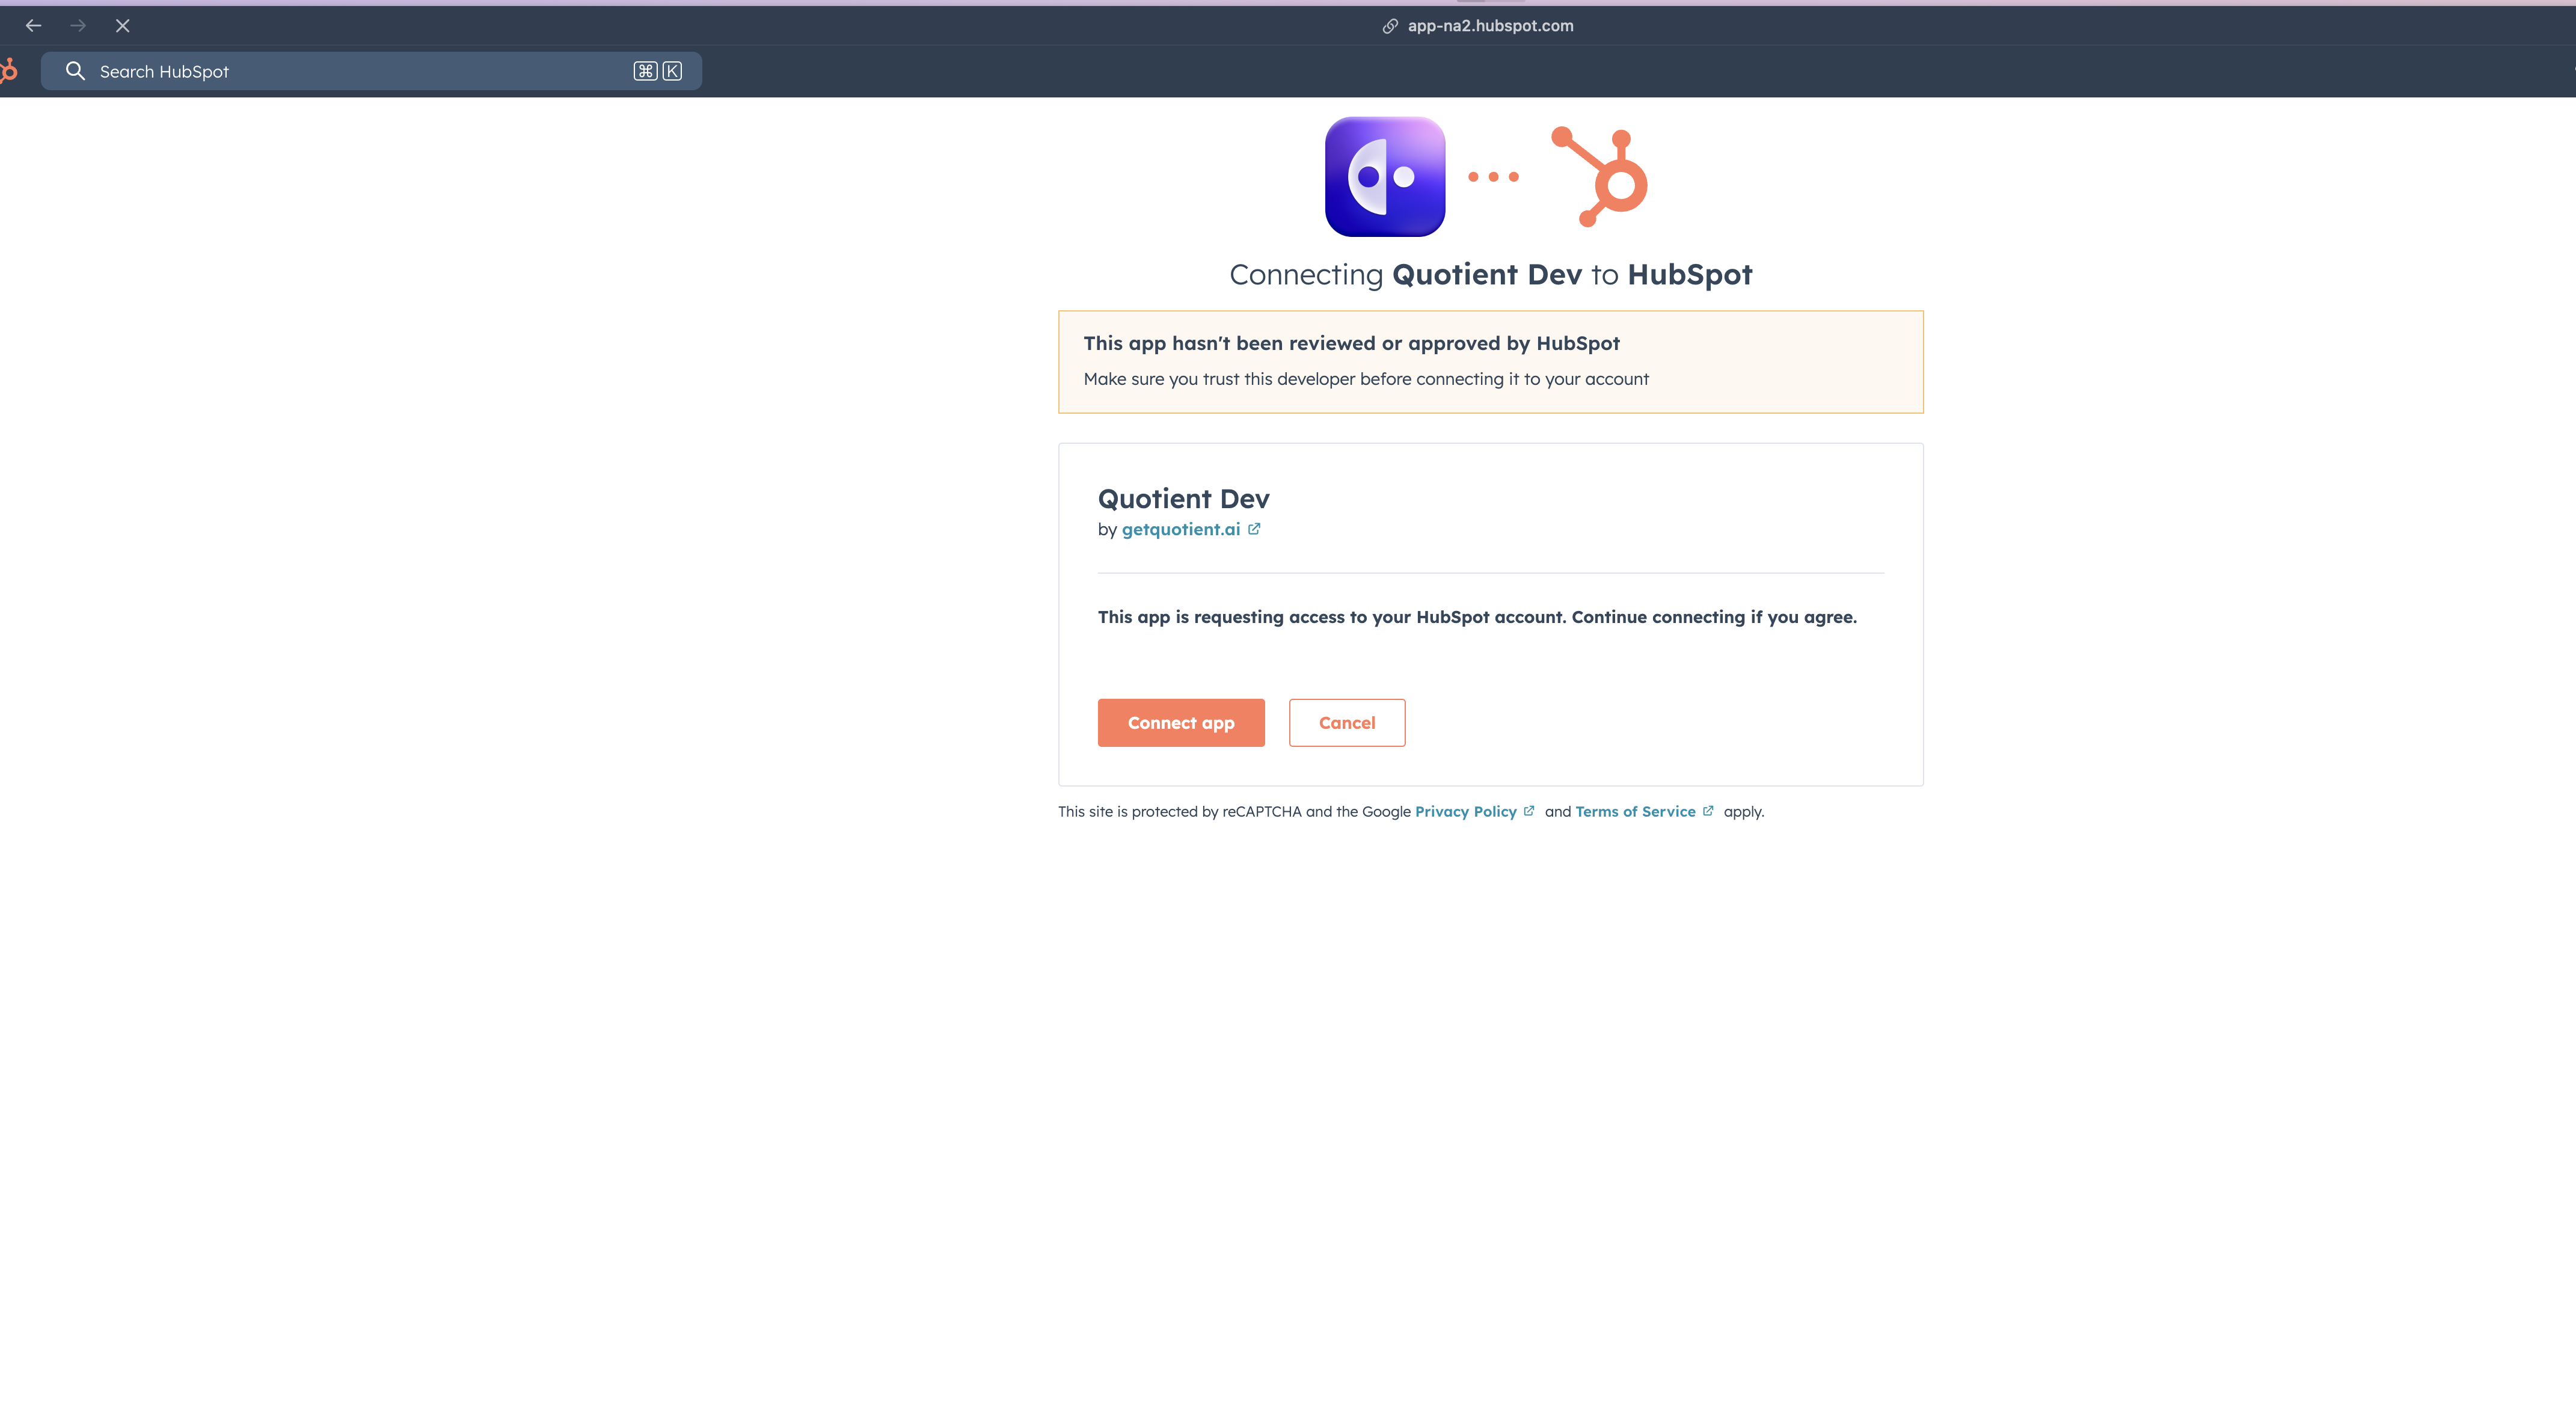
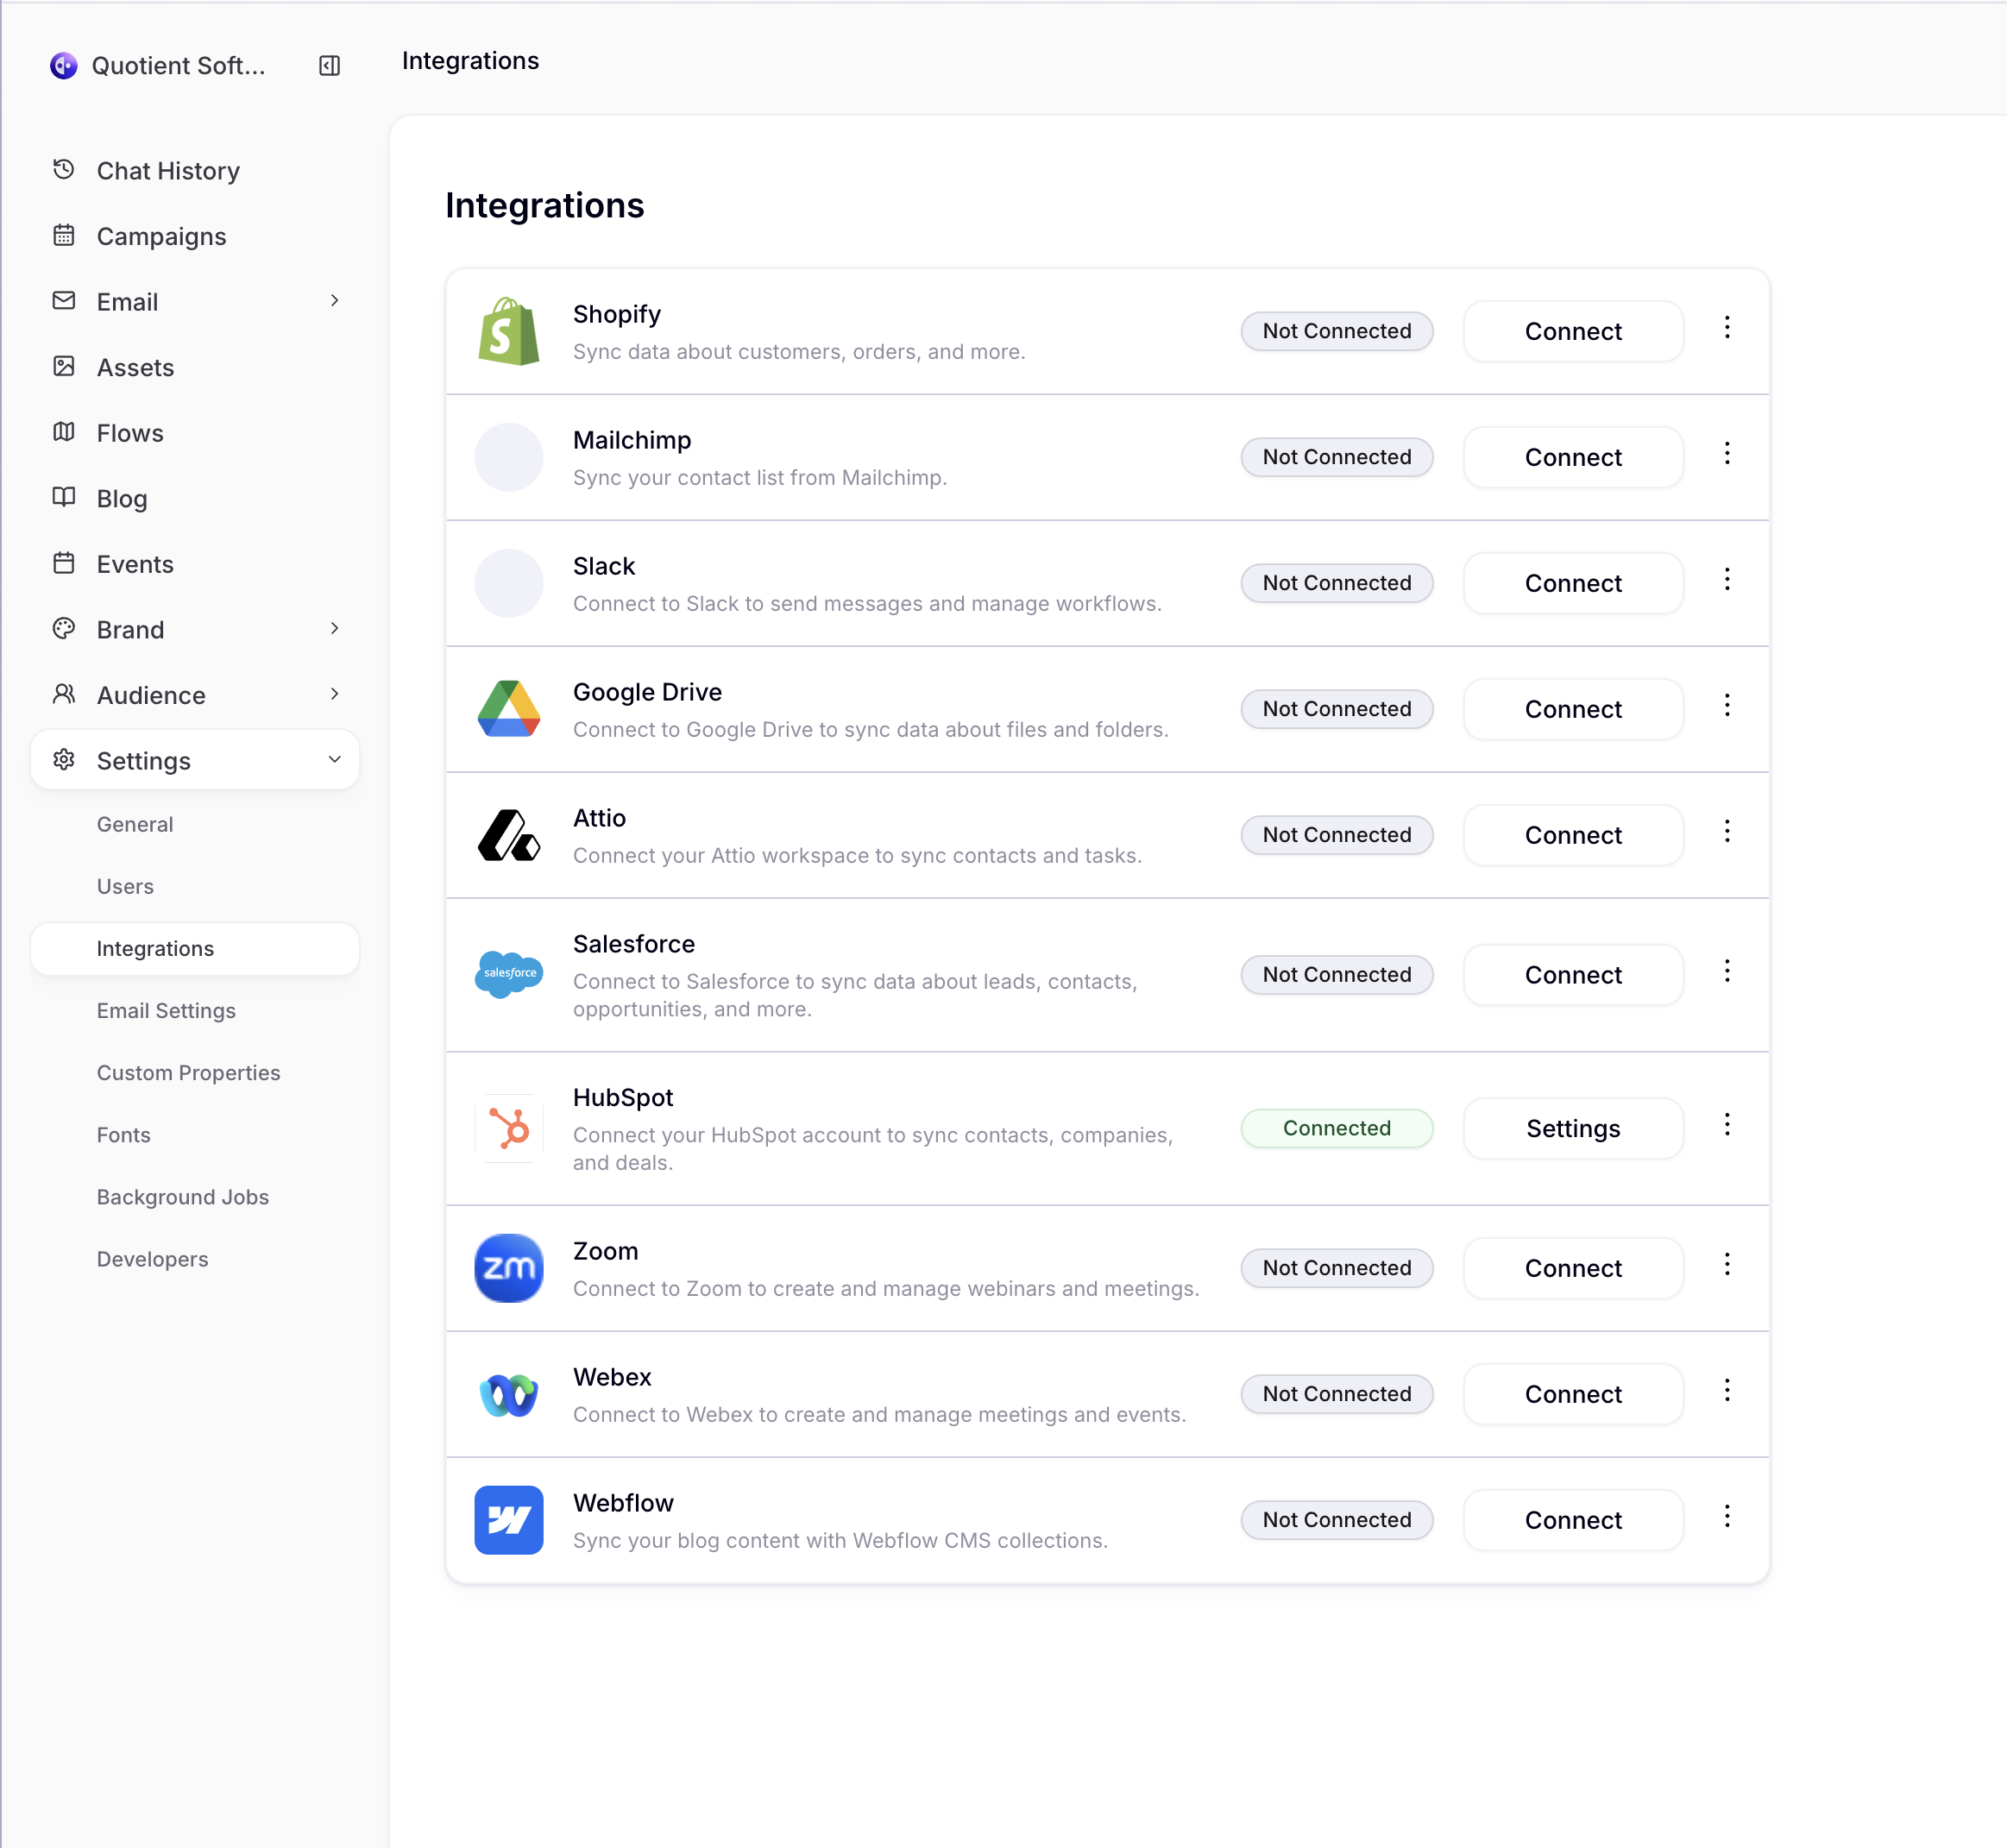

 Social media is a powerful channel for building your brand, engaging with your audience, and driving traffic to your website. Quotient helps you create compelling social media content tailored to each platform.
## Supported Platforms
Quotient currently supports creating and publishing posts to:
- **X (Twitter)** - Including support for threads
- **LinkedIn** - Professional networking and B2B content
- **Instagram** - Visual content and engagement
- **Facebook** - Pages and community engagement
- **TikTok** - Short-form video and photo carousels
## Creating Social Posts
Ask Quotient to help you [create social media posts](/s/most-recent-business/social) tailored to each platform. It understands the unique characteristics and best practices for each platform, including character limits, image requirements, and optimal posting strategies.
When you create a social post, you can:
- Write or edit the post content directly
- Add images and media
- Create multi-post threads (for X)
- Add a first comment (LinkedIn, Instagram, Facebook)
- Schedule posts for a specific date and time
- Track the status of your posts
## Publishing Your Posts
Once you've connected your social accounts in **Settings > Social Accounts**, Quotient can publish directly to each platform. Posts can be:
- **Published immediately** — click "Publish" to post right away
- **Scheduled** — set a date and time for automatic publishing
- **Unpublished** — remove a published post from the platform (X, LinkedIn, Facebook)
## Creating Posts with Quotient
Ask Quotient to help you create engaging social media content. It has access to your Knowledge Store, so everything it creates will be consistent with your brand's voice and messaging.
Here are some tips for getting the most out of Quotient when creating social posts:
- Provide context about your target audience and goals for each post
- Ask Quotient to create variations for different platforms
- Upload reference images or examples of posts you like
- Request specific hashtags or mentions to include
- Have Quotient create thread series for more in-depth topics
-- End of: /social/index
-- Start of: /trust-security/index
---
title: Trust and Security
description: How Quotient handles customer data.
order: 1100
---
Quotient is built with security at its core. We implement industry-standard security practices across our infrastructure, application layer, and operational processes to protect your data at every level.
This page provides an overview of our security practices and compliance measures. For more detailed information, please refer to our [Customer Data Privacy](/docs/trust-security/privacy) and [Data Processors](/docs/trust-security/subprocessors) documentation.
## Data Security
### Encryption
All customer data is protected with enterprise-grade encryption at every layer:
- **Encryption at rest:** Customer data stored in our databases is encrypted using AES-256 encryption, the industry standard for data at rest. Our database provider, [Neon](https://neon.tech), manages encryption keys and follows strict key management protocols.
- **Encryption in transit:** All data transmitted between clients and our services is encrypted using TLS 1.3 or higher. This includes all API requests, web application traffic, and internal service communication.
### Backups and Data Durability
Our database infrastructure is designed for high availability and durability. Continuous automated backups ensure that customer data can be recovered in the event of data loss or corruption. Our database provider supports point-in-time recovery, allowing us to restore data to any specific moment in time. Database backups are stored across multiple availability zones to protect against regional failures, and all backup data is encrypted with the same standards as production data.
## Infrastructure Security
### Cloud Infrastructure
Quotient leverages best-in-class cloud infrastructure providers. [Vercel](https://vercel.com) provides secure, scalable hosting for our main application with built-in DDoS protection and edge network security. [Neon](https://neon.tech) provides enterprise-grade PostgreSQL hosting with automatic failover and high availability. Amazon Web Services (AWS) powers our storage, content delivery, and container orchestration needs.
### Physical Security
We defer physical security controls to our infrastructure providers, who maintain SOC 2 Type II certified data centers. These facilities feature 24/7 security monitoring and surveillance, biometric access controls, environmental safeguards including fire suppression and climate control, redundant power systems, and undergo regular security audits and compliance certifications.
### Disaster Recovery
Our disaster recovery strategy ensures business continuity through multiple layers of protection. Database infrastructure automatically fails over to standby instances in the event of hardware failure. Services are distributed across multiple availability zones to minimize the impact of regional outages. We maintain documented incident response procedures and conduct regular reviews to ensure rapid recovery from potential incidents. For more information on our incident response process, see the Incident Response section below.
## Application Security
### Secure Development Lifecycle
Security is integrated into every phase of our development process. All code changes must be reviewed and approved by another engineer before deployment, ensuring that multiple eyes examine every change to our production systems. We maintain comprehensive test suites using [Vitest](https://vitest.dev) to catch bugs and security issues early in the development cycle. GitHub Actions automatically runs security checks, tests, and code quality analysis on every commit, providing immediate feedback to our engineering team.
### Vulnerability Management
We actively monitor and address security vulnerabilities through multiple channels. [Dependabot](https://github.com/dependabot) automatically monitors our dependencies for known vulnerabilities and creates pull requests to update affected packages. We subscribe to security advisories from GitHub and our infrastructure providers to stay informed of emerging threats. Our systems automatically alert our engineering team when security issues are detected, and critical security patches are prioritized and deployed promptly following our change management procedures.
### Responsible Disclosure
We take security vulnerabilities seriously. If you discover a security issue, please report it to us at security@getquotient.ai. We commit to acknowledging your report within 48 hours, investigating all legitimate security concerns, keeping you informed of our progress, and recognizing responsible disclosure in our security acknowledgments.
## Access Controls
### Internal Access Management
Access to customer data is strictly controlled and monitored. Only engineering team members who require access for application support and debugging can access customer data, following the principle of least privilege. Access to critical systems including our codebase on GitHub, secrets management through [Infisical](https://infisical.com), and corporate applications is protected by multi-factor authentication. All team access is centrally managed through Google Workspace and can be immediately revoked when necessary. Access to customer data is logged and monitored for security and compliance purposes.
### Authentication and Authorization
Internal systems use role-based access control (RBAC) to ensure team members only have access to the resources they need for their specific roles. We use Google Workspace as our primary identity provider, enabling consistent access policies across our tools and services. We conduct periodic reviews of access permissions to ensure they remain appropriate as team members' responsibilities evolve.
## Monitoring and Incident Response
### Security Monitoring
Our systems are continuously monitored for security events and anomalies. [Sentry](https://sentry.io) provides real-time error tracking and performance monitoring across our application, alerting us immediately to any unexpected behavior. Self-hosted [Grafana](https://grafana.com) provides centralized logging, metrics, and alerting capabilities. Our engineering team receives immediate notifications of security-related events and anomalies, enabling rapid response to potential threats.
### Incident Response
We maintain a structured incident response process to quickly identify, contain, and resolve security incidents. Automated monitoring systems alert our team to potential security incidents as they occur. We follow documented procedures for investigating, containing, and resolving security incidents to ensure consistent and effective responses. After any incident, we conduct thorough post-mortems to identify root causes and implement preventive measures. We commit to promptly notifying affected customers in the event of a data breach or security incident.
For detailed information on our incident response procedures, please refer to our [Customer Data Privacy](/docs/trust-security/privacy) documentation.
## Data Processing
For information about our data processing practices and the third-party service providers we use, please see our [Customer Data Privacy](/docs/trust-security/privacy) documentation for comprehensive privacy and data handling practices, and our [Data Processors](/docs/trust-security/subprocessors) page for a complete list of third-party service providers.
## Contact Us
For security-related inquiries or to report a vulnerability, please contact us at security@getquotient.ai. For general questions about our security practices, reach out to support@getquotient.ai.
## Related Documentation
Social media is a powerful channel for building your brand, engaging with your audience, and driving traffic to your website. Quotient helps you create compelling social media content tailored to each platform.
## Supported Platforms
Quotient currently supports creating and publishing posts to:
- **X (Twitter)** - Including support for threads
- **LinkedIn** - Professional networking and B2B content
- **Instagram** - Visual content and engagement
- **Facebook** - Pages and community engagement
- **TikTok** - Short-form video and photo carousels
## Creating Social Posts
Ask Quotient to help you [create social media posts](/s/most-recent-business/social) tailored to each platform. It understands the unique characteristics and best practices for each platform, including character limits, image requirements, and optimal posting strategies.
When you create a social post, you can:
- Write or edit the post content directly
- Add images and media
- Create multi-post threads (for X)
- Add a first comment (LinkedIn, Instagram, Facebook)
- Schedule posts for a specific date and time
- Track the status of your posts
## Publishing Your Posts
Once you've connected your social accounts in **Settings > Social Accounts**, Quotient can publish directly to each platform. Posts can be:
- **Published immediately** — click "Publish" to post right away
- **Scheduled** — set a date and time for automatic publishing
- **Unpublished** — remove a published post from the platform (X, LinkedIn, Facebook)
## Creating Posts with Quotient
Ask Quotient to help you create engaging social media content. It has access to your Knowledge Store, so everything it creates will be consistent with your brand's voice and messaging.
Here are some tips for getting the most out of Quotient when creating social posts:
- Provide context about your target audience and goals for each post
- Ask Quotient to create variations for different platforms
- Upload reference images or examples of posts you like
- Request specific hashtags or mentions to include
- Have Quotient create thread series for more in-depth topics
-- End of: /social/index
-- Start of: /trust-security/index
---
title: Trust and Security
description: How Quotient handles customer data.
order: 1100
---
Quotient is built with security at its core. We implement industry-standard security practices across our infrastructure, application layer, and operational processes to protect your data at every level.
This page provides an overview of our security practices and compliance measures. For more detailed information, please refer to our [Customer Data Privacy](/docs/trust-security/privacy) and [Data Processors](/docs/trust-security/subprocessors) documentation.
## Data Security
### Encryption
All customer data is protected with enterprise-grade encryption at every layer:
- **Encryption at rest:** Customer data stored in our databases is encrypted using AES-256 encryption, the industry standard for data at rest. Our database provider, [Neon](https://neon.tech), manages encryption keys and follows strict key management protocols.
- **Encryption in transit:** All data transmitted between clients and our services is encrypted using TLS 1.3 or higher. This includes all API requests, web application traffic, and internal service communication.
### Backups and Data Durability
Our database infrastructure is designed for high availability and durability. Continuous automated backups ensure that customer data can be recovered in the event of data loss or corruption. Our database provider supports point-in-time recovery, allowing us to restore data to any specific moment in time. Database backups are stored across multiple availability zones to protect against regional failures, and all backup data is encrypted with the same standards as production data.
## Infrastructure Security
### Cloud Infrastructure
Quotient leverages best-in-class cloud infrastructure providers. [Vercel](https://vercel.com) provides secure, scalable hosting for our main application with built-in DDoS protection and edge network security. [Neon](https://neon.tech) provides enterprise-grade PostgreSQL hosting with automatic failover and high availability. Amazon Web Services (AWS) powers our storage, content delivery, and container orchestration needs.
### Physical Security
We defer physical security controls to our infrastructure providers, who maintain SOC 2 Type II certified data centers. These facilities feature 24/7 security monitoring and surveillance, biometric access controls, environmental safeguards including fire suppression and climate control, redundant power systems, and undergo regular security audits and compliance certifications.
### Disaster Recovery
Our disaster recovery strategy ensures business continuity through multiple layers of protection. Database infrastructure automatically fails over to standby instances in the event of hardware failure. Services are distributed across multiple availability zones to minimize the impact of regional outages. We maintain documented incident response procedures and conduct regular reviews to ensure rapid recovery from potential incidents. For more information on our incident response process, see the Incident Response section below.
## Application Security
### Secure Development Lifecycle
Security is integrated into every phase of our development process. All code changes must be reviewed and approved by another engineer before deployment, ensuring that multiple eyes examine every change to our production systems. We maintain comprehensive test suites using [Vitest](https://vitest.dev) to catch bugs and security issues early in the development cycle. GitHub Actions automatically runs security checks, tests, and code quality analysis on every commit, providing immediate feedback to our engineering team.
### Vulnerability Management
We actively monitor and address security vulnerabilities through multiple channels. [Dependabot](https://github.com/dependabot) automatically monitors our dependencies for known vulnerabilities and creates pull requests to update affected packages. We subscribe to security advisories from GitHub and our infrastructure providers to stay informed of emerging threats. Our systems automatically alert our engineering team when security issues are detected, and critical security patches are prioritized and deployed promptly following our change management procedures.
### Responsible Disclosure
We take security vulnerabilities seriously. If you discover a security issue, please report it to us at security@getquotient.ai. We commit to acknowledging your report within 48 hours, investigating all legitimate security concerns, keeping you informed of our progress, and recognizing responsible disclosure in our security acknowledgments.
## Access Controls
### Internal Access Management
Access to customer data is strictly controlled and monitored. Only engineering team members who require access for application support and debugging can access customer data, following the principle of least privilege. Access to critical systems including our codebase on GitHub, secrets management through [Infisical](https://infisical.com), and corporate applications is protected by multi-factor authentication. All team access is centrally managed through Google Workspace and can be immediately revoked when necessary. Access to customer data is logged and monitored for security and compliance purposes.
### Authentication and Authorization
Internal systems use role-based access control (RBAC) to ensure team members only have access to the resources they need for their specific roles. We use Google Workspace as our primary identity provider, enabling consistent access policies across our tools and services. We conduct periodic reviews of access permissions to ensure they remain appropriate as team members' responsibilities evolve.
## Monitoring and Incident Response
### Security Monitoring
Our systems are continuously monitored for security events and anomalies. [Sentry](https://sentry.io) provides real-time error tracking and performance monitoring across our application, alerting us immediately to any unexpected behavior. Self-hosted [Grafana](https://grafana.com) provides centralized logging, metrics, and alerting capabilities. Our engineering team receives immediate notifications of security-related events and anomalies, enabling rapid response to potential threats.
### Incident Response
We maintain a structured incident response process to quickly identify, contain, and resolve security incidents. Automated monitoring systems alert our team to potential security incidents as they occur. We follow documented procedures for investigating, containing, and resolving security incidents to ensure consistent and effective responses. After any incident, we conduct thorough post-mortems to identify root causes and implement preventive measures. We commit to promptly notifying affected customers in the event of a data breach or security incident.
For detailed information on our incident response procedures, please refer to our [Customer Data Privacy](/docs/trust-security/privacy) documentation.
## Data Processing
For information about our data processing practices and the third-party service providers we use, please see our [Customer Data Privacy](/docs/trust-security/privacy) documentation for comprehensive privacy and data handling practices, and our [Data Processors](/docs/trust-security/subprocessors) page for a complete list of third-party service providers.
## Contact Us
For security-related inquiries or to report a vulnerability, please contact us at security@getquotient.ai. For general questions about our security practices, reach out to support@getquotient.ai.
## Related Documentation